
Mick’s Workbench: The Old Graveyard
A couple of years ago (before I started working for Goblin King Games full time) I was lucky enough to be invited by Tom to come over to the GKG studio and work with him to build the board for the Sunken City of Moonreach.

This board had two purposes, firstly it was a new demo table to generate excitement at events, and secondly it was some pre-planning by Tom to have some Moonreach-esque terrain to photograph the Shades on (that’s how long the new faction has been in the works).
The board we made was absolutely spectacular, and you may have seen it at events since then. It’s full of great details: collapsed buildings, the cliff full of gnomish tunnels from the explosion 500 years ago, an underground banqueting hall, zombie servants hidden all over, an estate agent, and even lights and sound. One thing that it did not include (which is a staple of any undead faction) was a graveyard for our gravedigger Viktor and his risen friends to hang around, looking gothic and spooky. It’s been one of my jobs recently to fill that gap with a new terrain piece we can both use as a backdrop for photographs and play on, just like the Moonreach table.
Initial Design and Inspiration
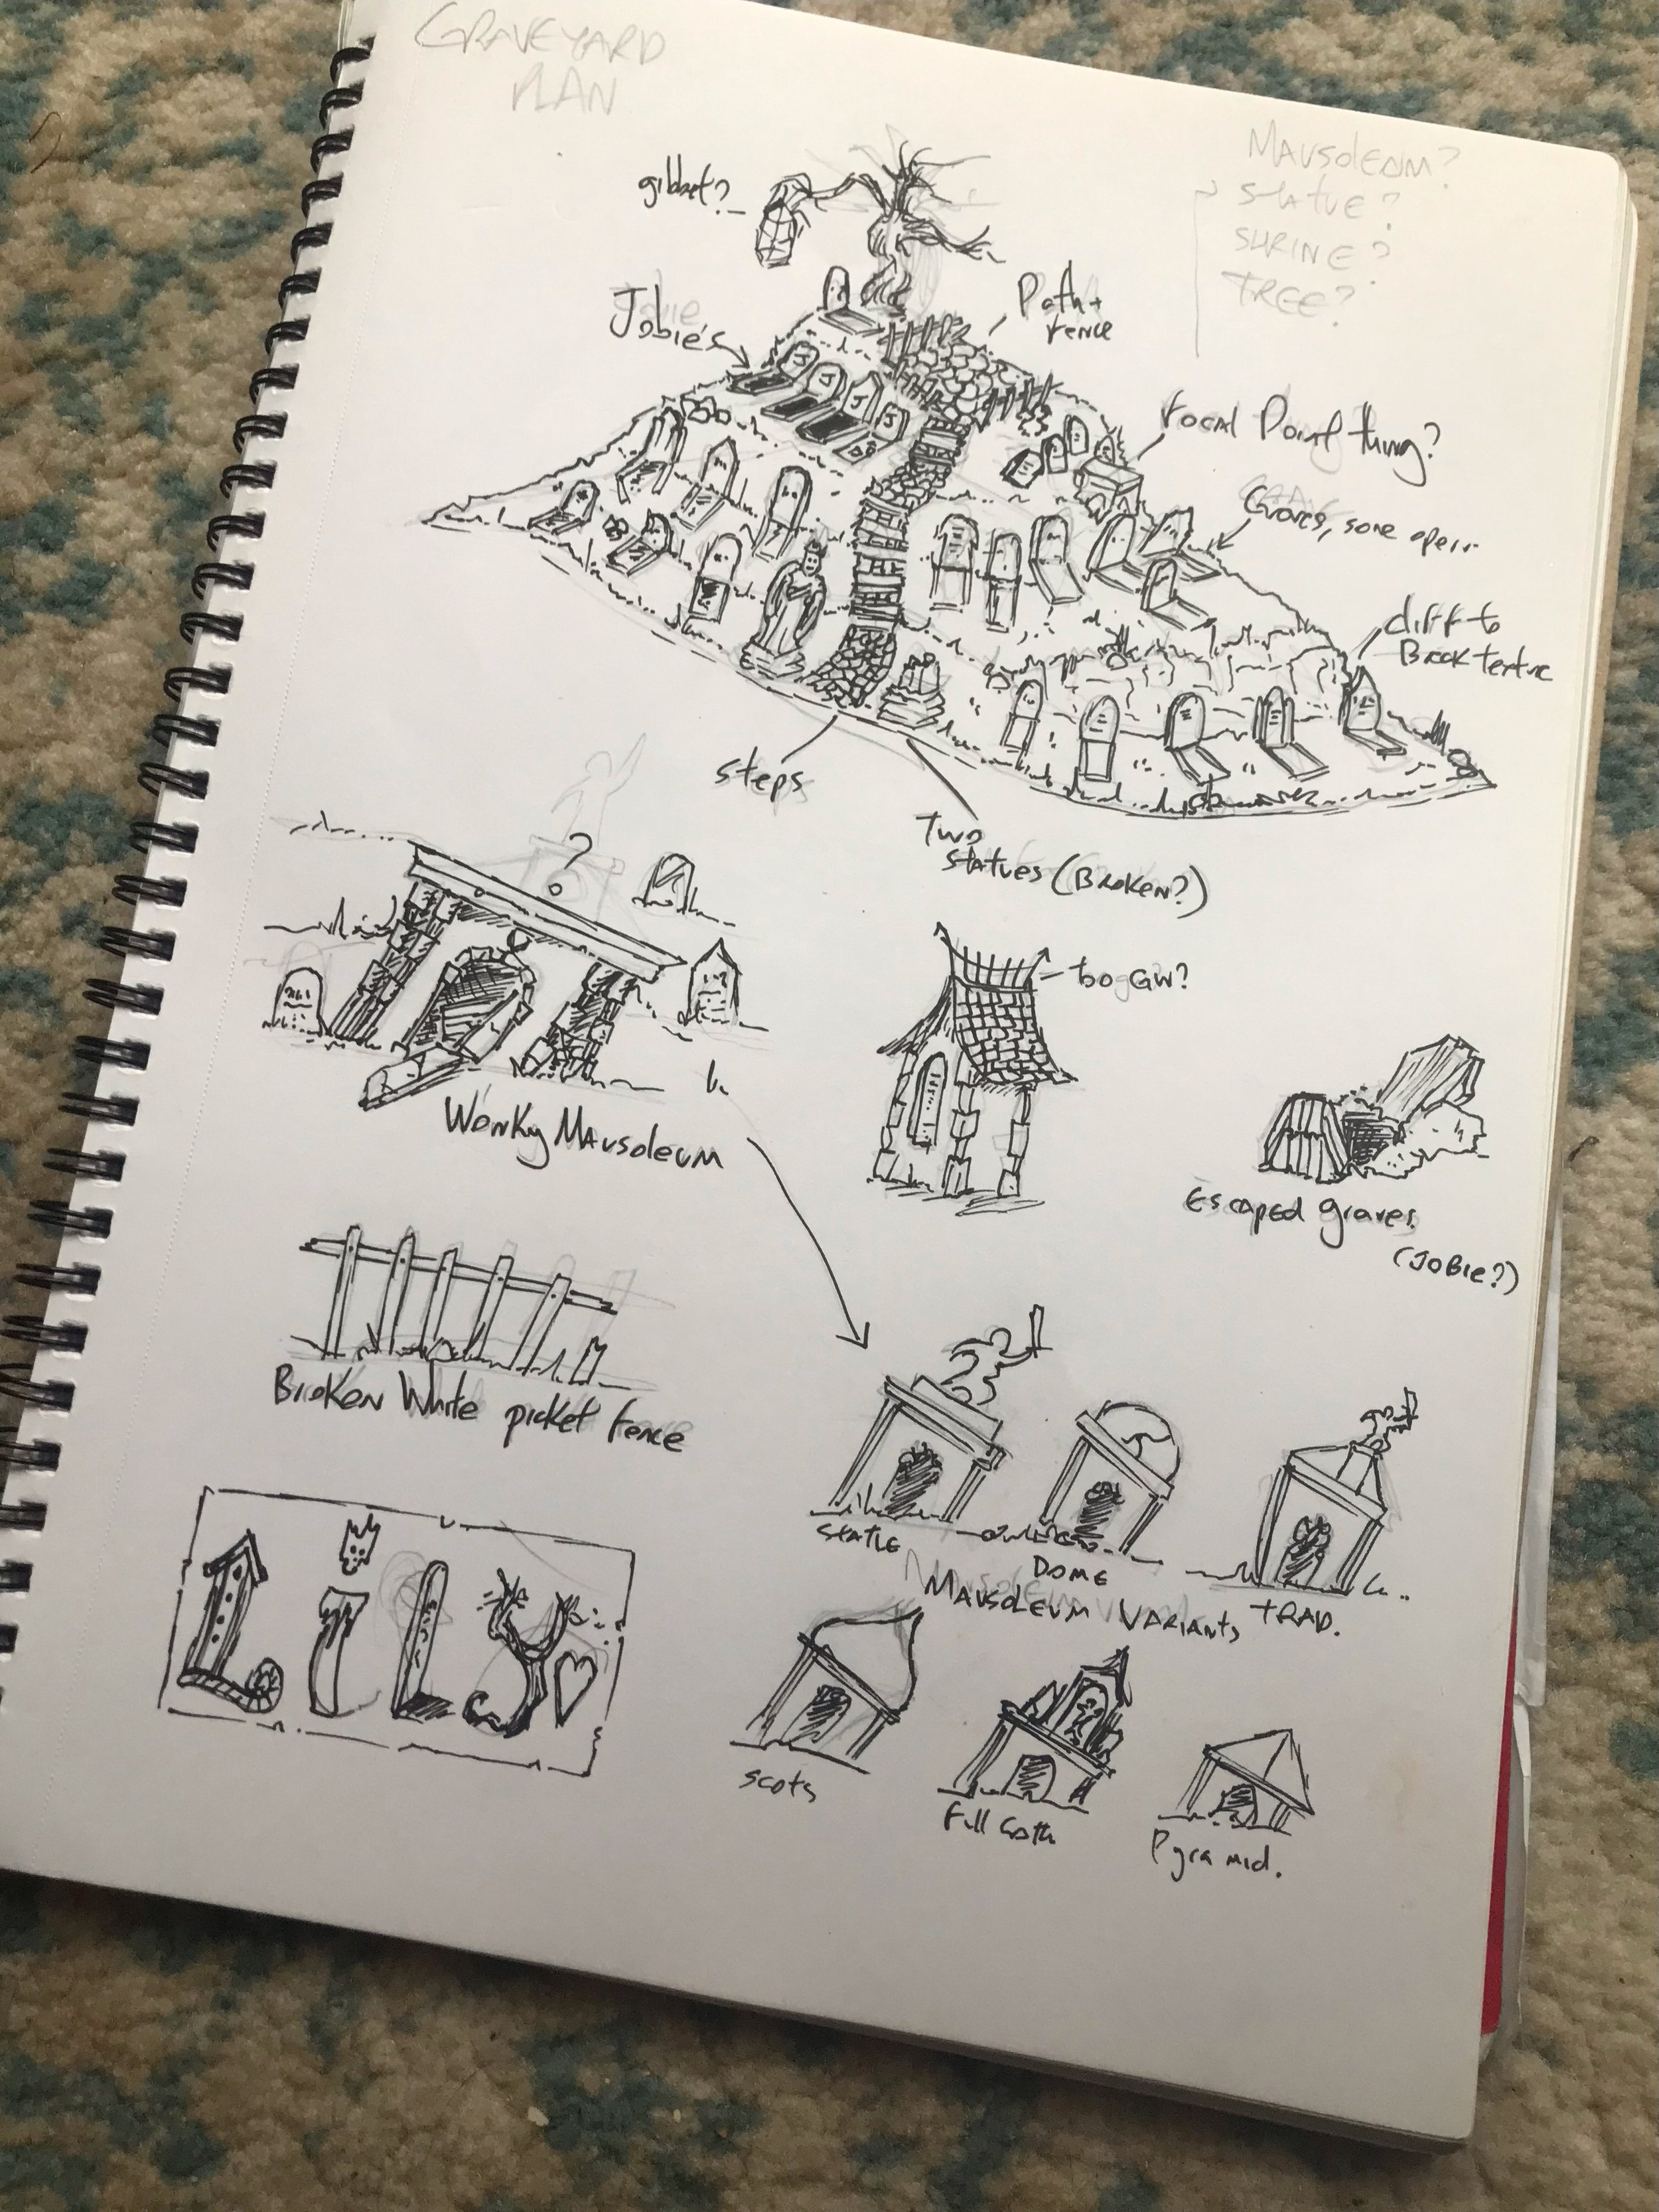
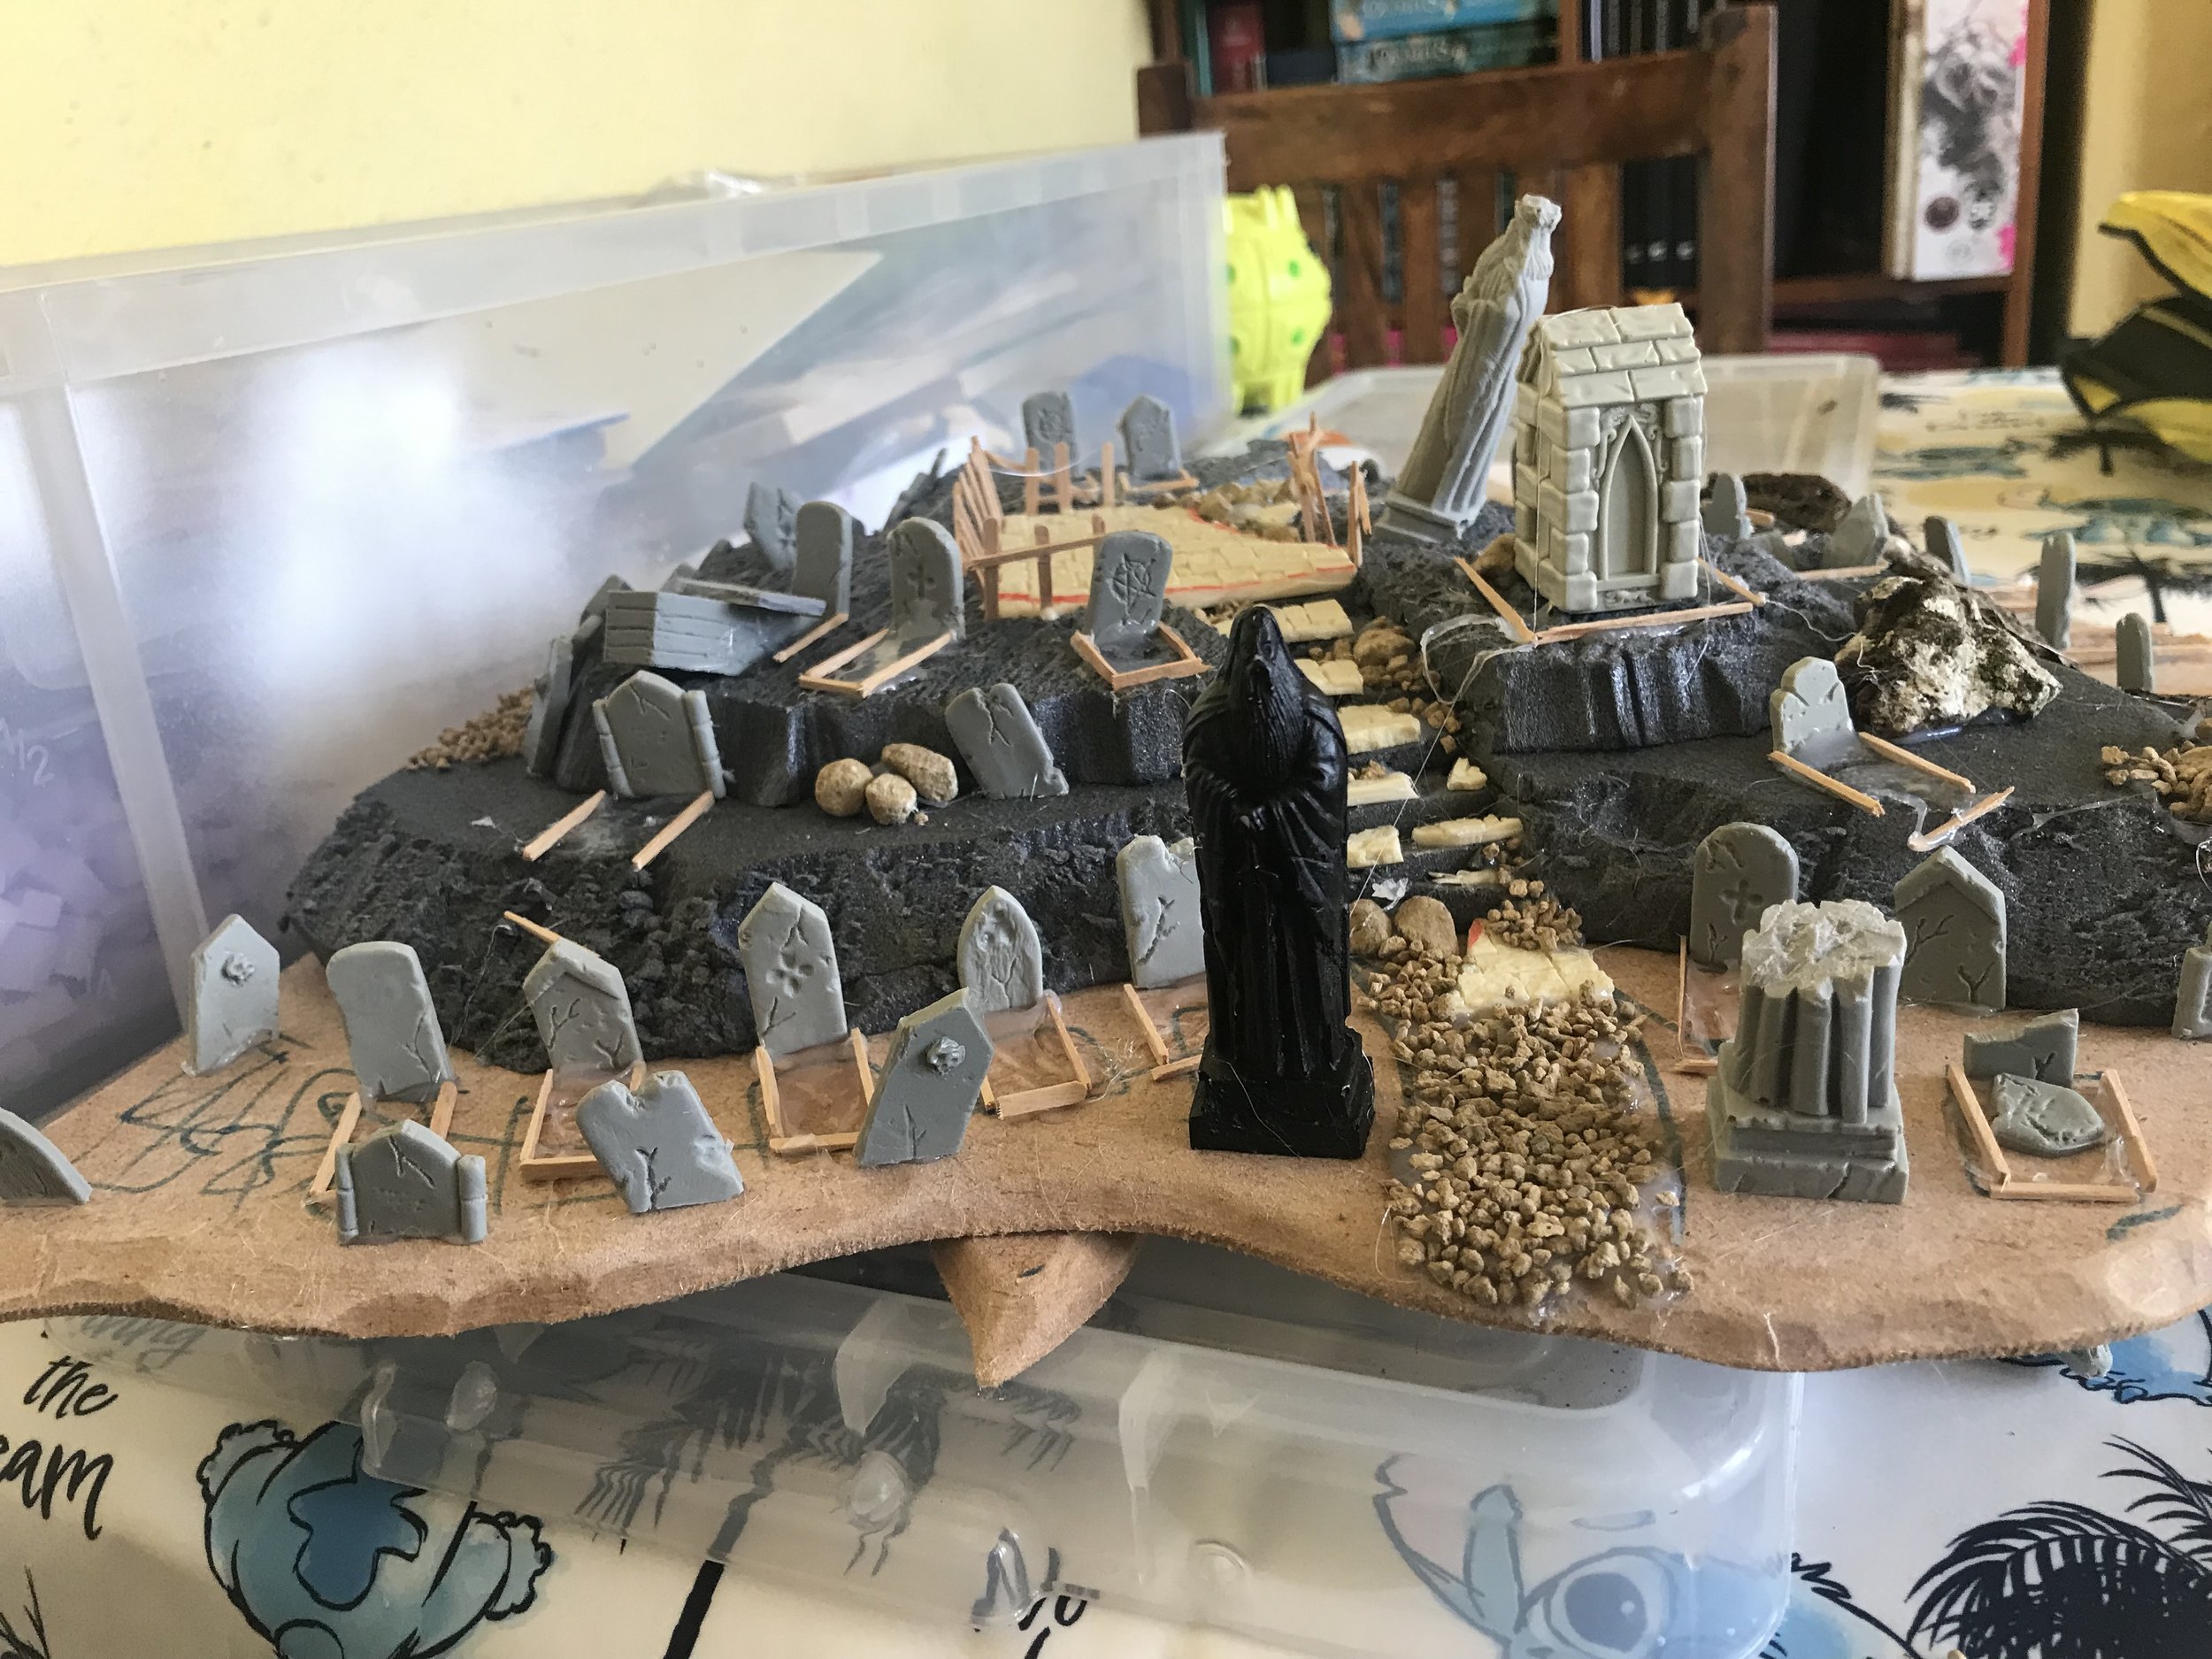
As with any of my terrain projects, this started off with a scribbled drawing in my sketchbook. I decided on a hill for a couple or reasons - firstly the layered height would give depth to any photographs and secondly because the studio has zero hills in it’s pretty big terrain collection! Other details like the statues and graves are from items I knew I had in my bits box, and this seemed like a good opportunity to use them.
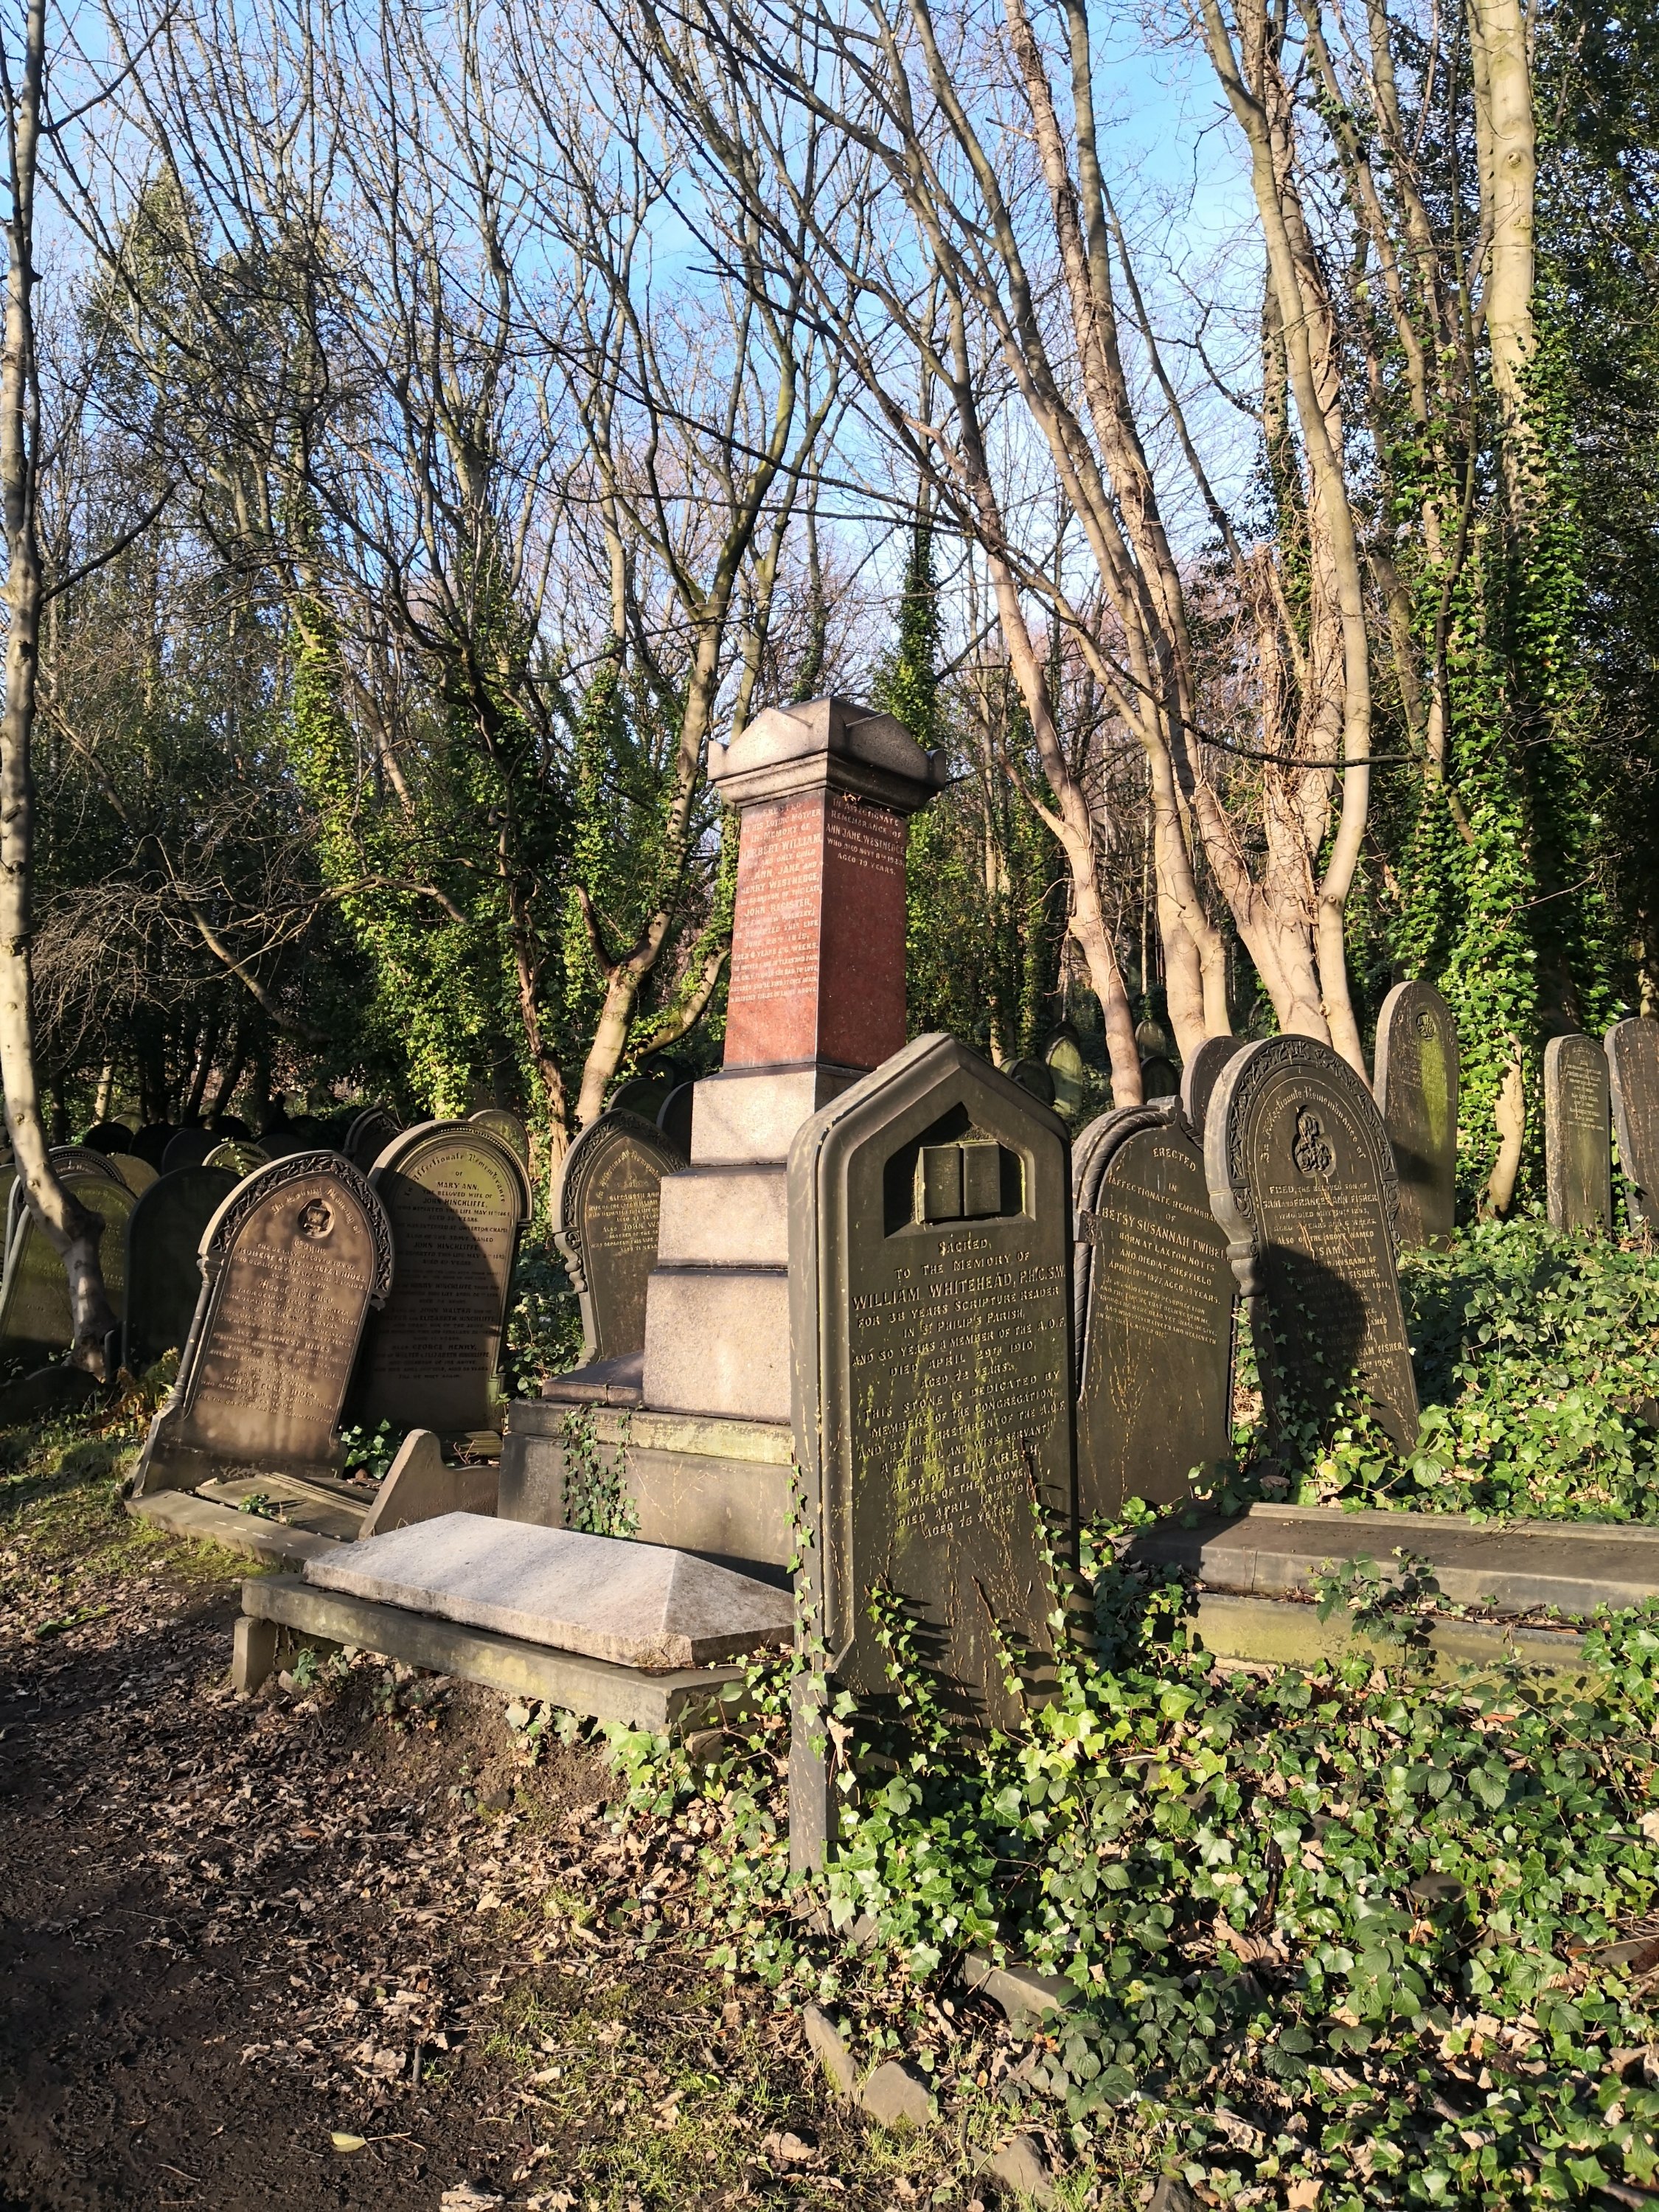
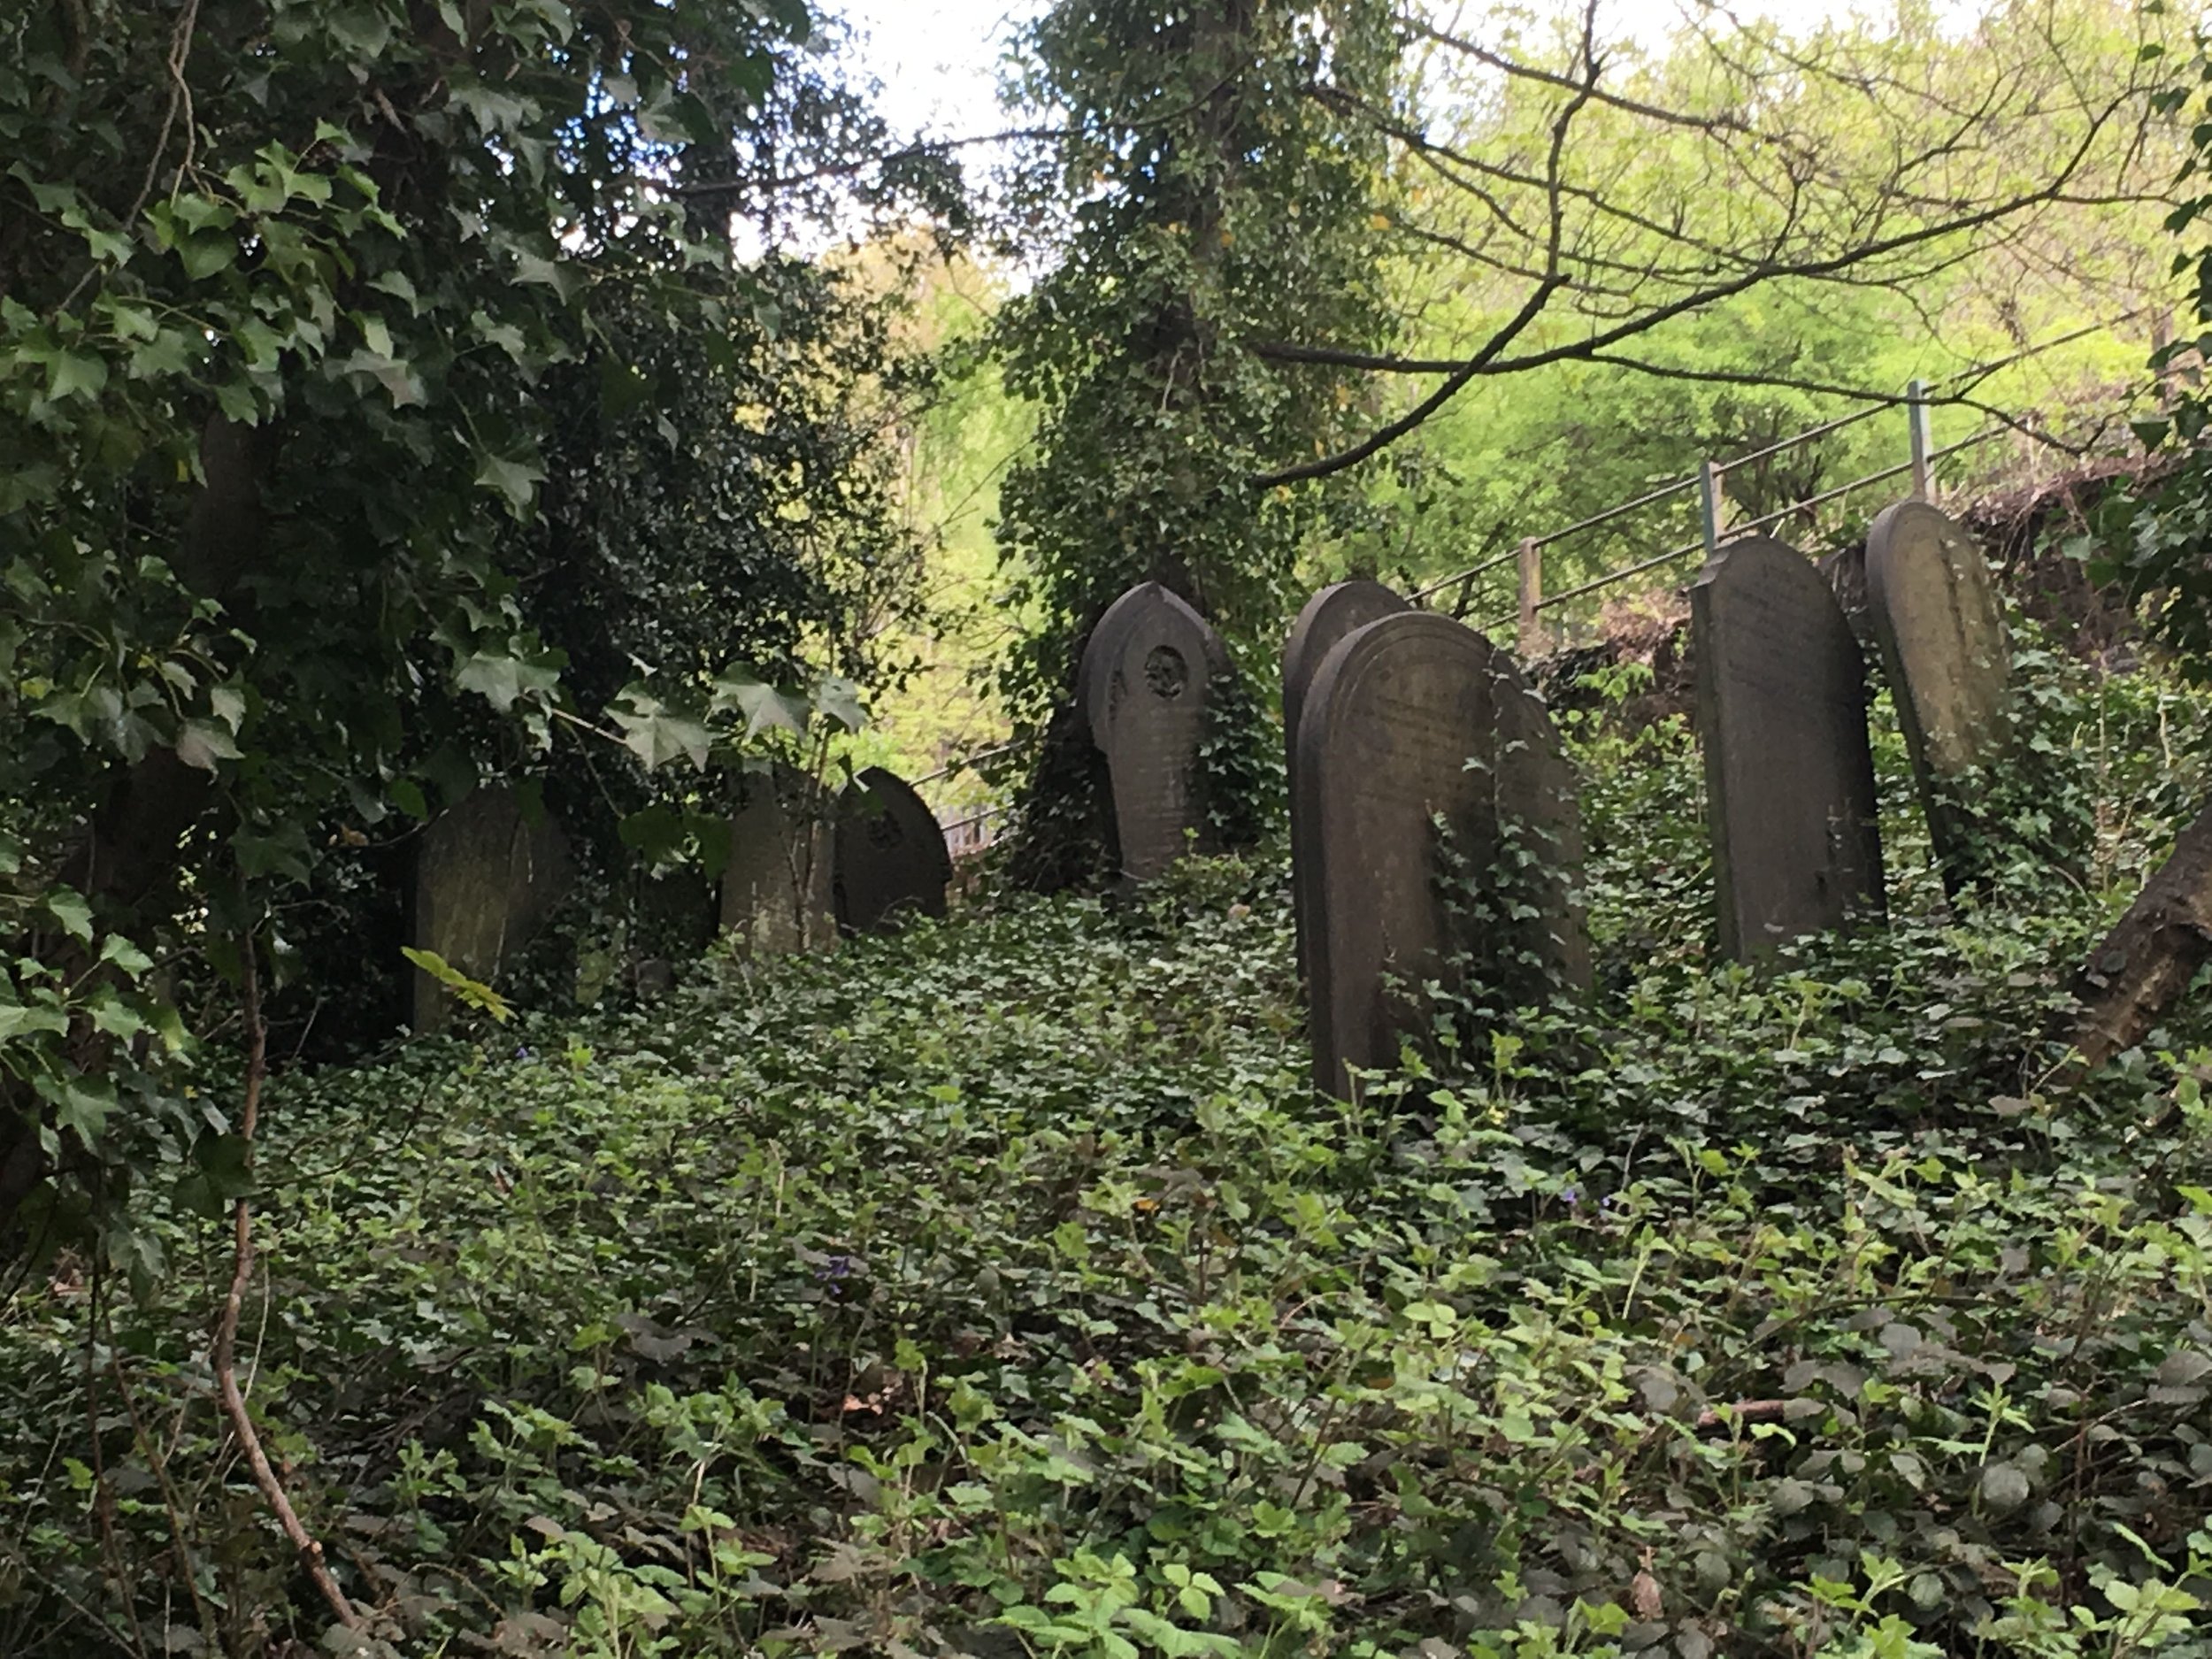
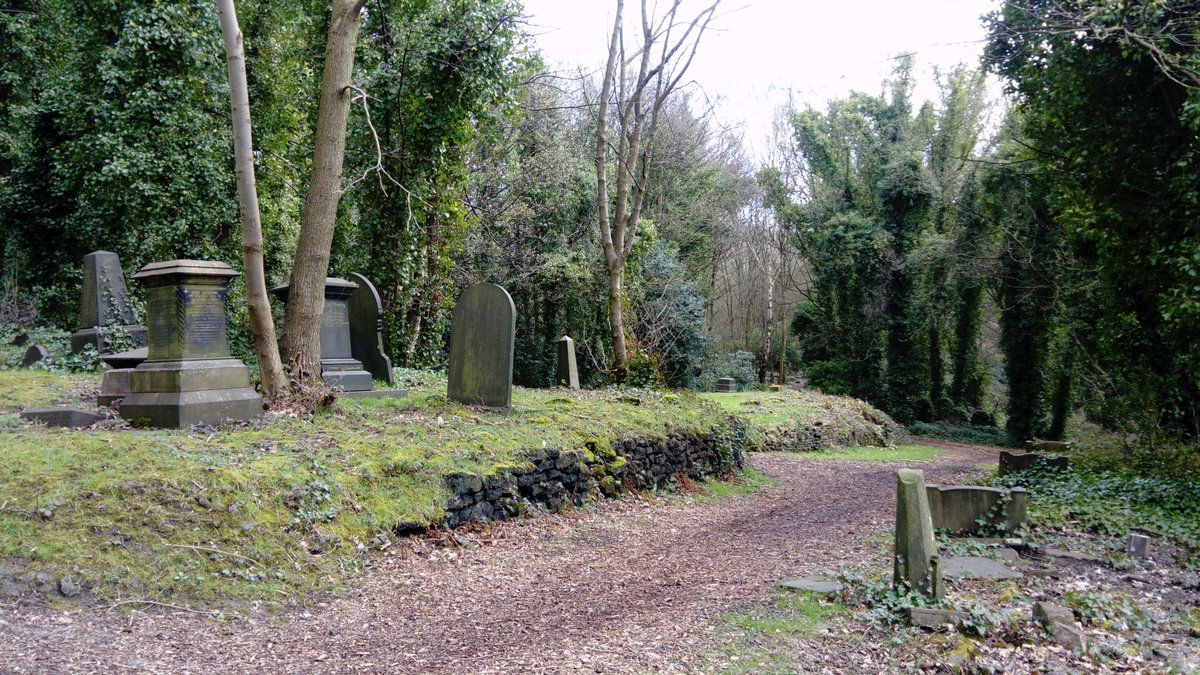
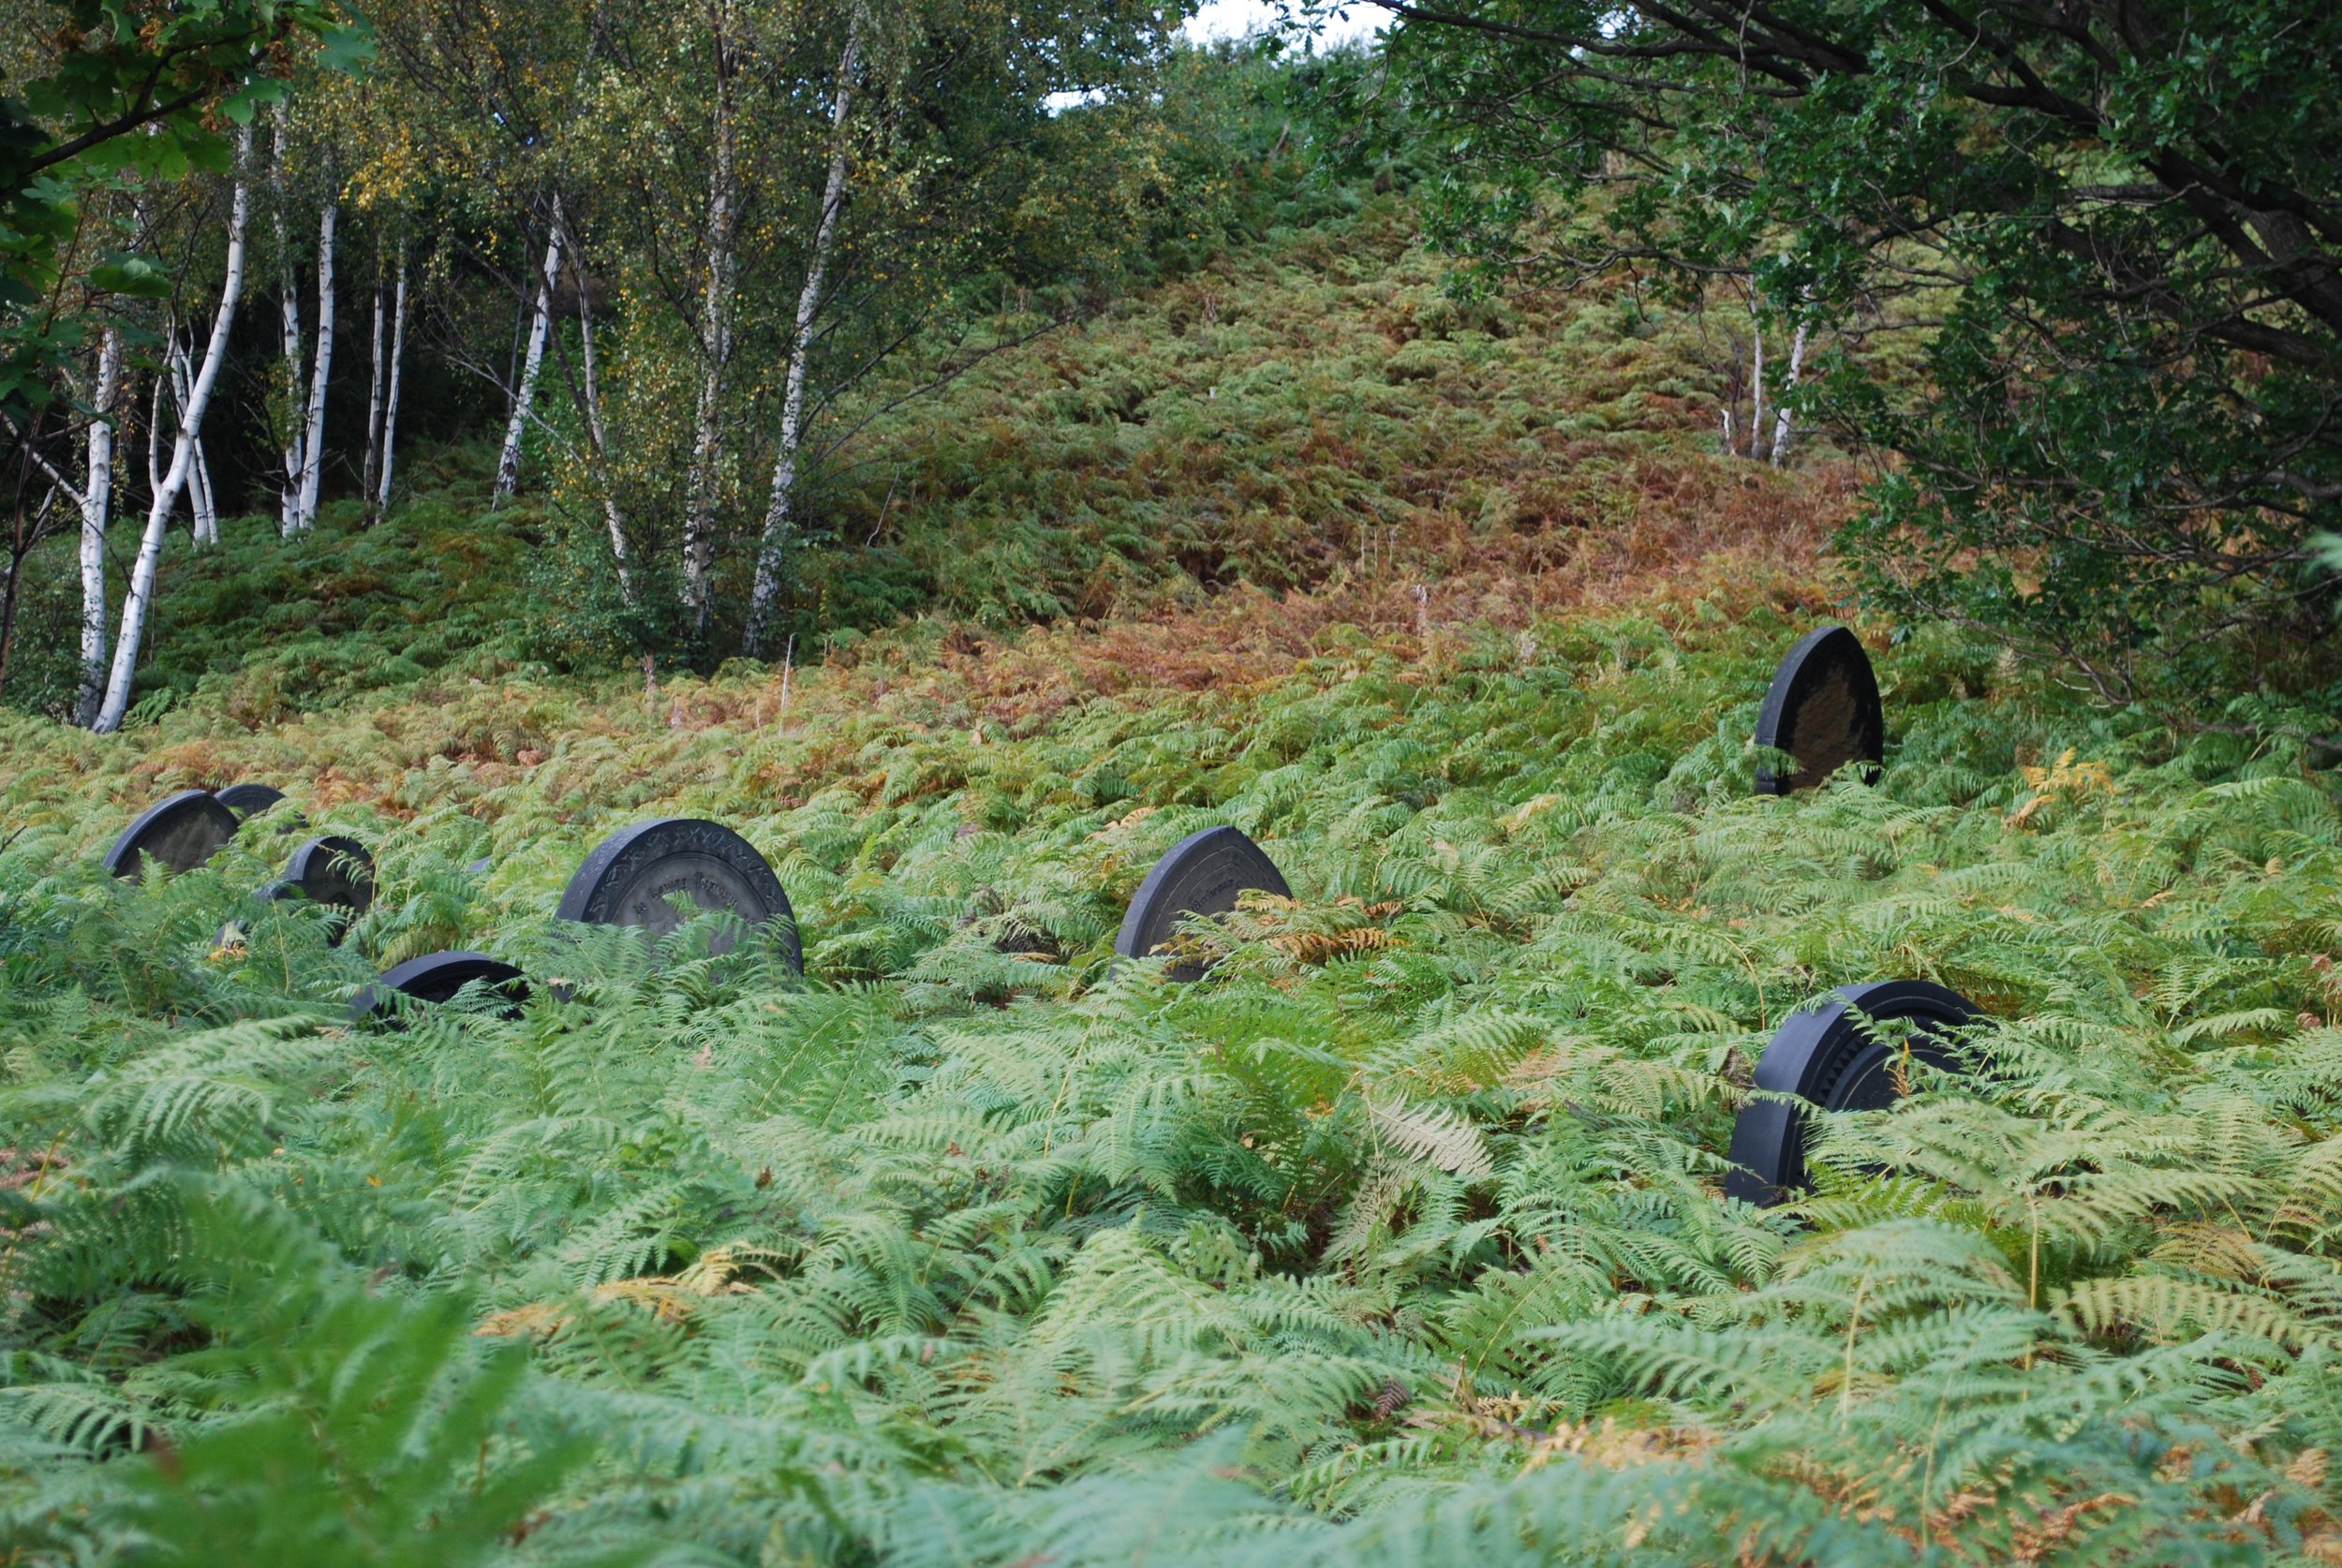
I drew a lot of inspiration from one of my childhood haunts (ba-dum-tish) for this. Just down the cliff from my secondary school was Wardsend Cemetery, a very old abandoned cemetery that was completely overgrown. I spent many afternoons in the summer exploring this place, fascinated by the lopsided graves, broken tombs covered in ivy and even one half dug out grave with my name on it…
Basic Bits
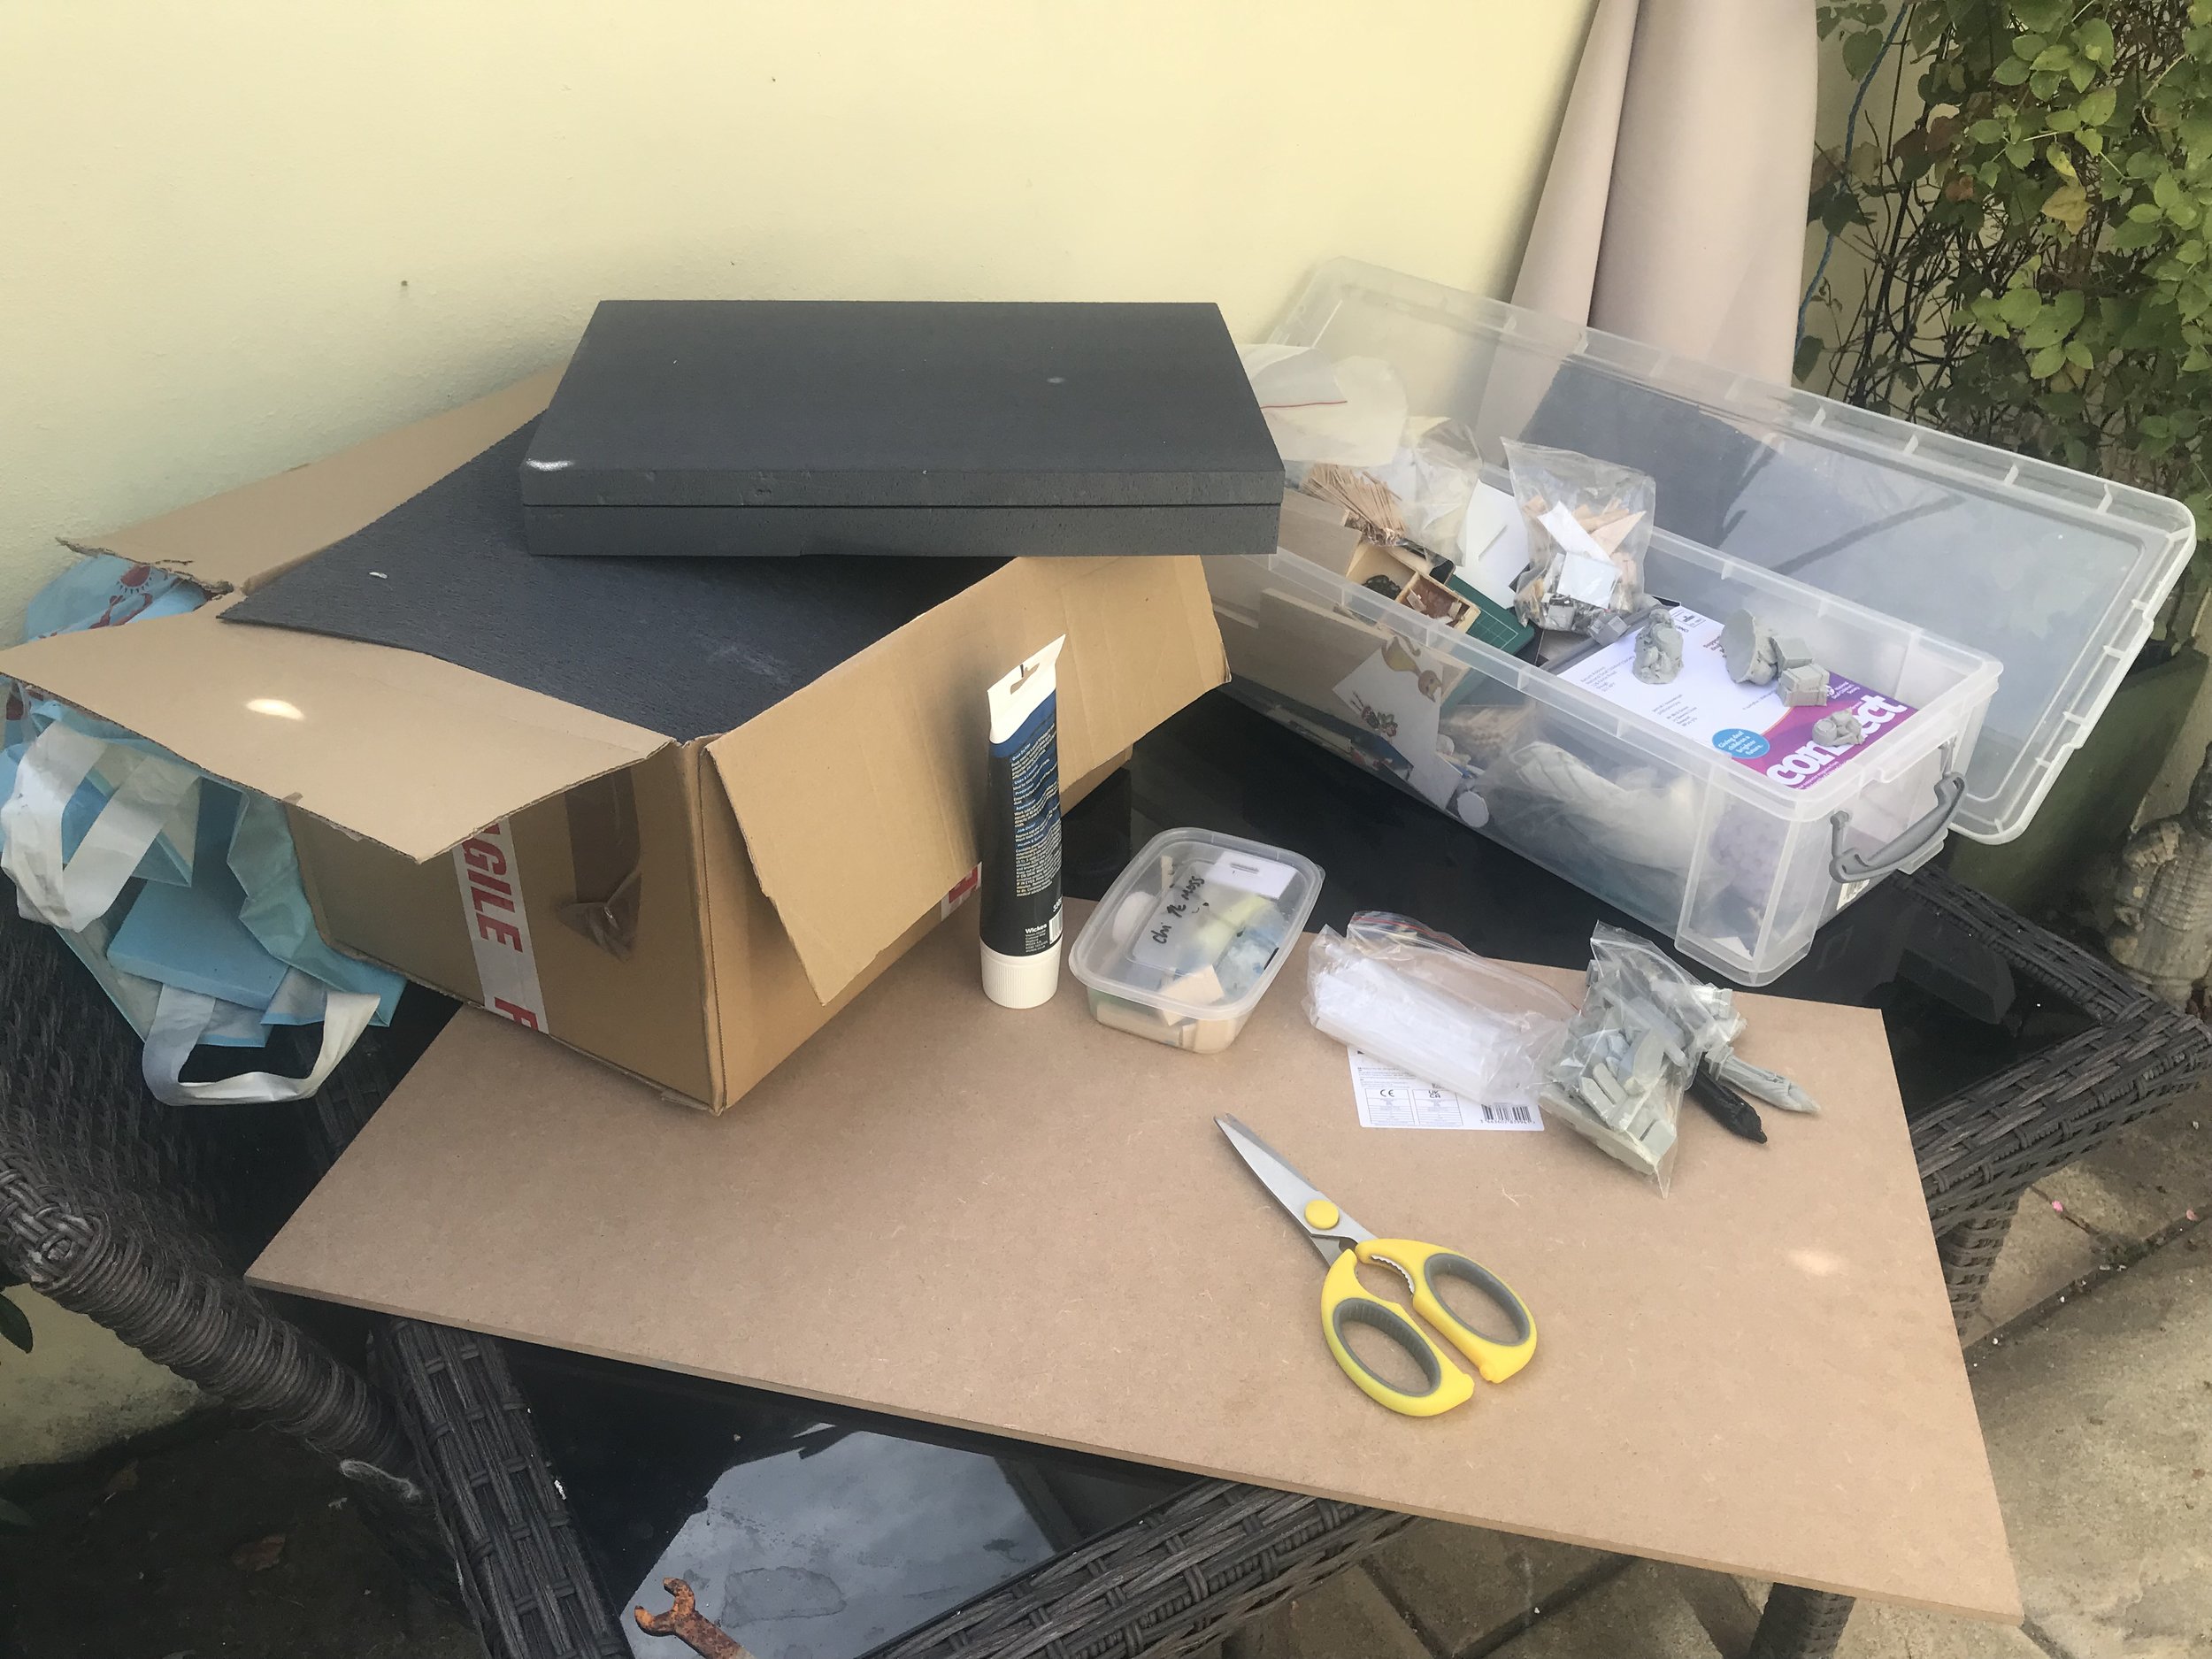
Once I knew roughly where I was going I had a rummage in my shed, and with some spare foam from Tom I thought I could get away with this build without buying anything new outside the foliage. My basic bits were:
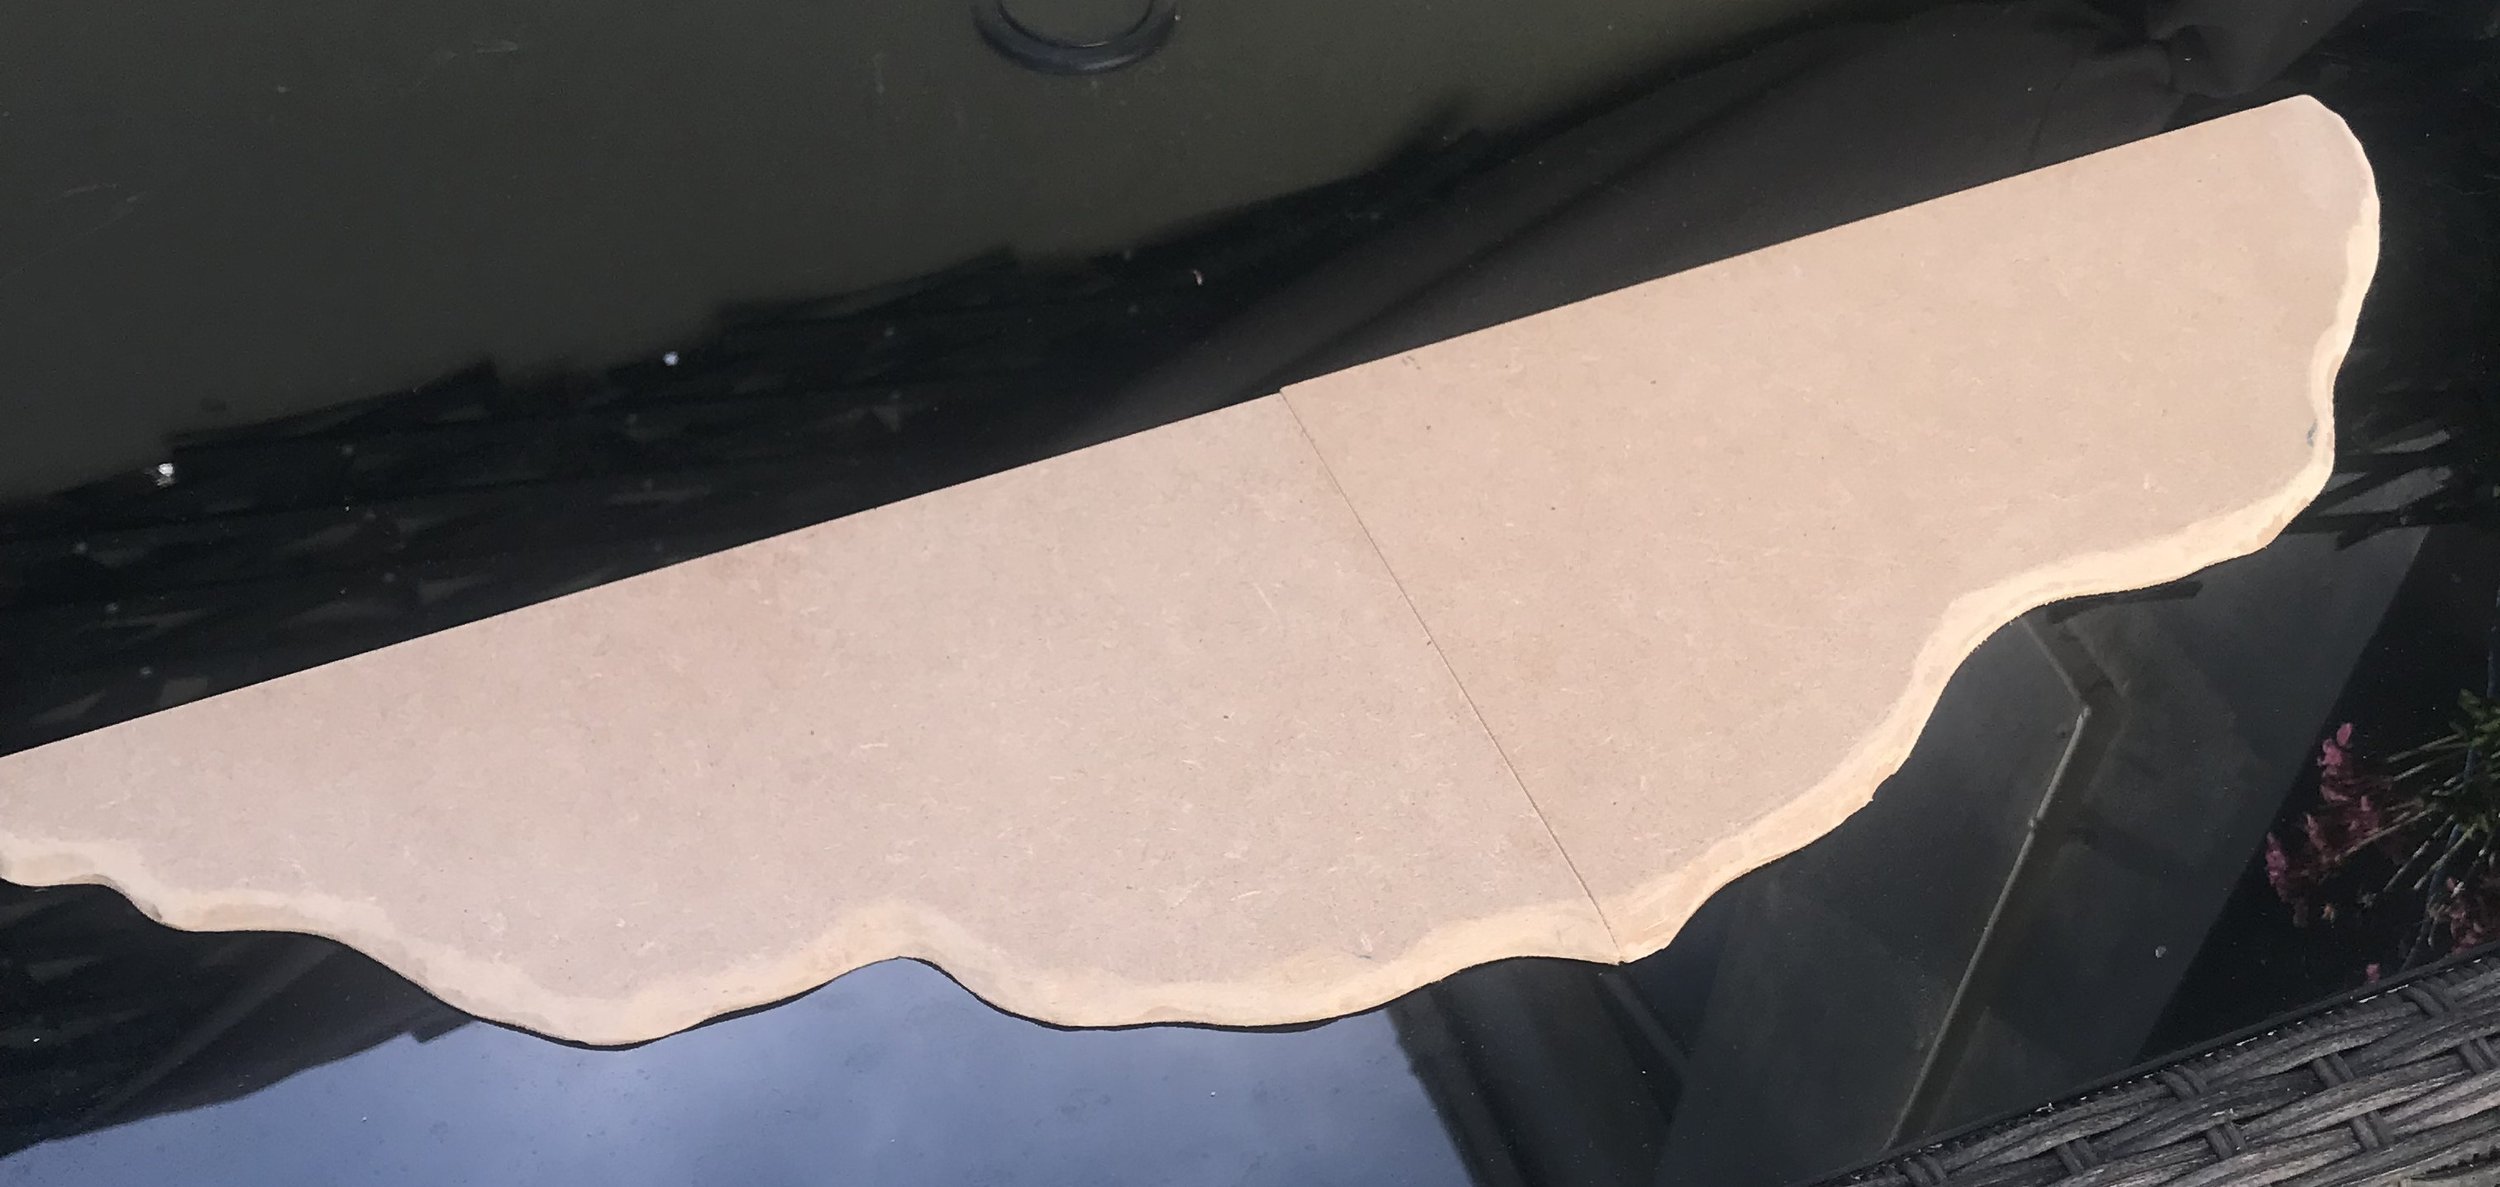
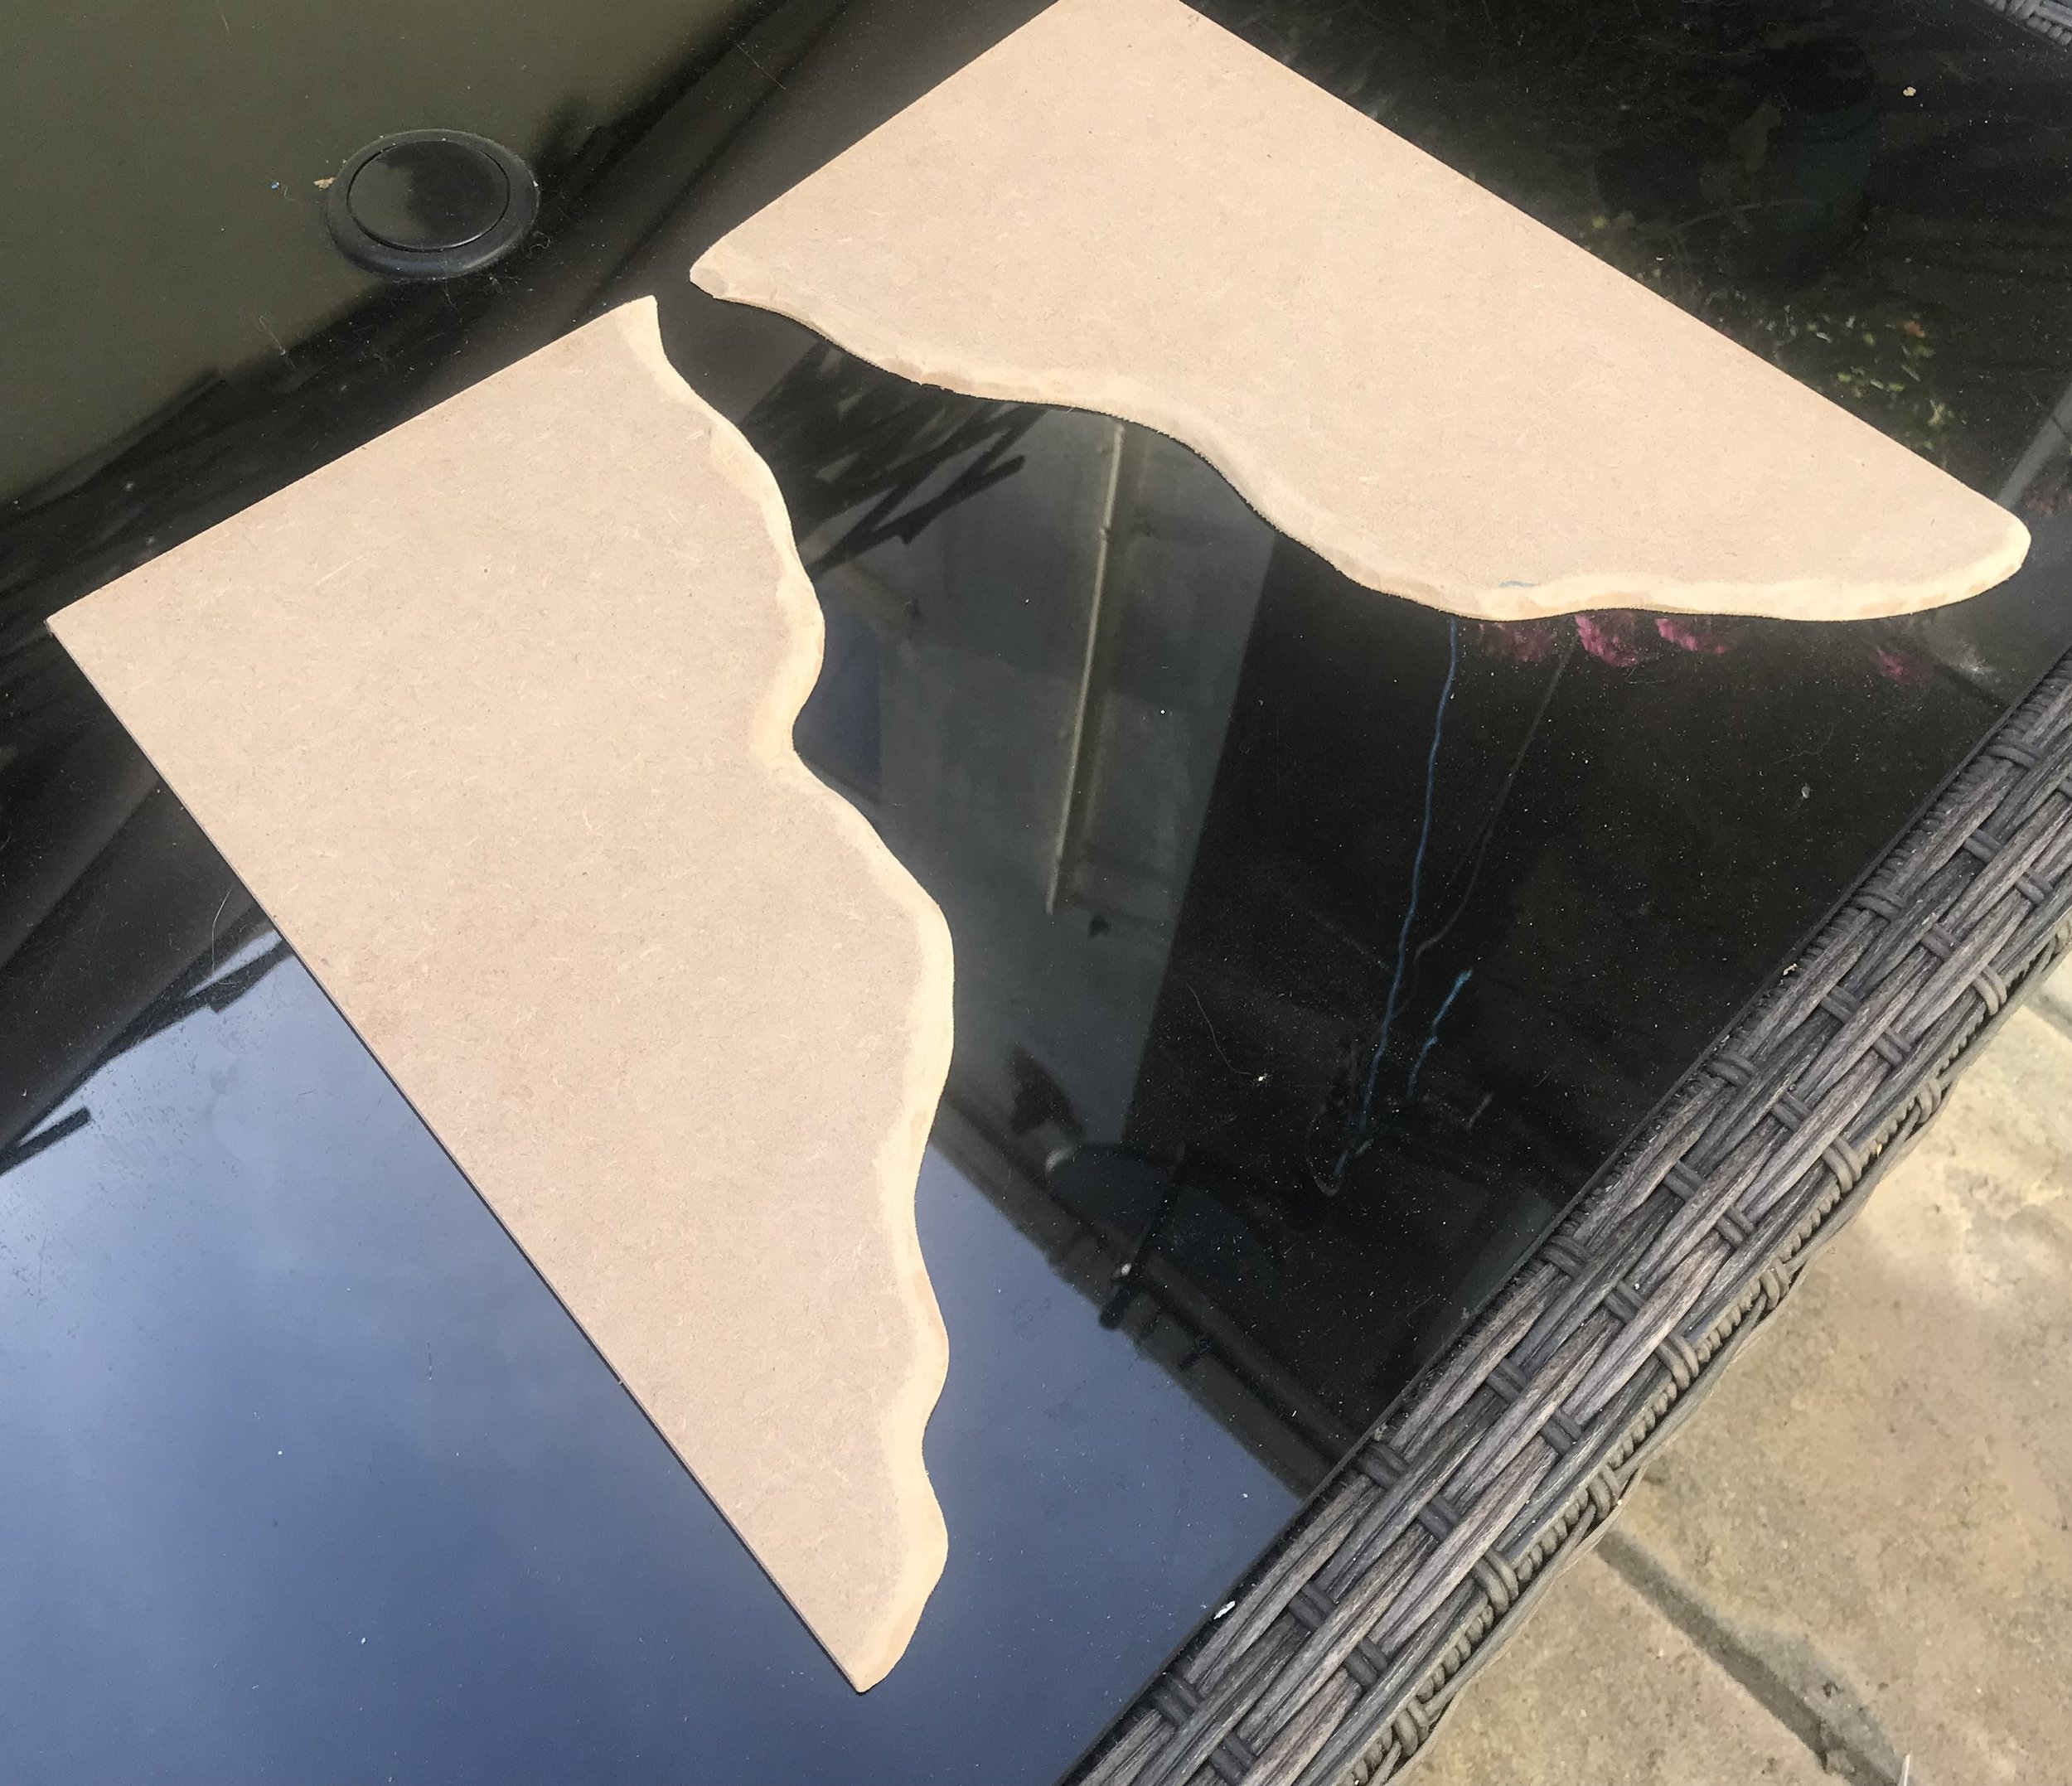
6mm MDF board for the base - this is sturdy, doesn’t warp on small projects like this and I can bevel the edges easily.
20mm HDF Foam for carving into the hill shape.
5mm EPVC Foam for any additional buildings like the Mausoleum, this is my standard building material and I stockpile it whenever I can!
A massive pile of resin gravestones, statues and other bits donated by my mate Tom at Model Display Products.
Bird sand, model train ballast, pea gravel and a little tree bark for texture.
Colour Forge green moss static grass, Gamers Grass dry grass XL tufts and some other assorted tufts from the bits box.
Non-shrink filler in a tube, PVA glue, super glue and a hot glue gun.
The Build
First an Important Note on Basing Moonstone Terrain
I've always based any large terrain pieces on wood or foam, it makes them more sturdy, less likely to move around during play and gives you space around things like houses to add extra detail. However in Moonstone you need to balance this with the fact that any major lip on a base is going to stop moonstones as they are dropped, and the tactical difference between a stone touching a building or object, and just stopping at the edge of a base can be quite major.
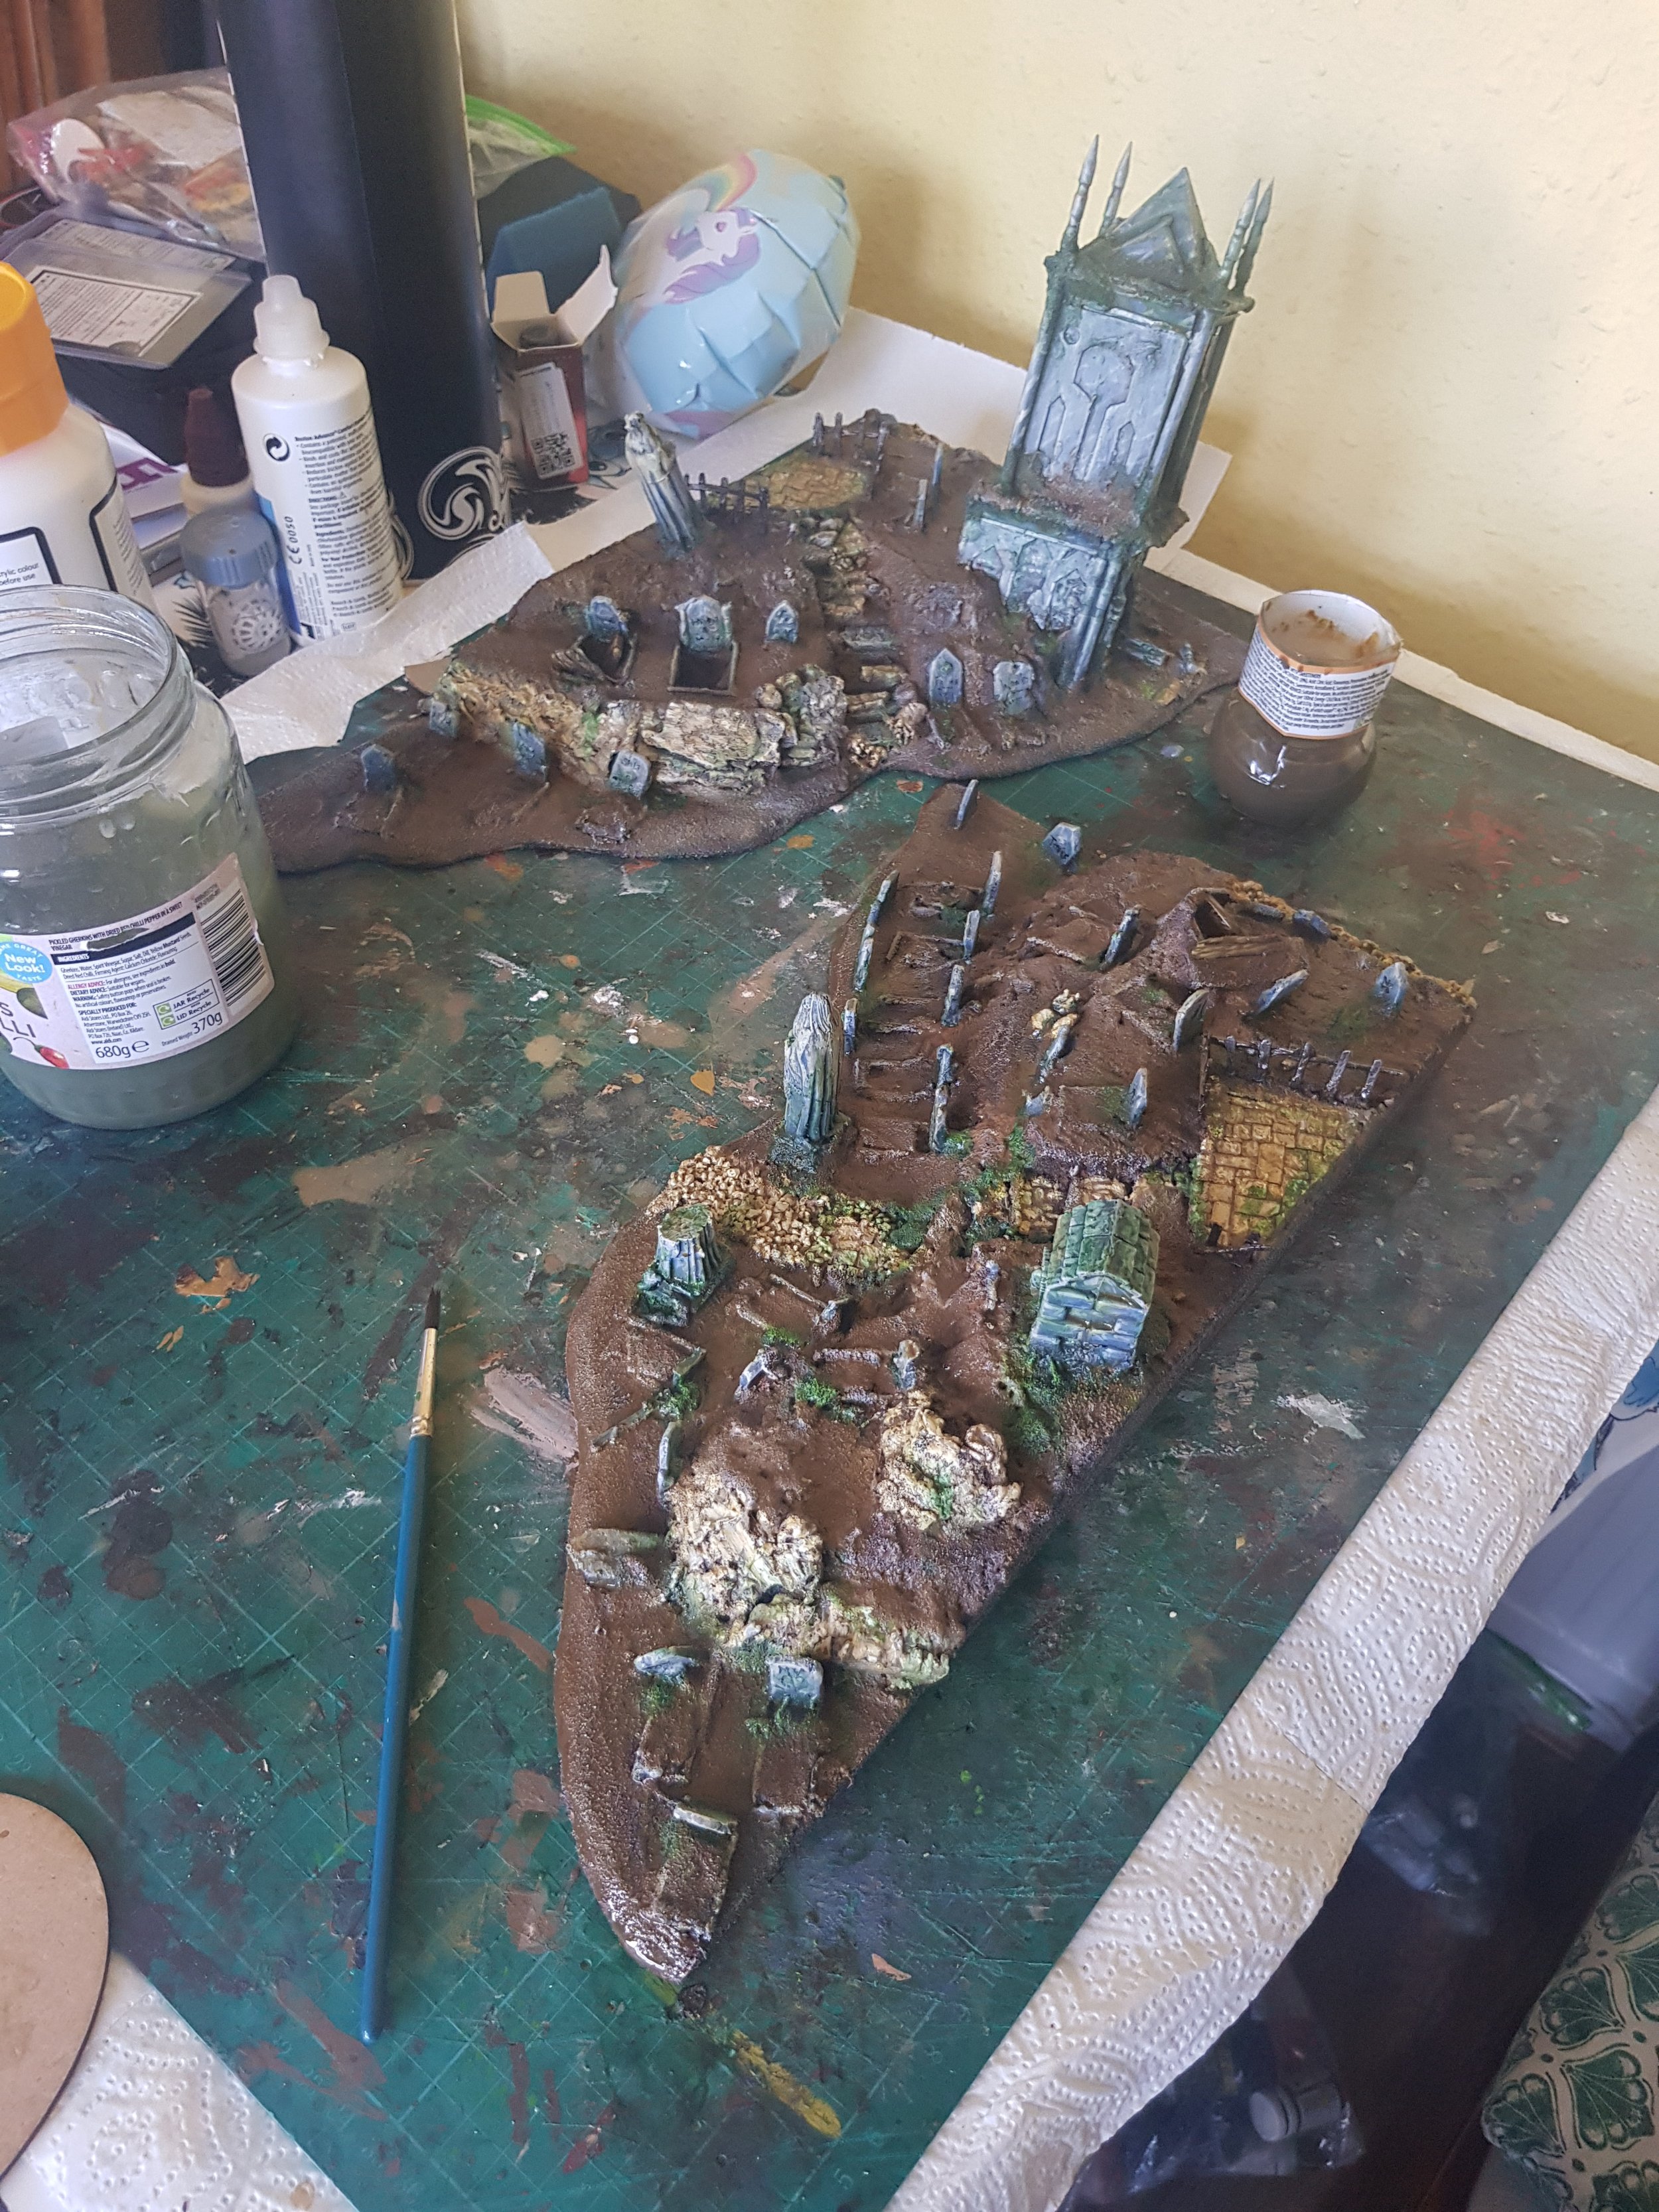
Working Bottom Up
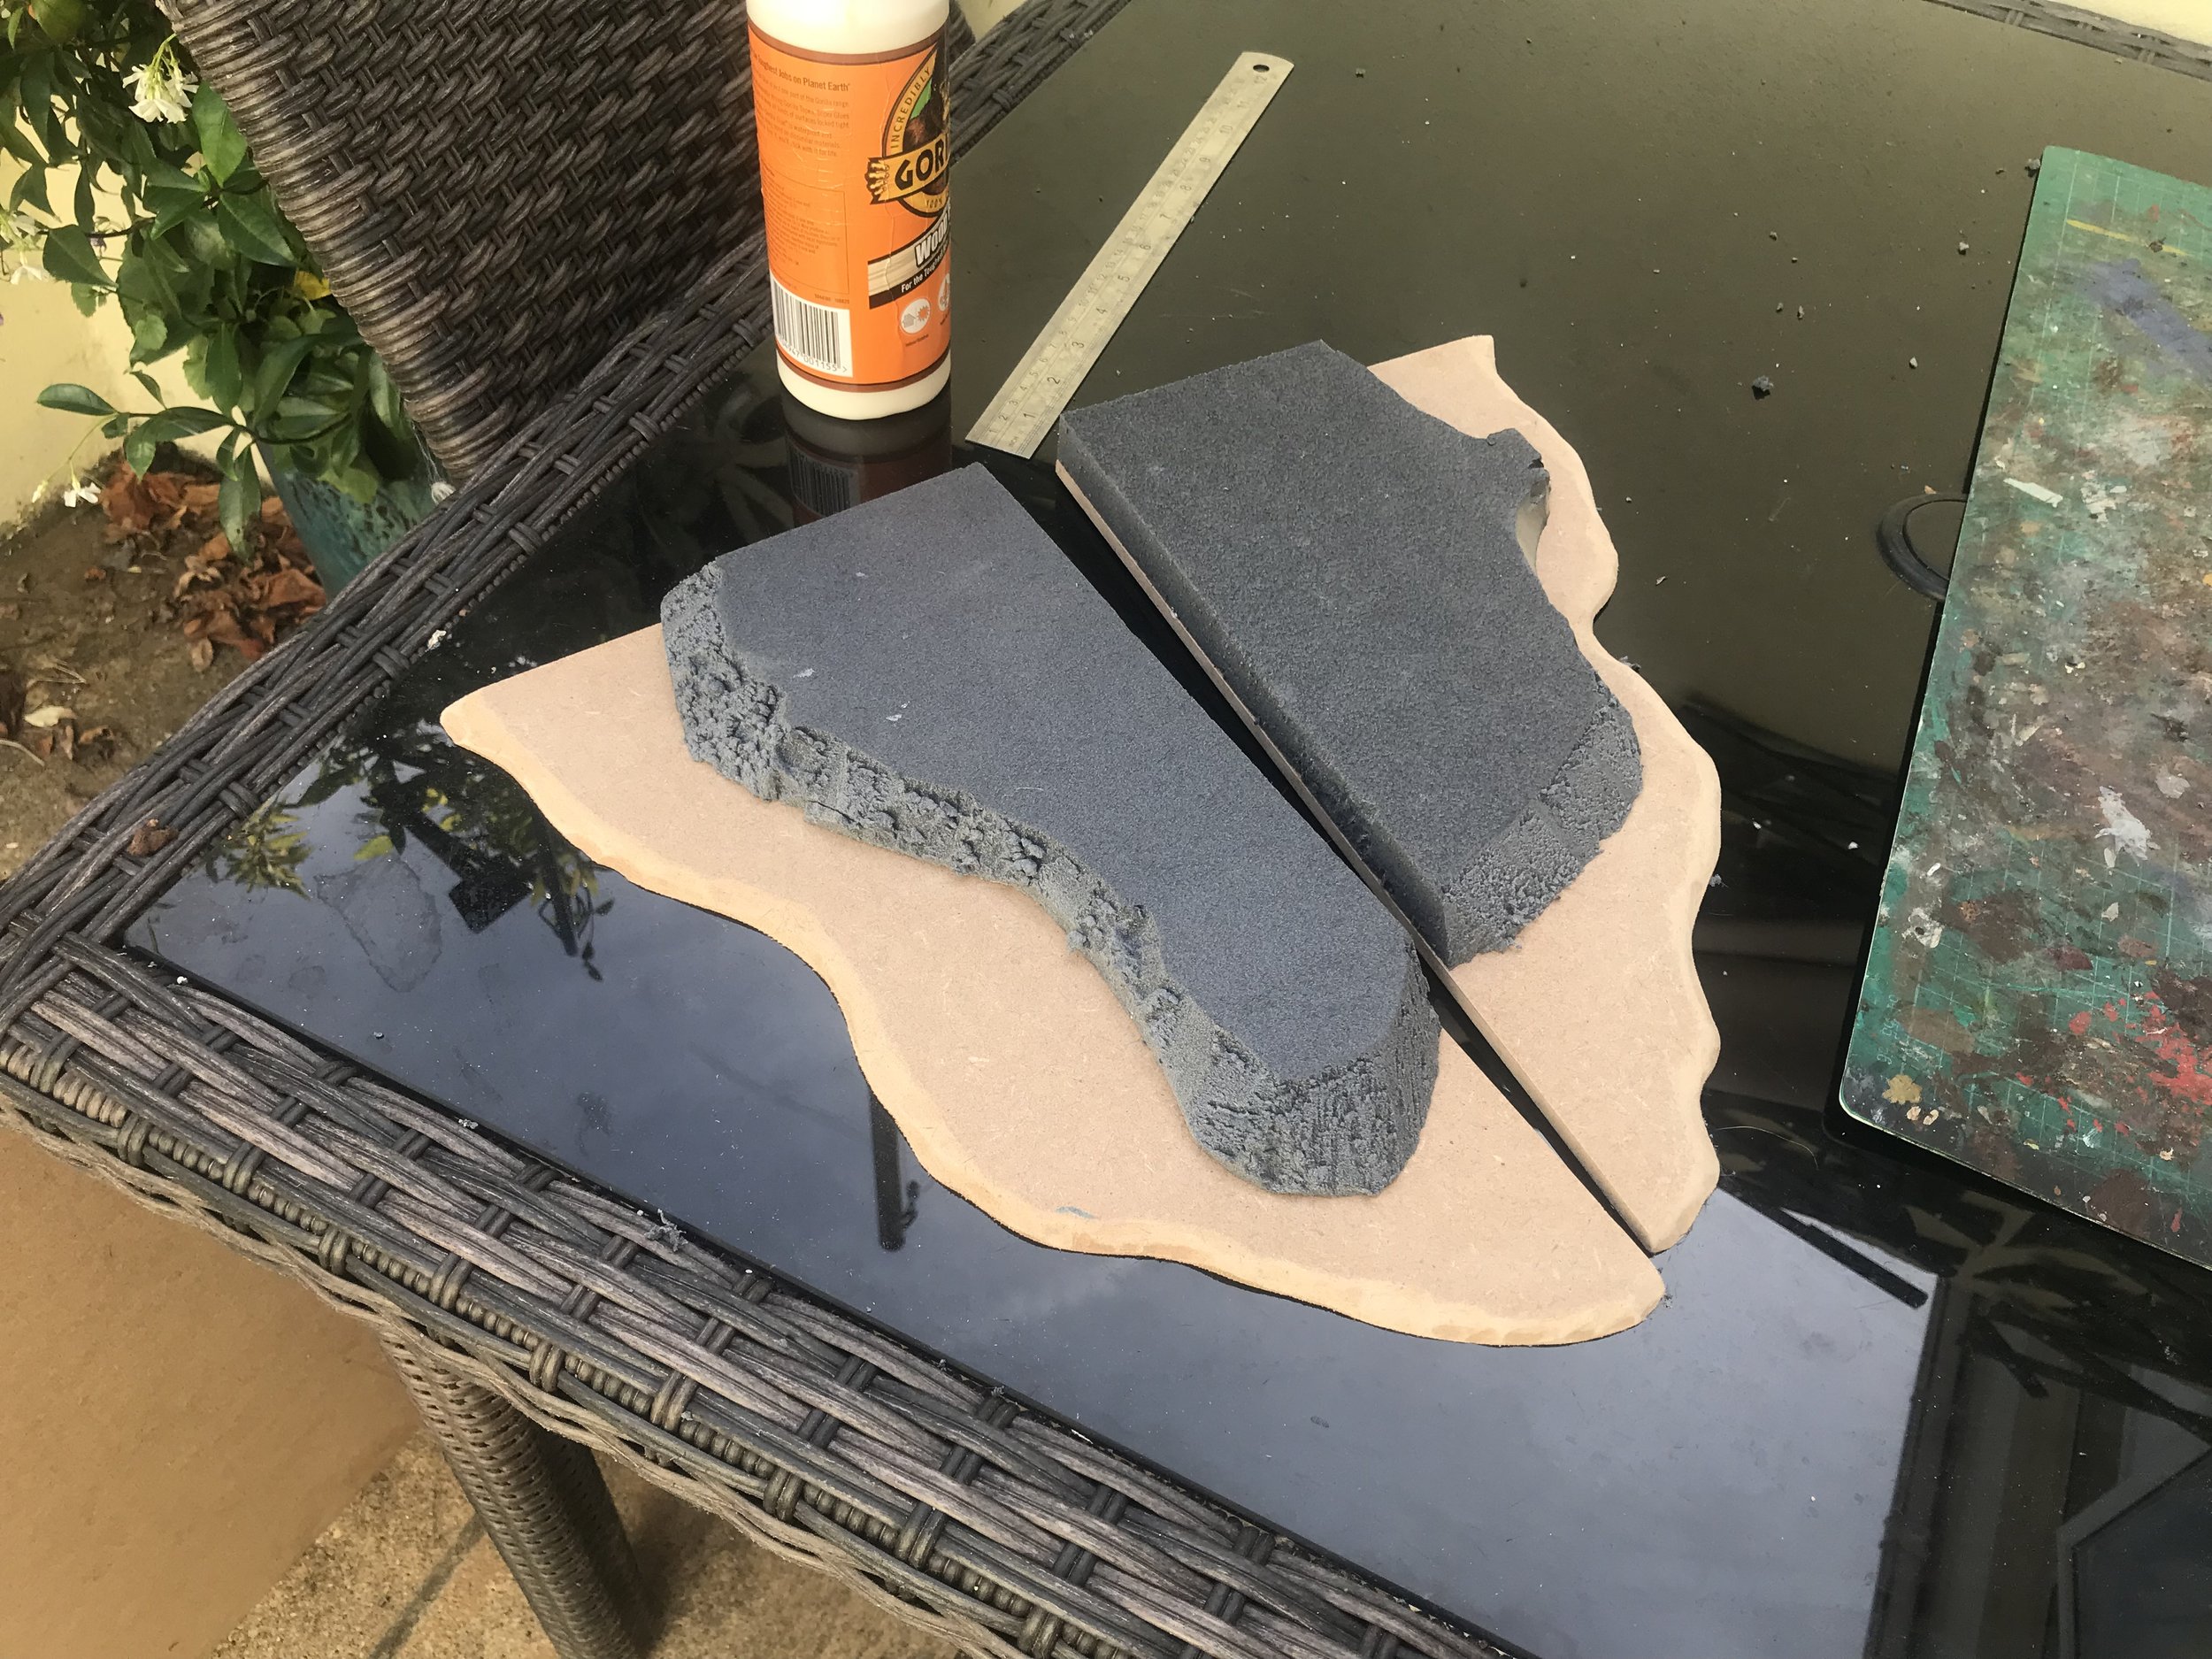
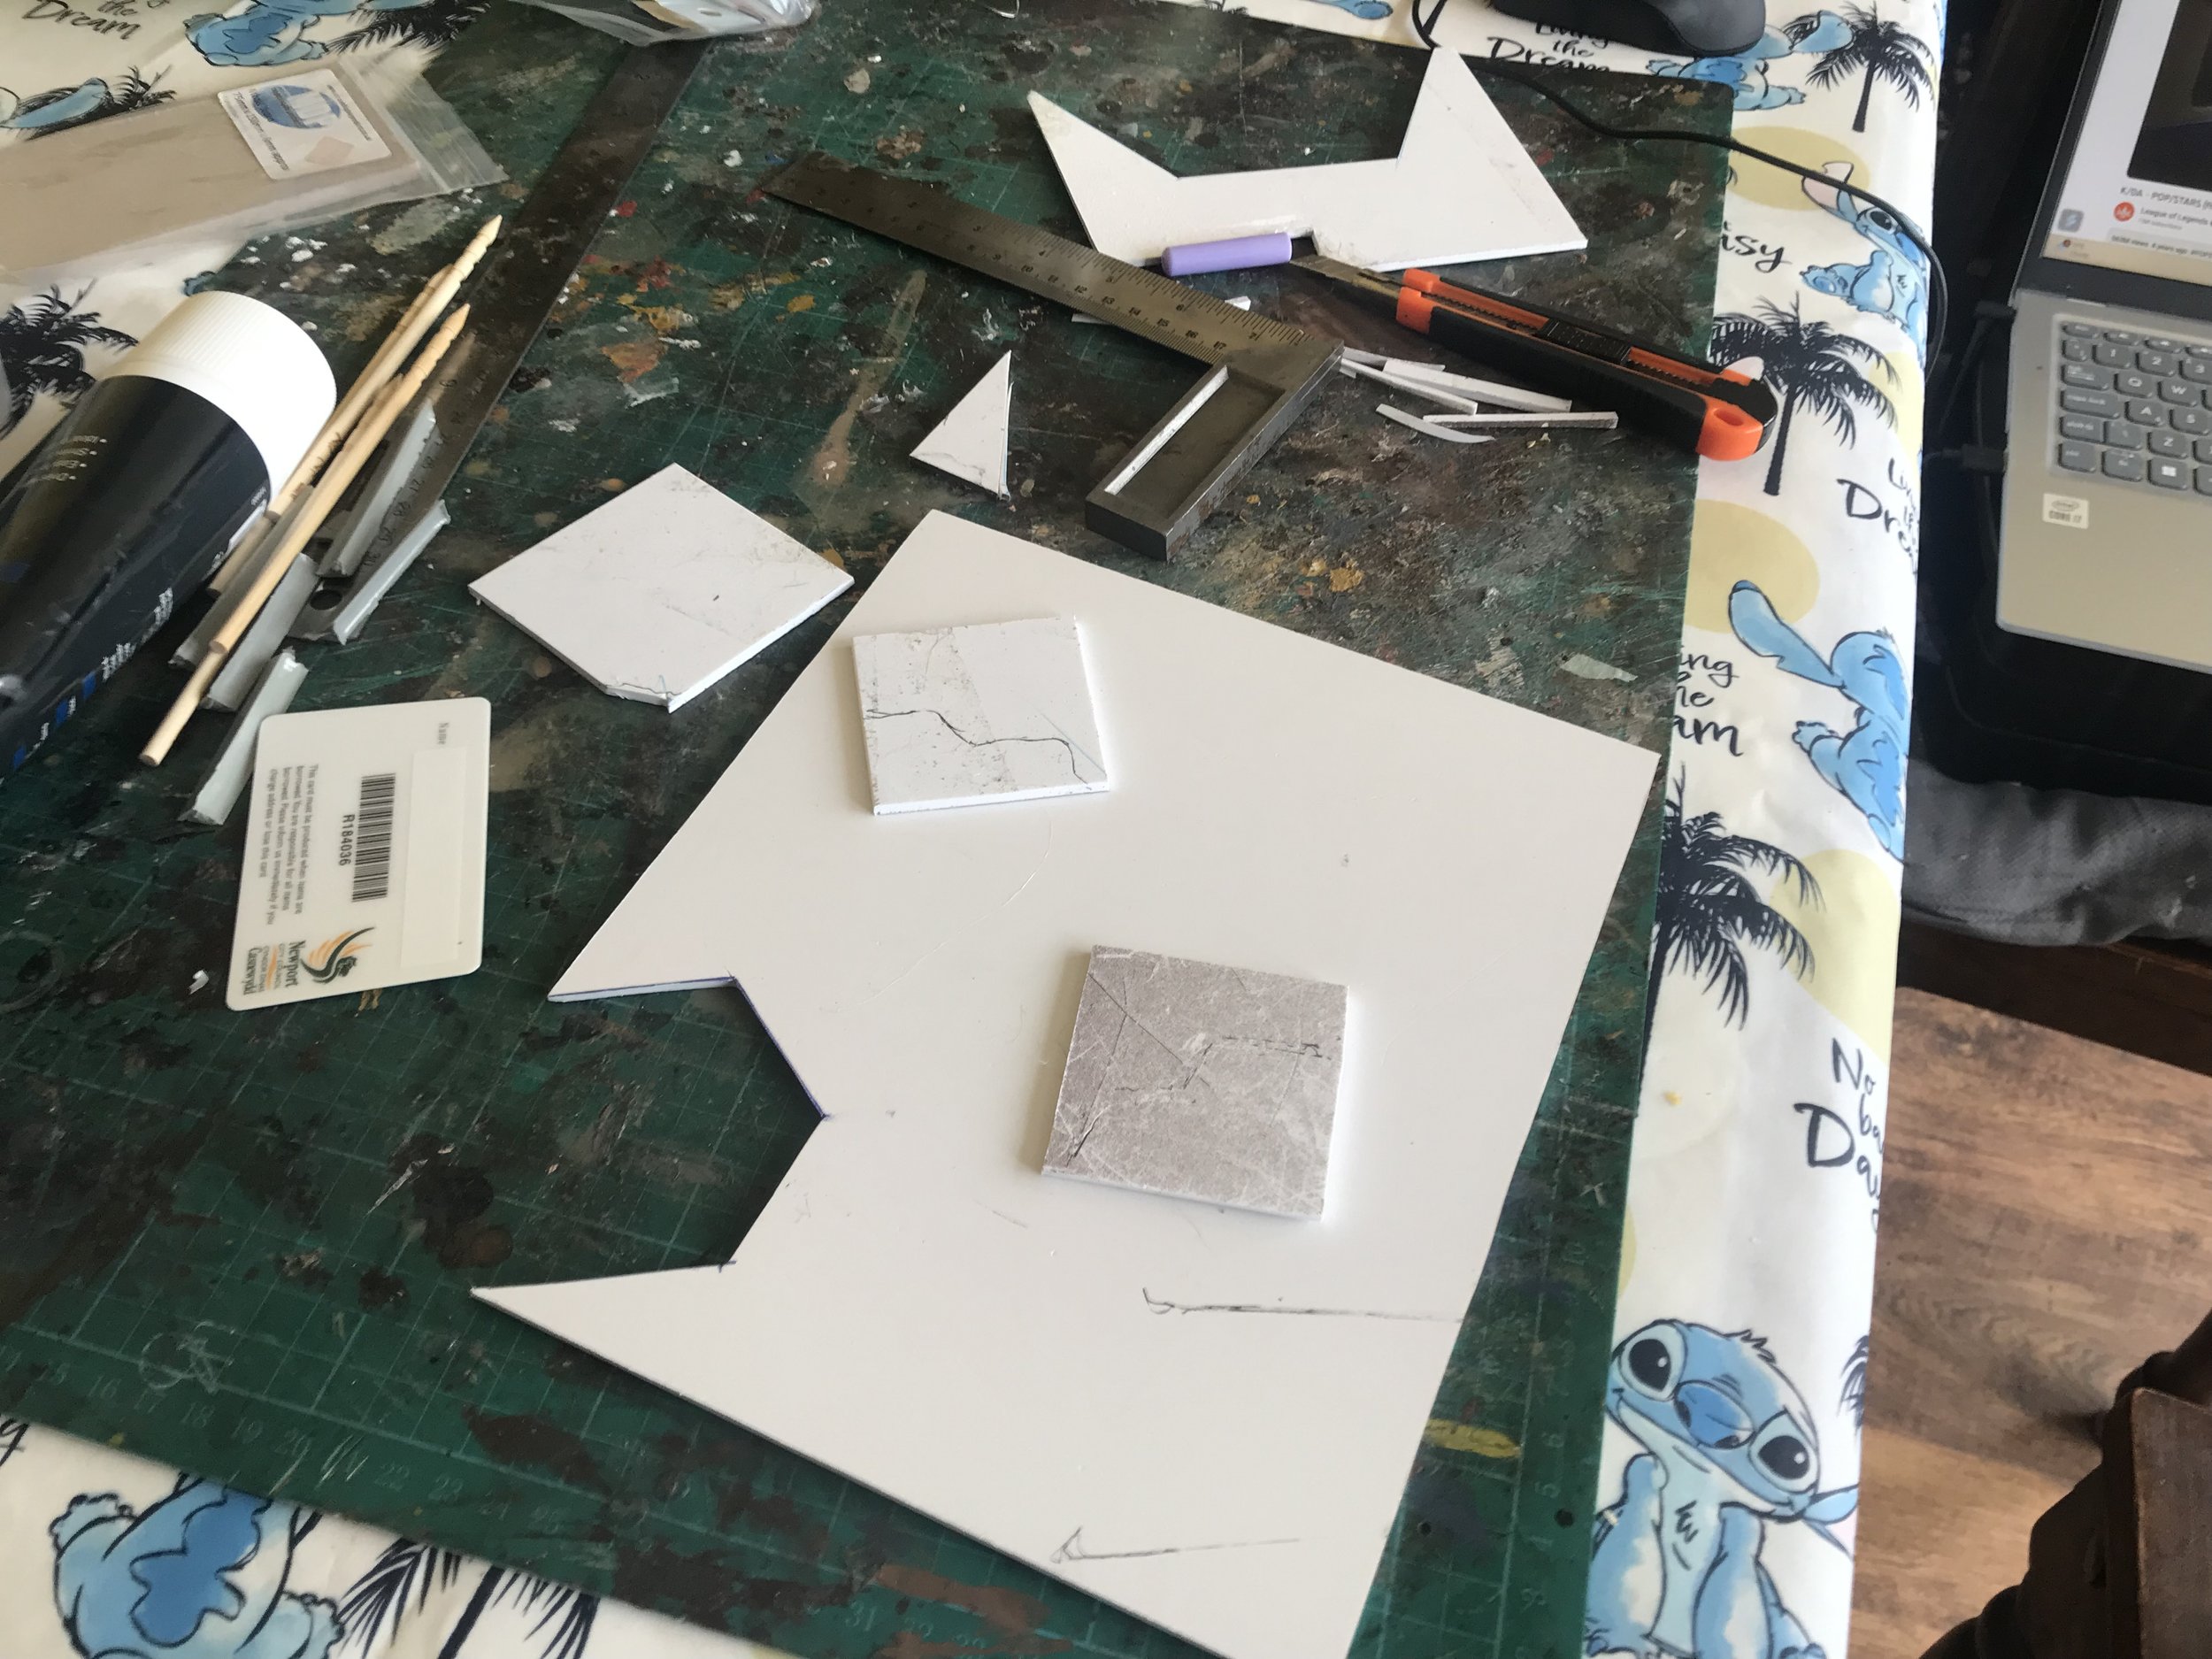
Now my patio table was loaded up with nonsense it was time to start. I always work from the bottom up, because it just seems logical to me. So, first I used power tools to cut and sand the wooden bases, making sure they matched up when I placed them side by side in both positions. The edges I bevelled really heavily with a knife before sanding to make sure it had as low a step between it and the table as possible. I should buy a rasp as it would make the whole process faster, really…
First Layer of Foam
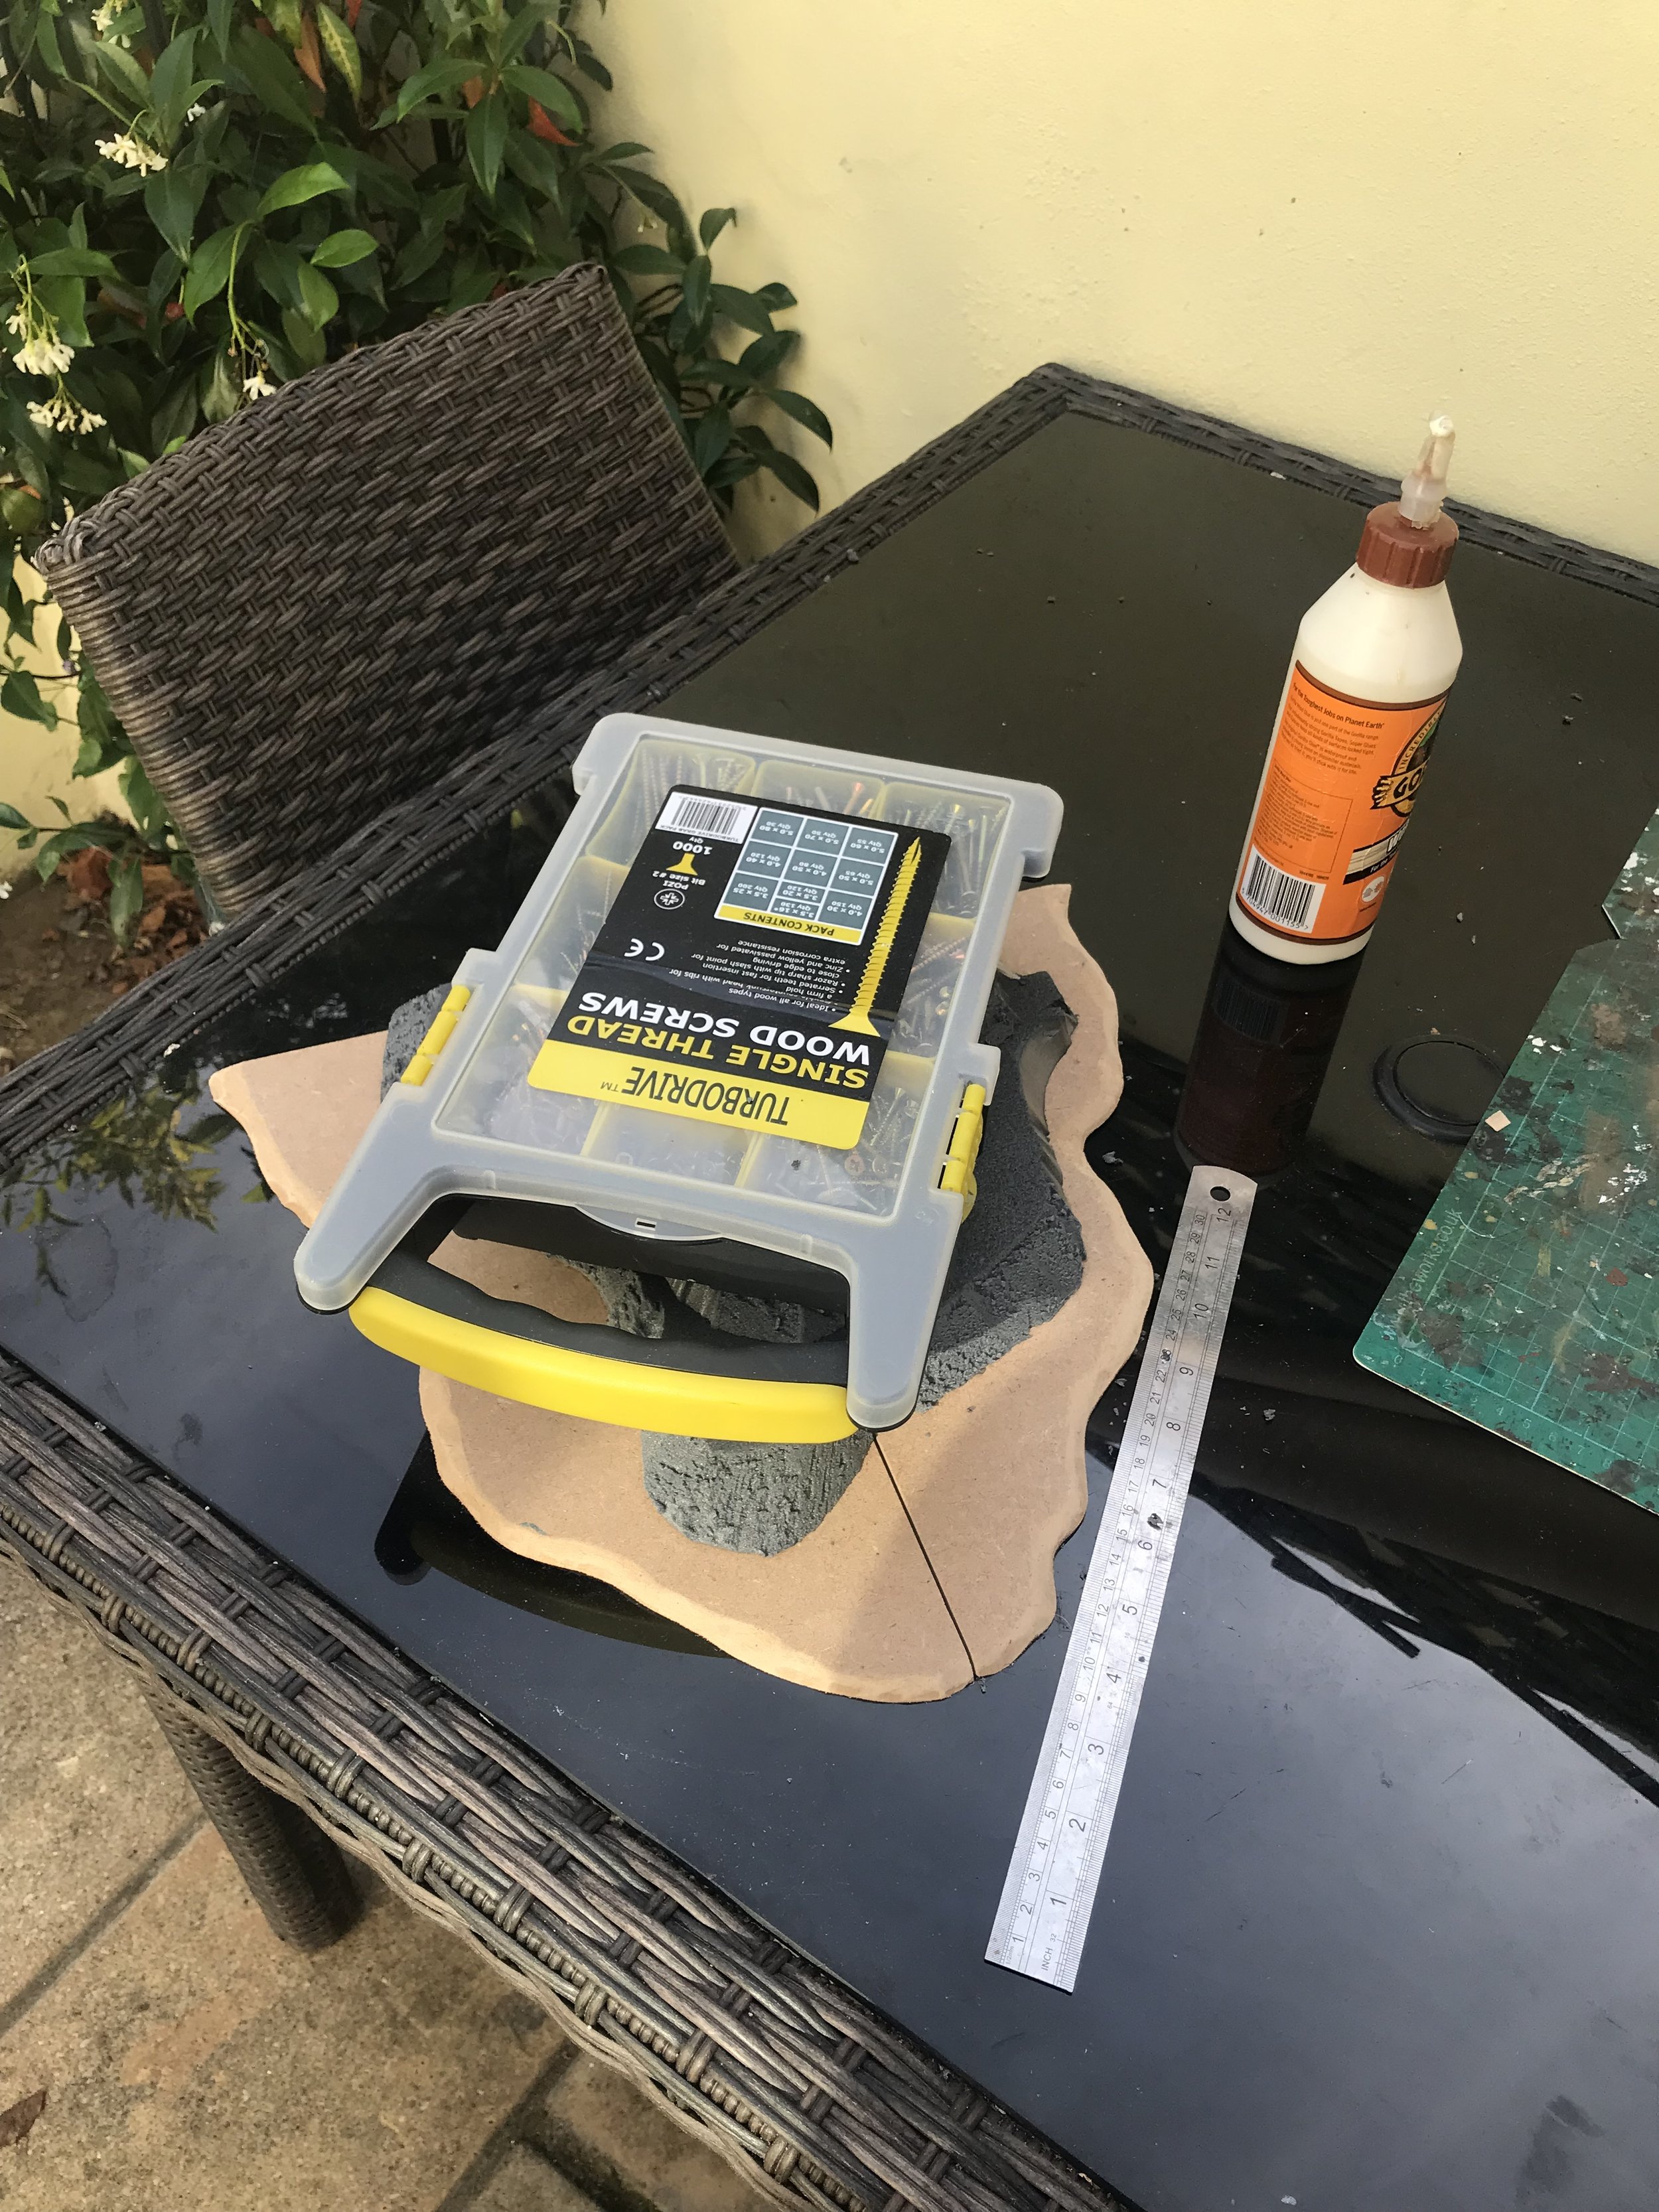
Next I added the first layer of foam; I used Gorilla wood glue for this and left it with a heavy weight squishing it down for half an hour between layers. Once again the key here was making sure the edges matched up exactly when the pieces were placed side by side. Between sanding and cutting this took a little time to get right, but when it was I added a second tier, matched it up then plopped the weight (in this case a box of nails) on it and went for tea. Gorilla glue in this situation forms an amazing bond once dry, but does need to be left alone lest it slips around. I am incapable of not fidgeting with stuff which is why I just left it and went away for a while!
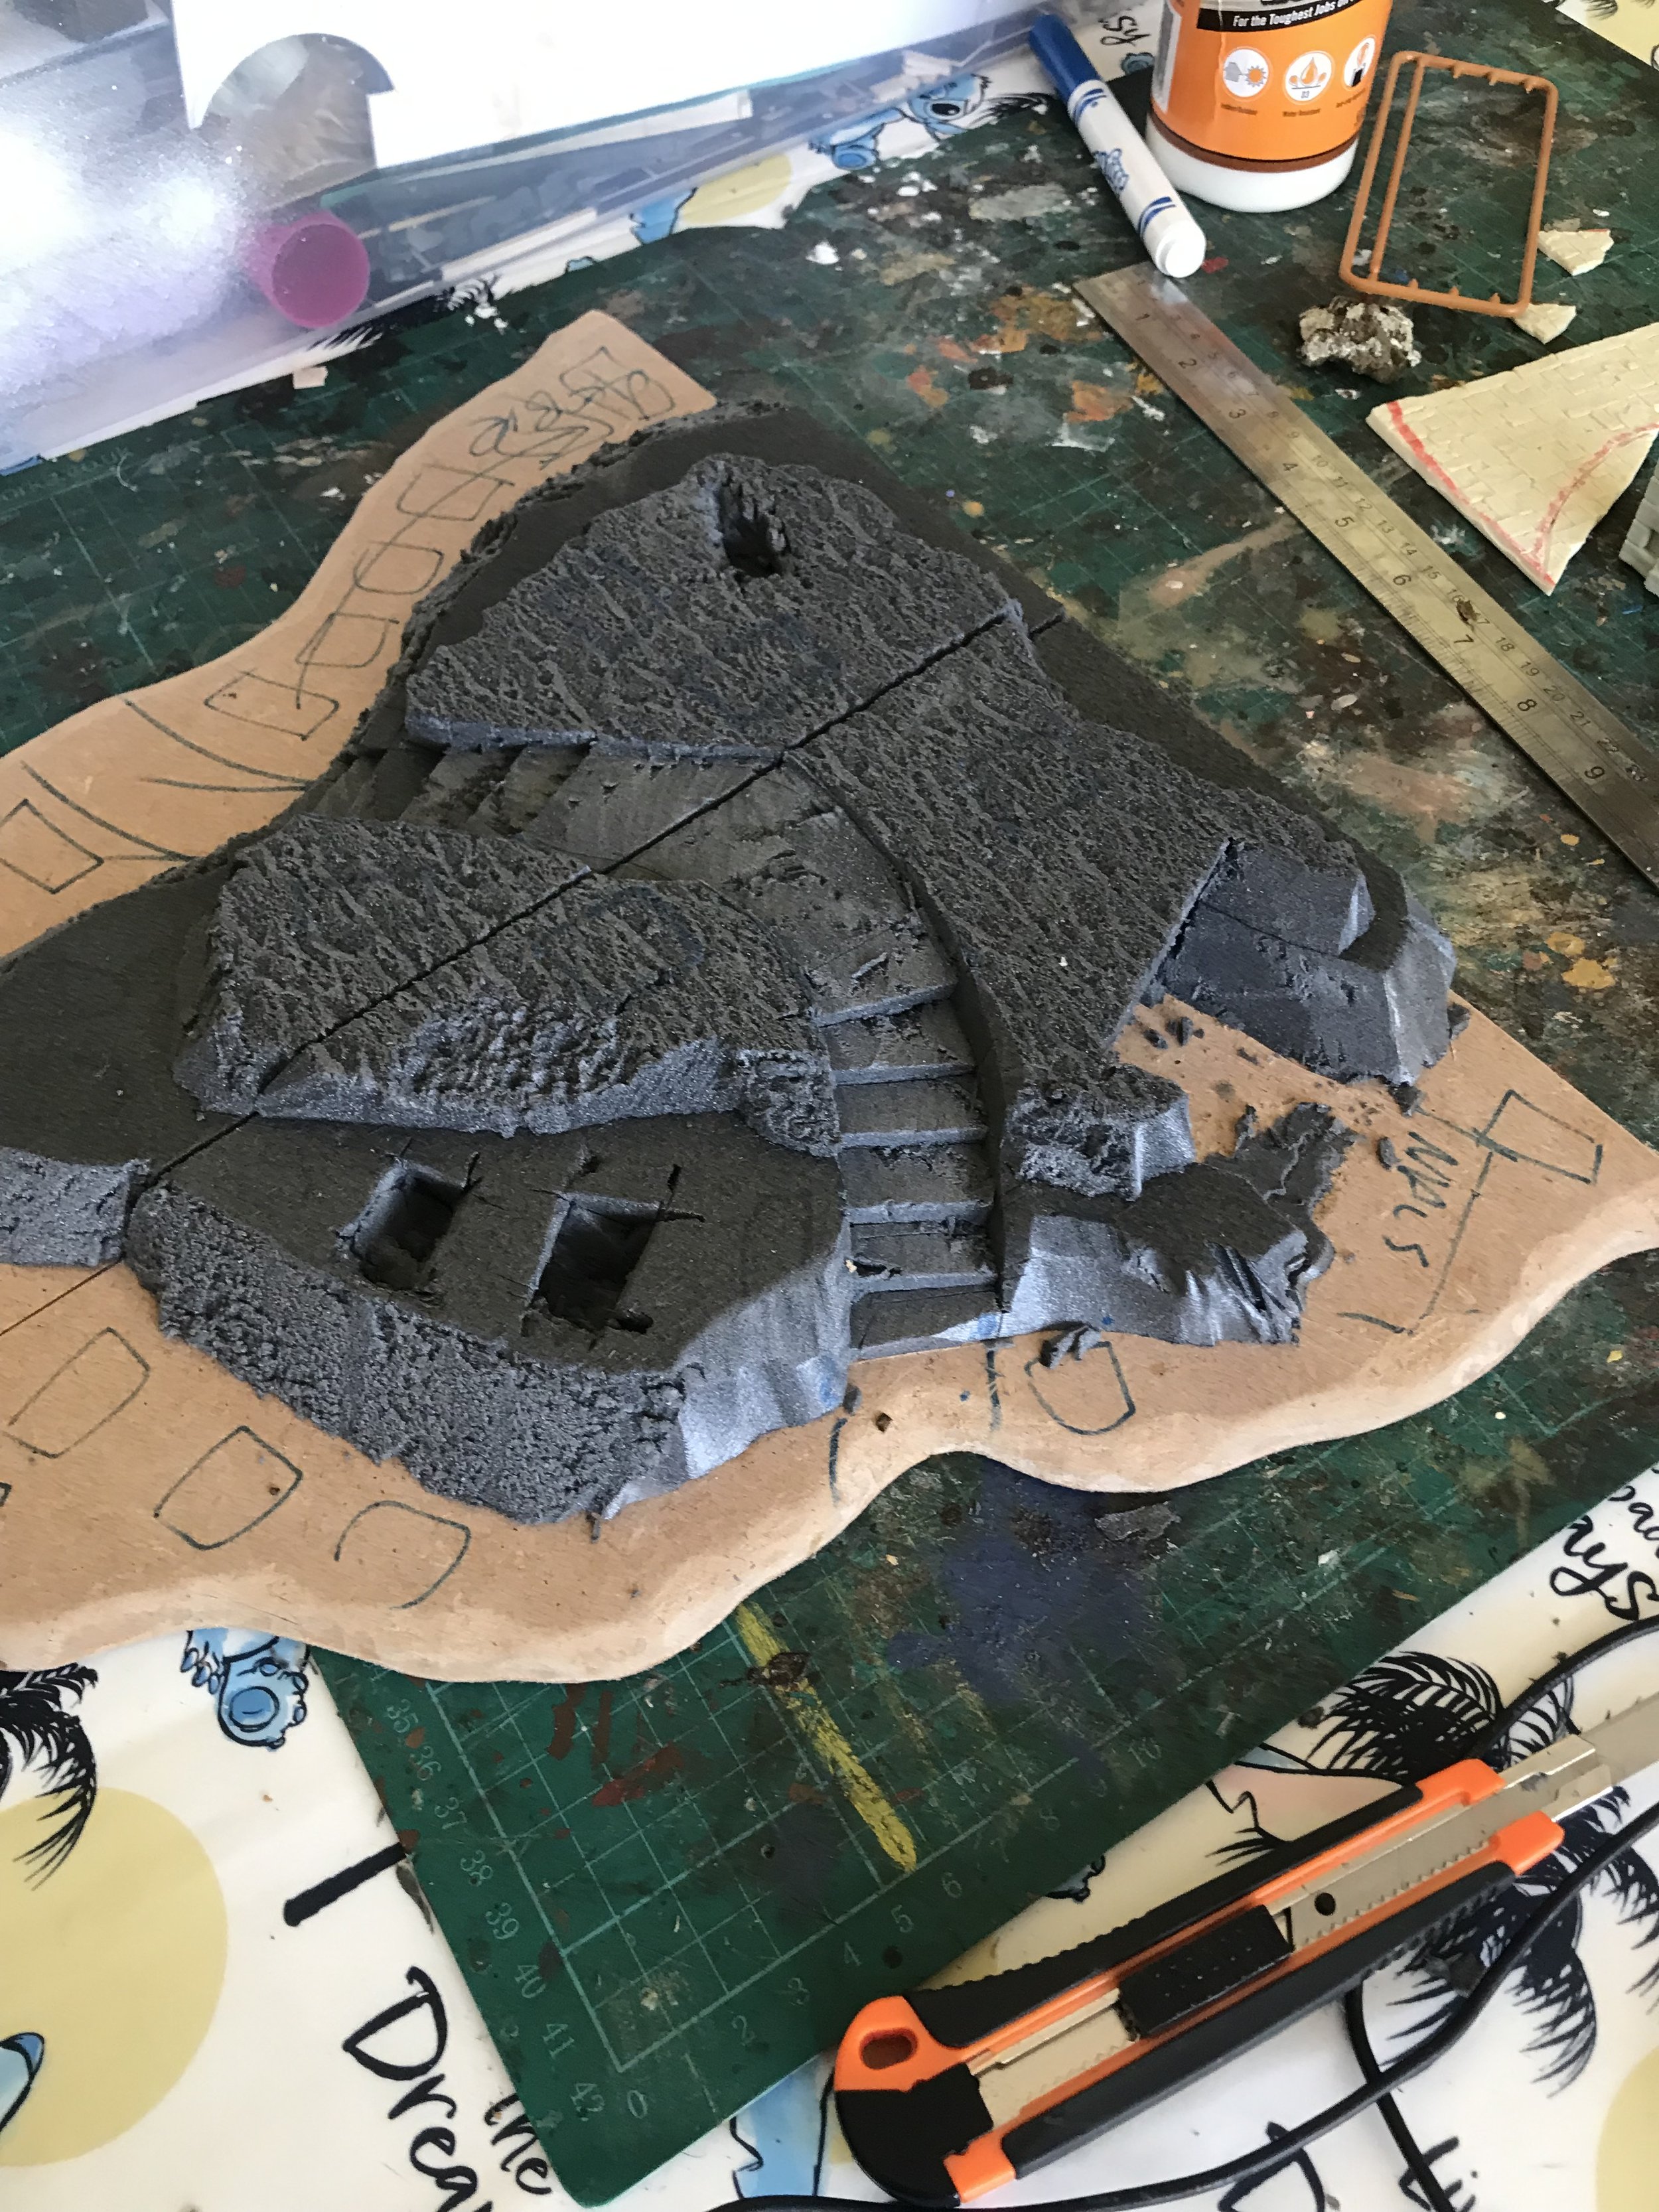
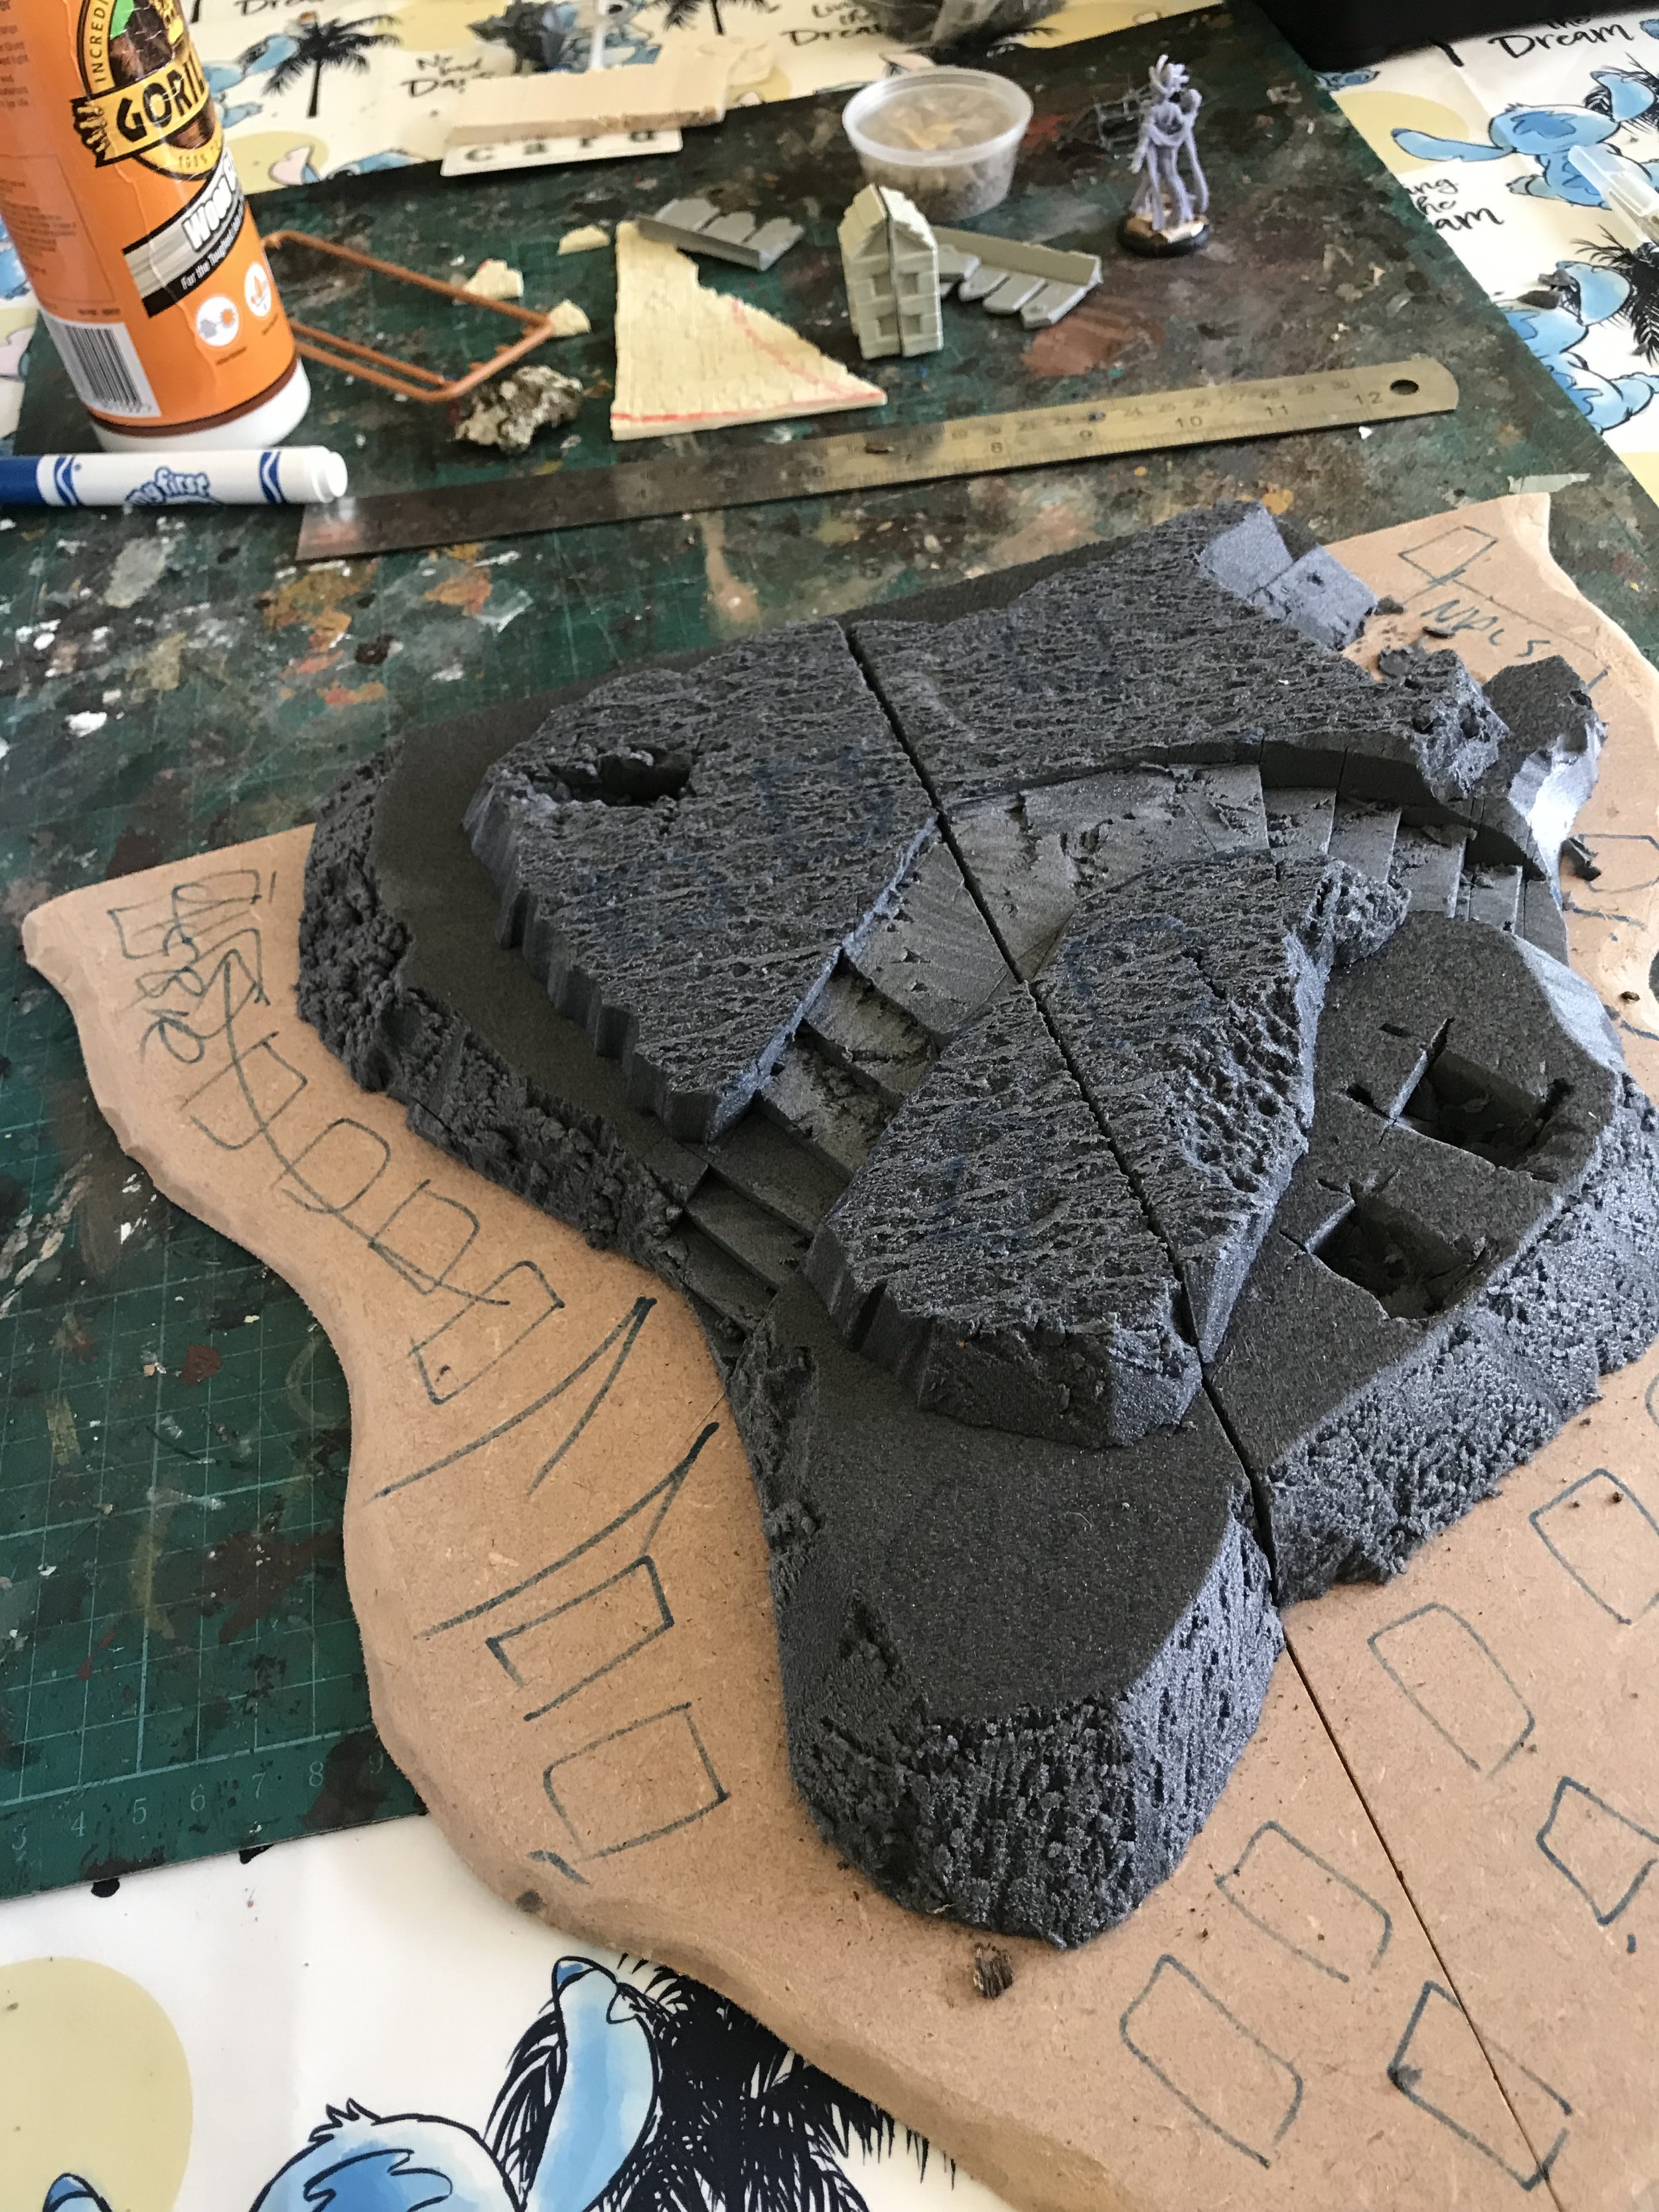
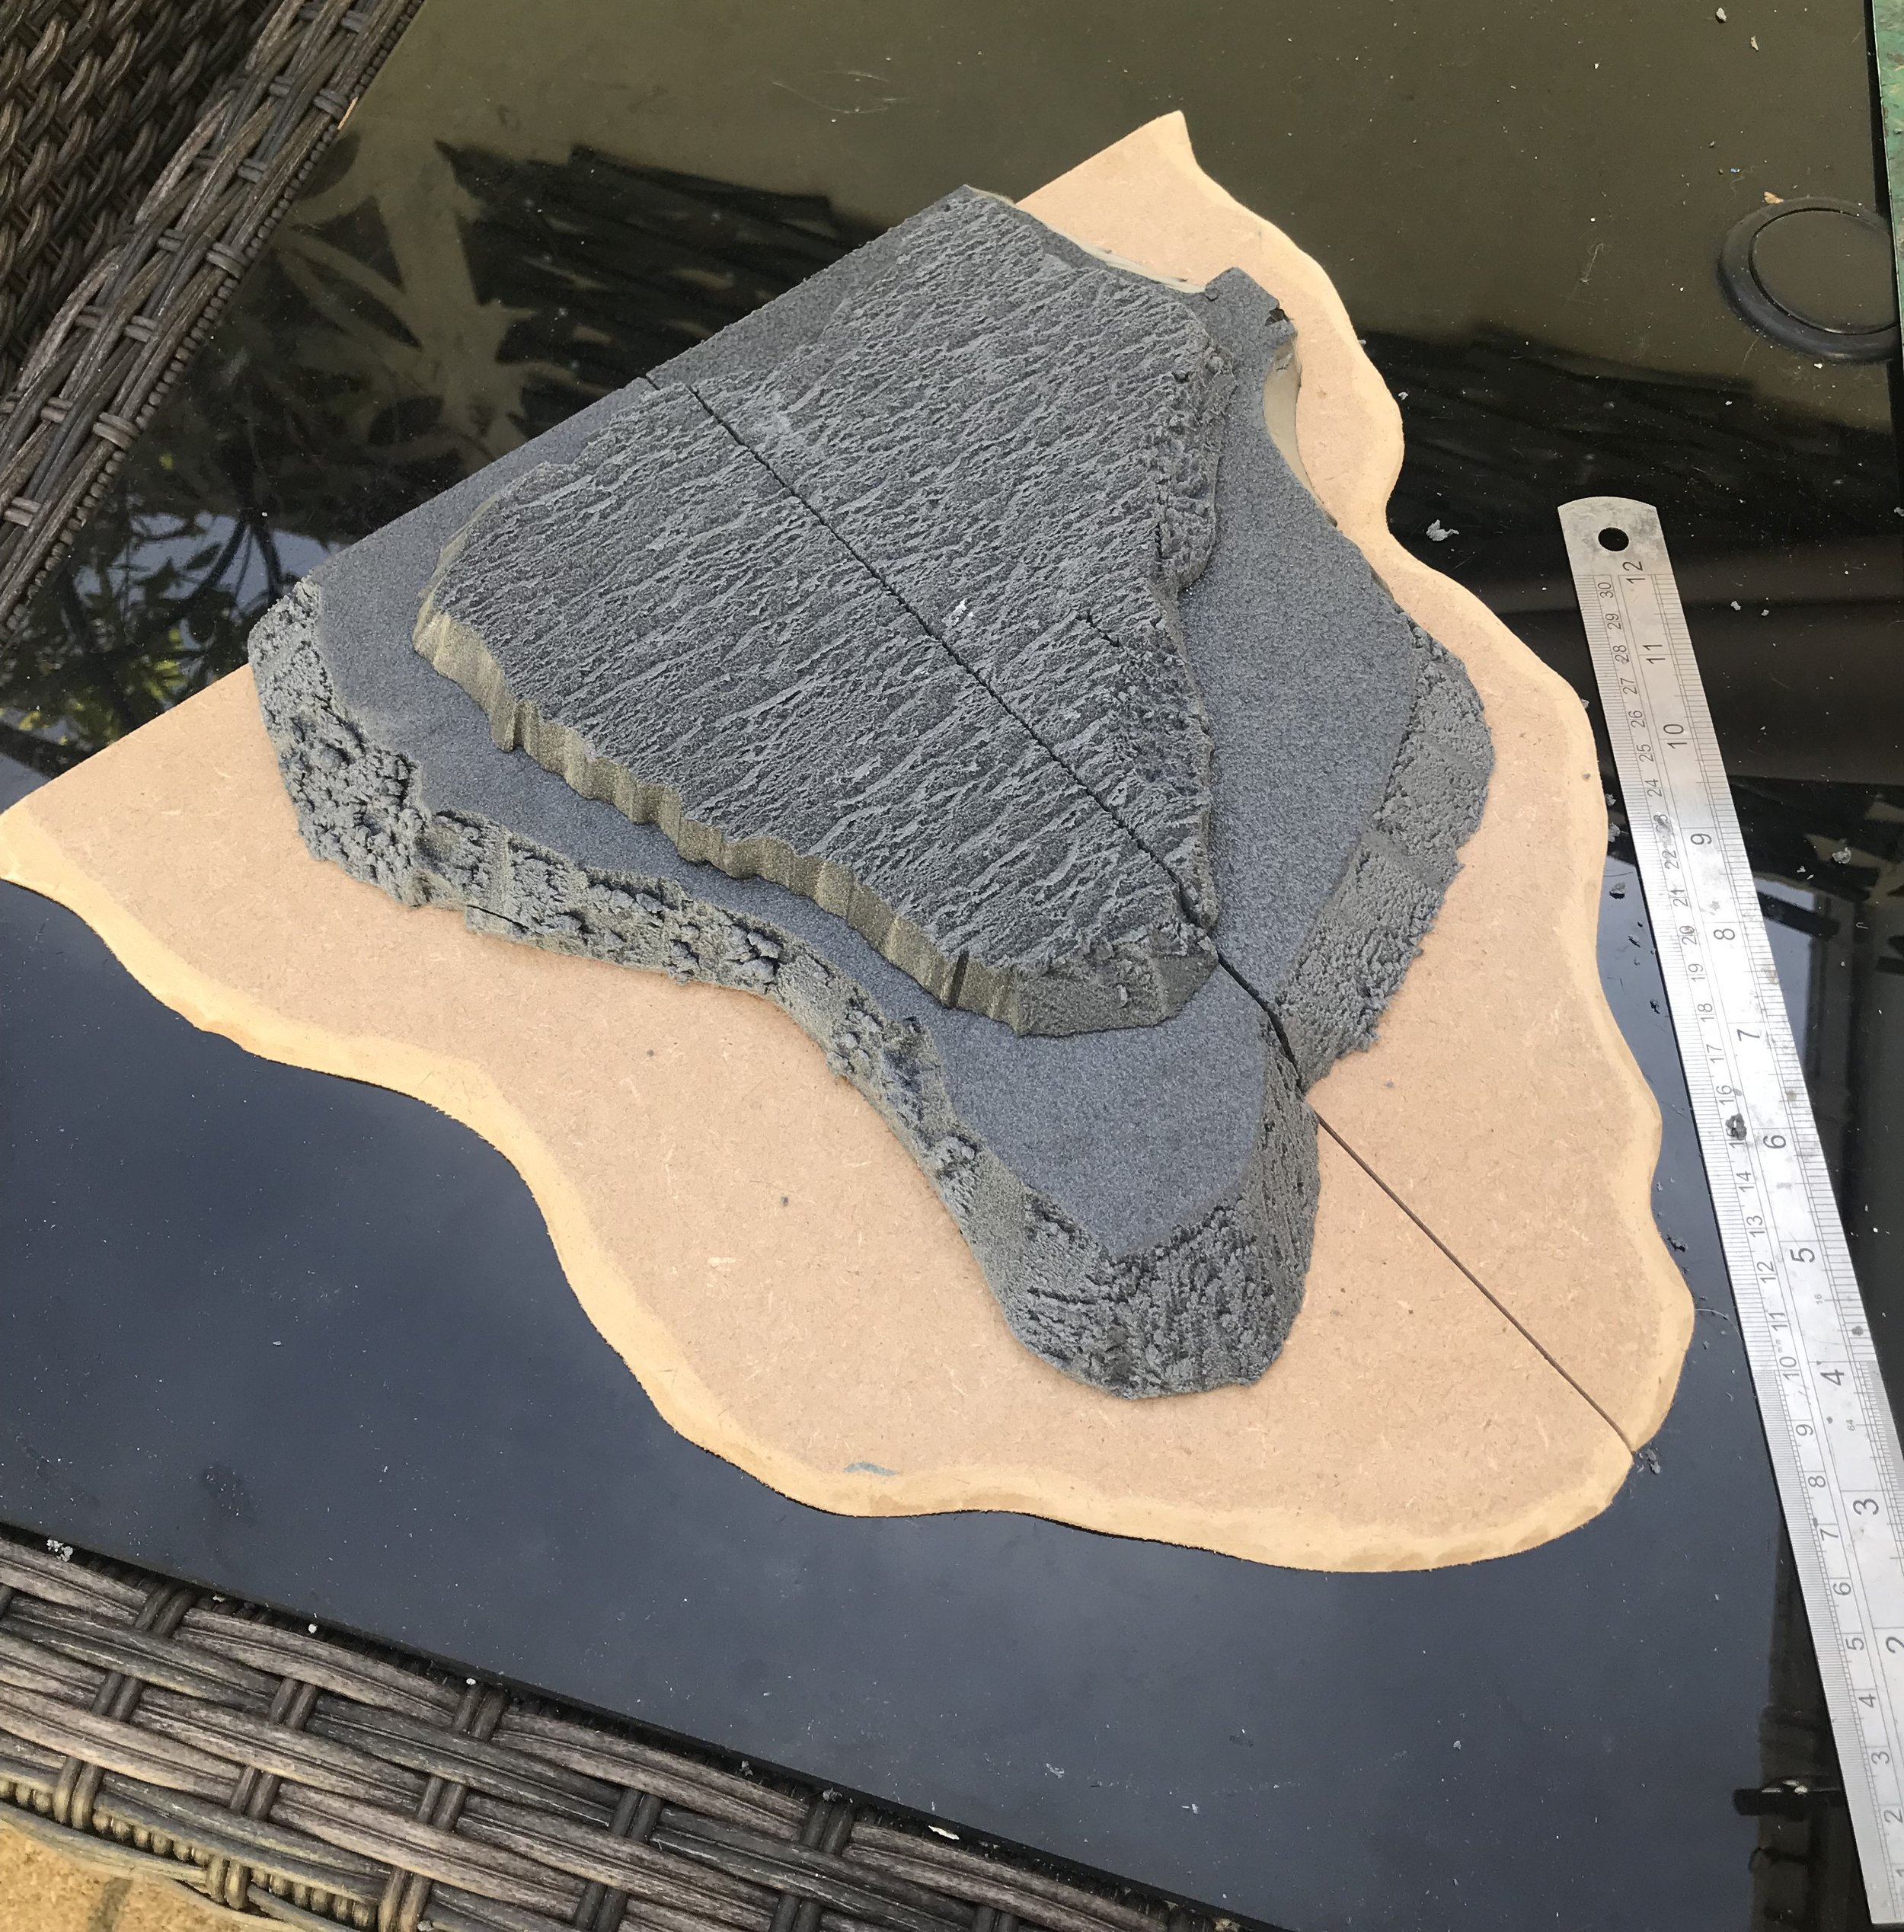
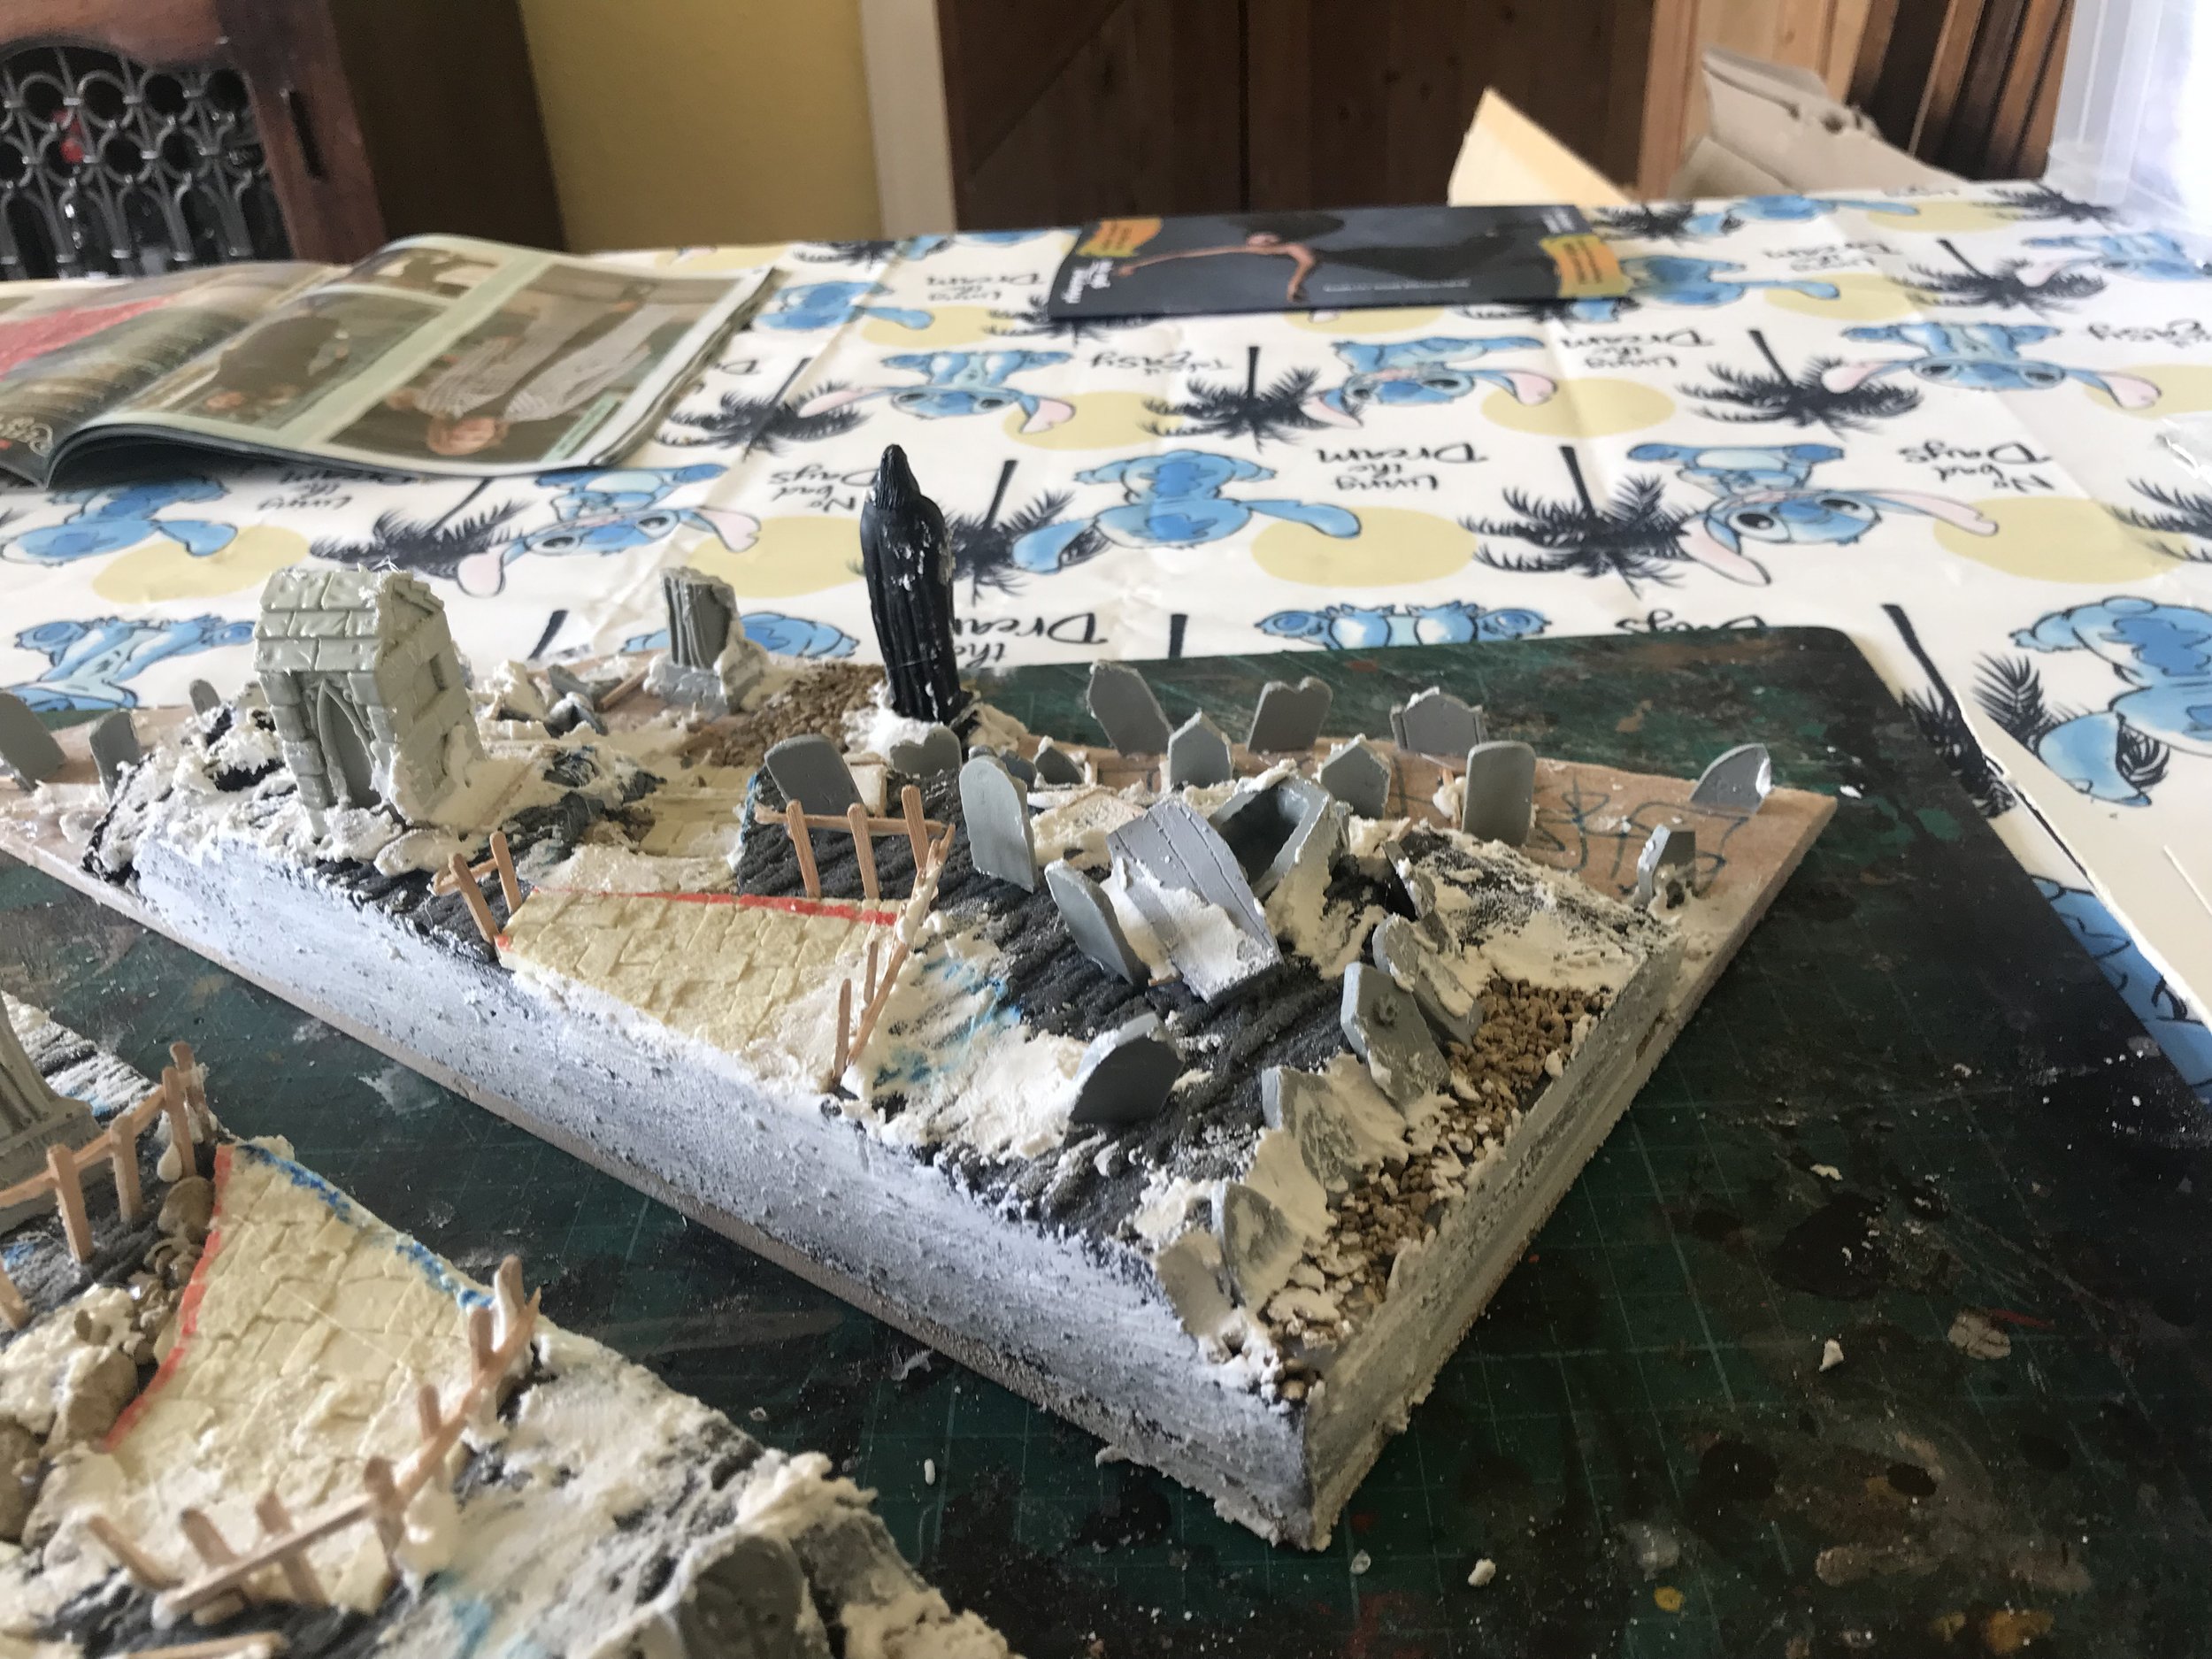
Carving Time
Dry and firmly stuck, it’s carving time! Carving foam is actually loads of fun and because this was a fairly rough looking piece I did not need to be exact. I knew I wanted the paths to meet up pretty centrally, space for the mausoleum and lots of levels with nice, flat spaces for models to pose on. I also took the opportunity to dig out a few graves while I was there - I would add the headstones after to match up with them, what’s the point of an undead graveyard without a few graves where the occupants have gone for a wander?
This was a super quick albeit messy job, and I used a knife rather than a hot wire cutter as rain had forced me indoors (Welsh summer is short) and I didn’t fancy getting fumigated by the gases. Once I was happy, I sanded down any bits that needed smoothing, and bashed any visible rocks faces with my modelling rock(TM) to create texture and hide the lines.
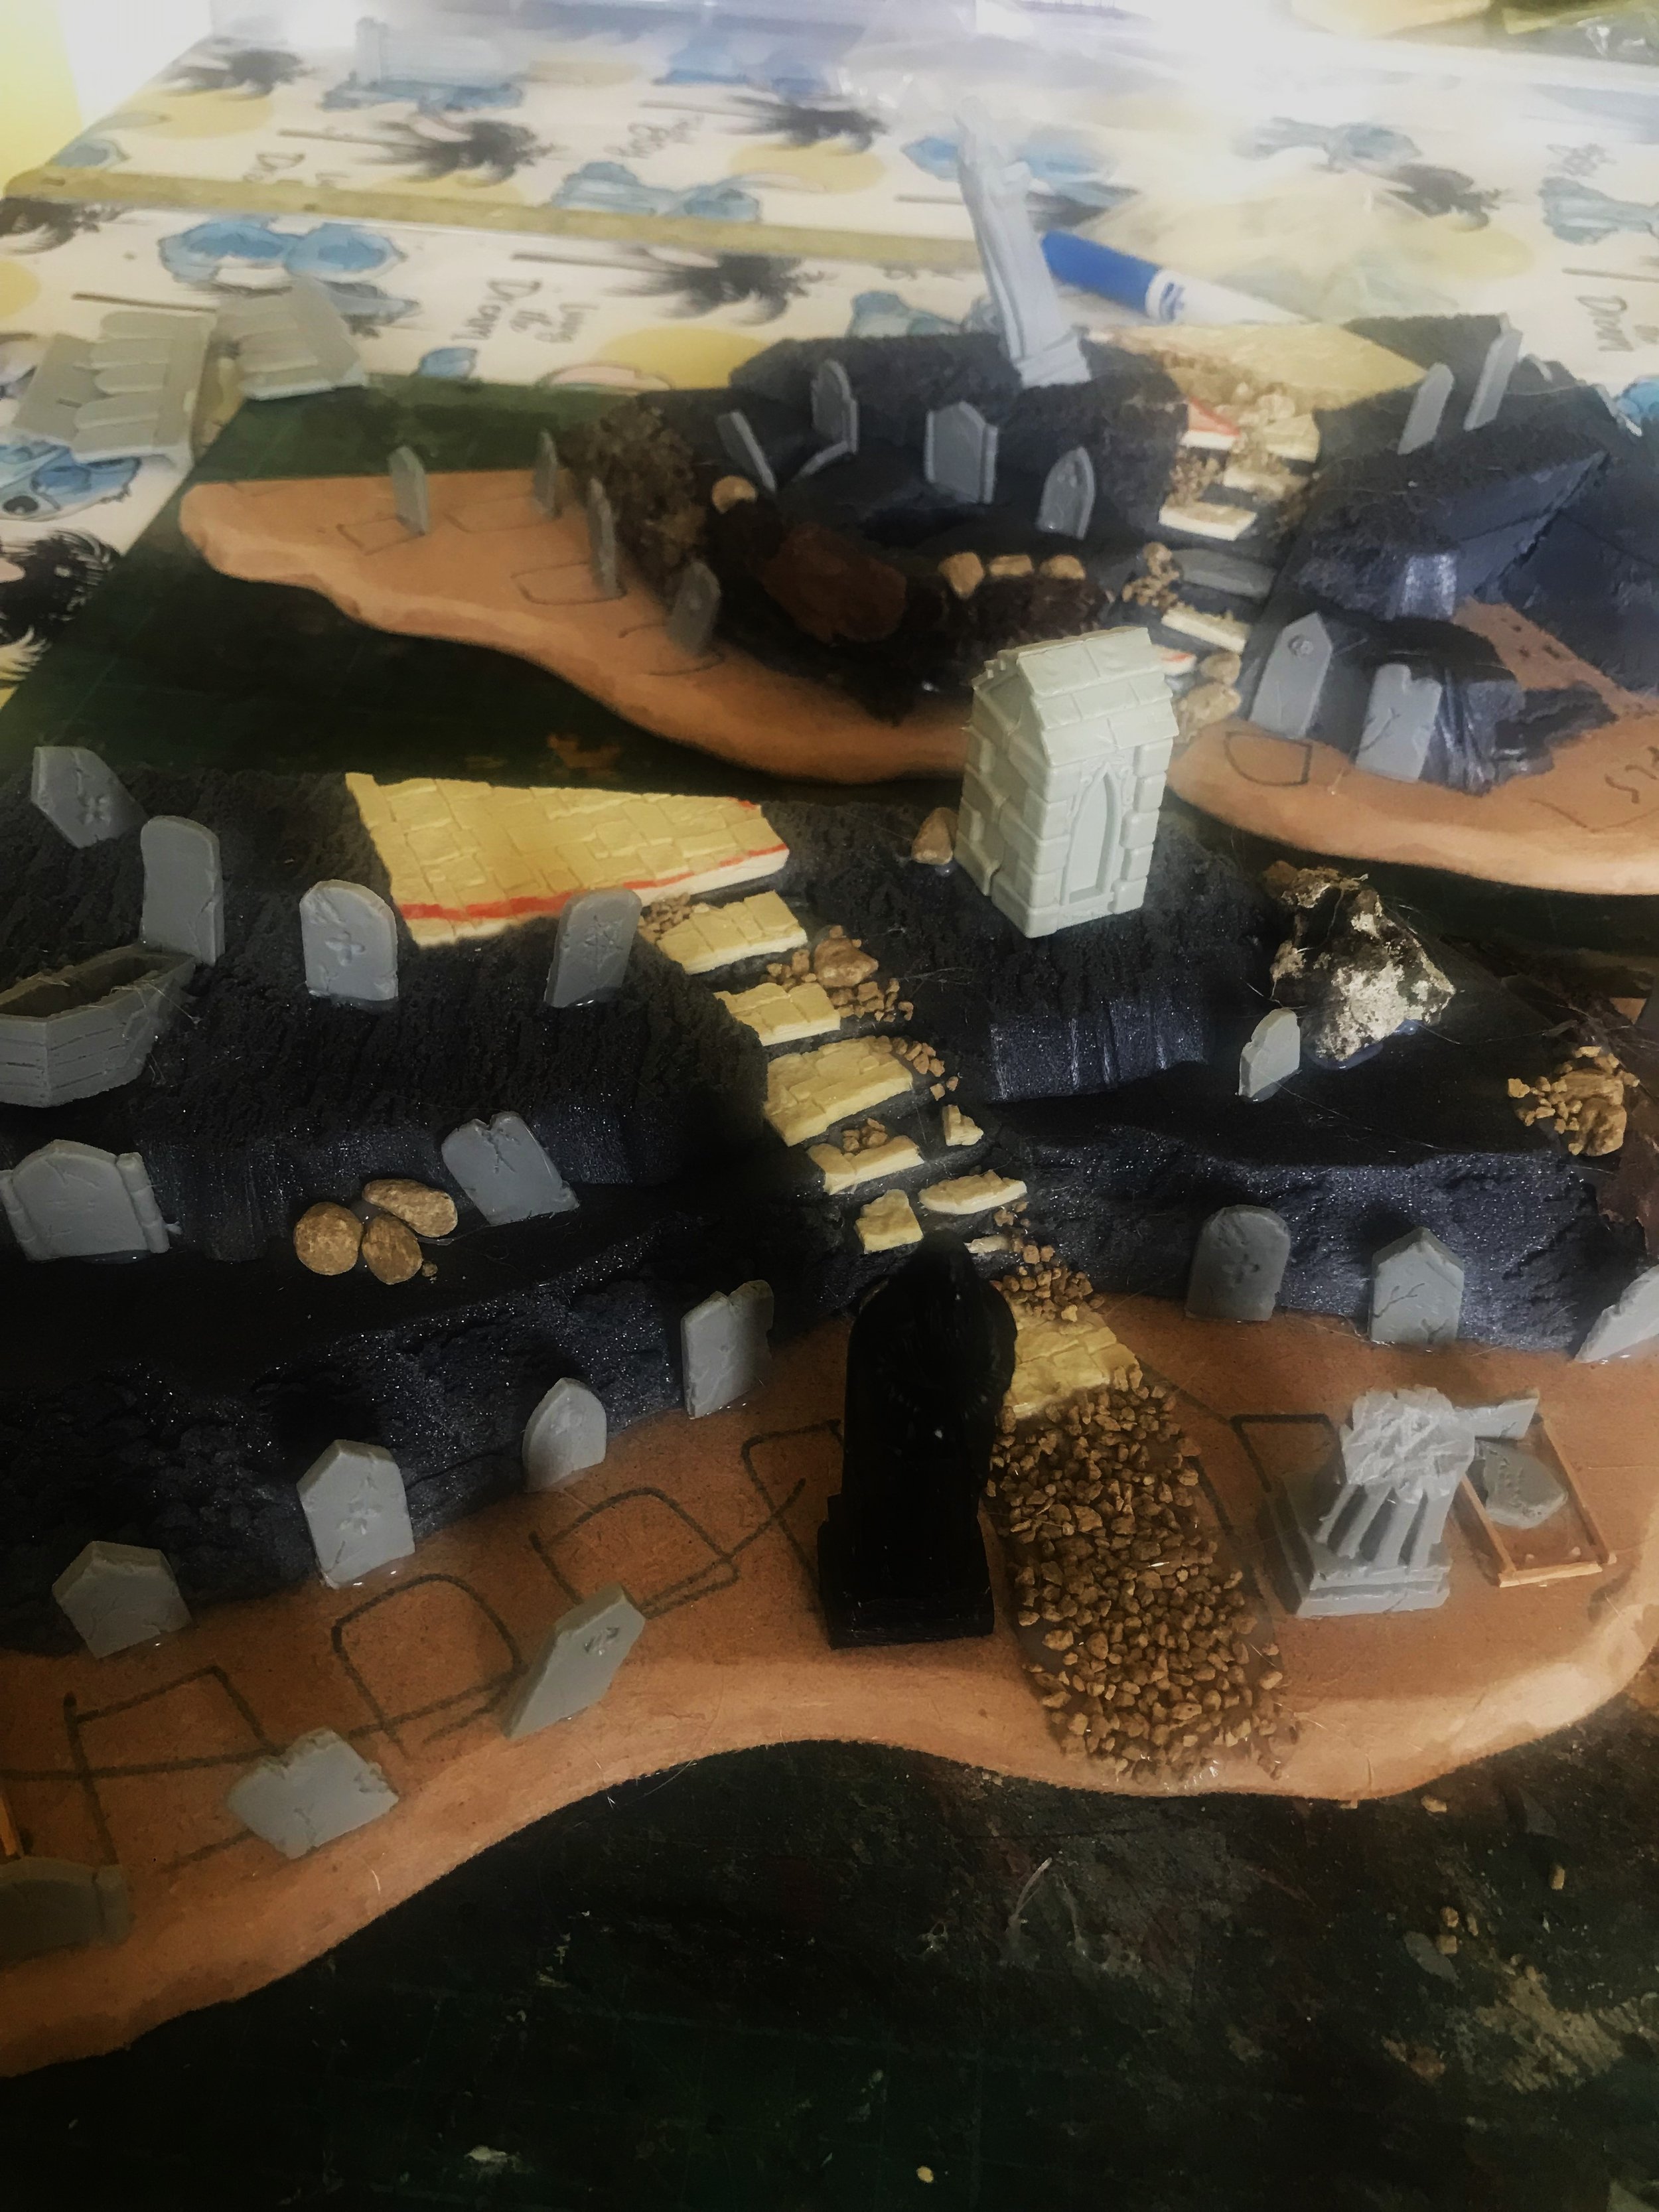
Paving Slabs and Paving (Grave)Stones
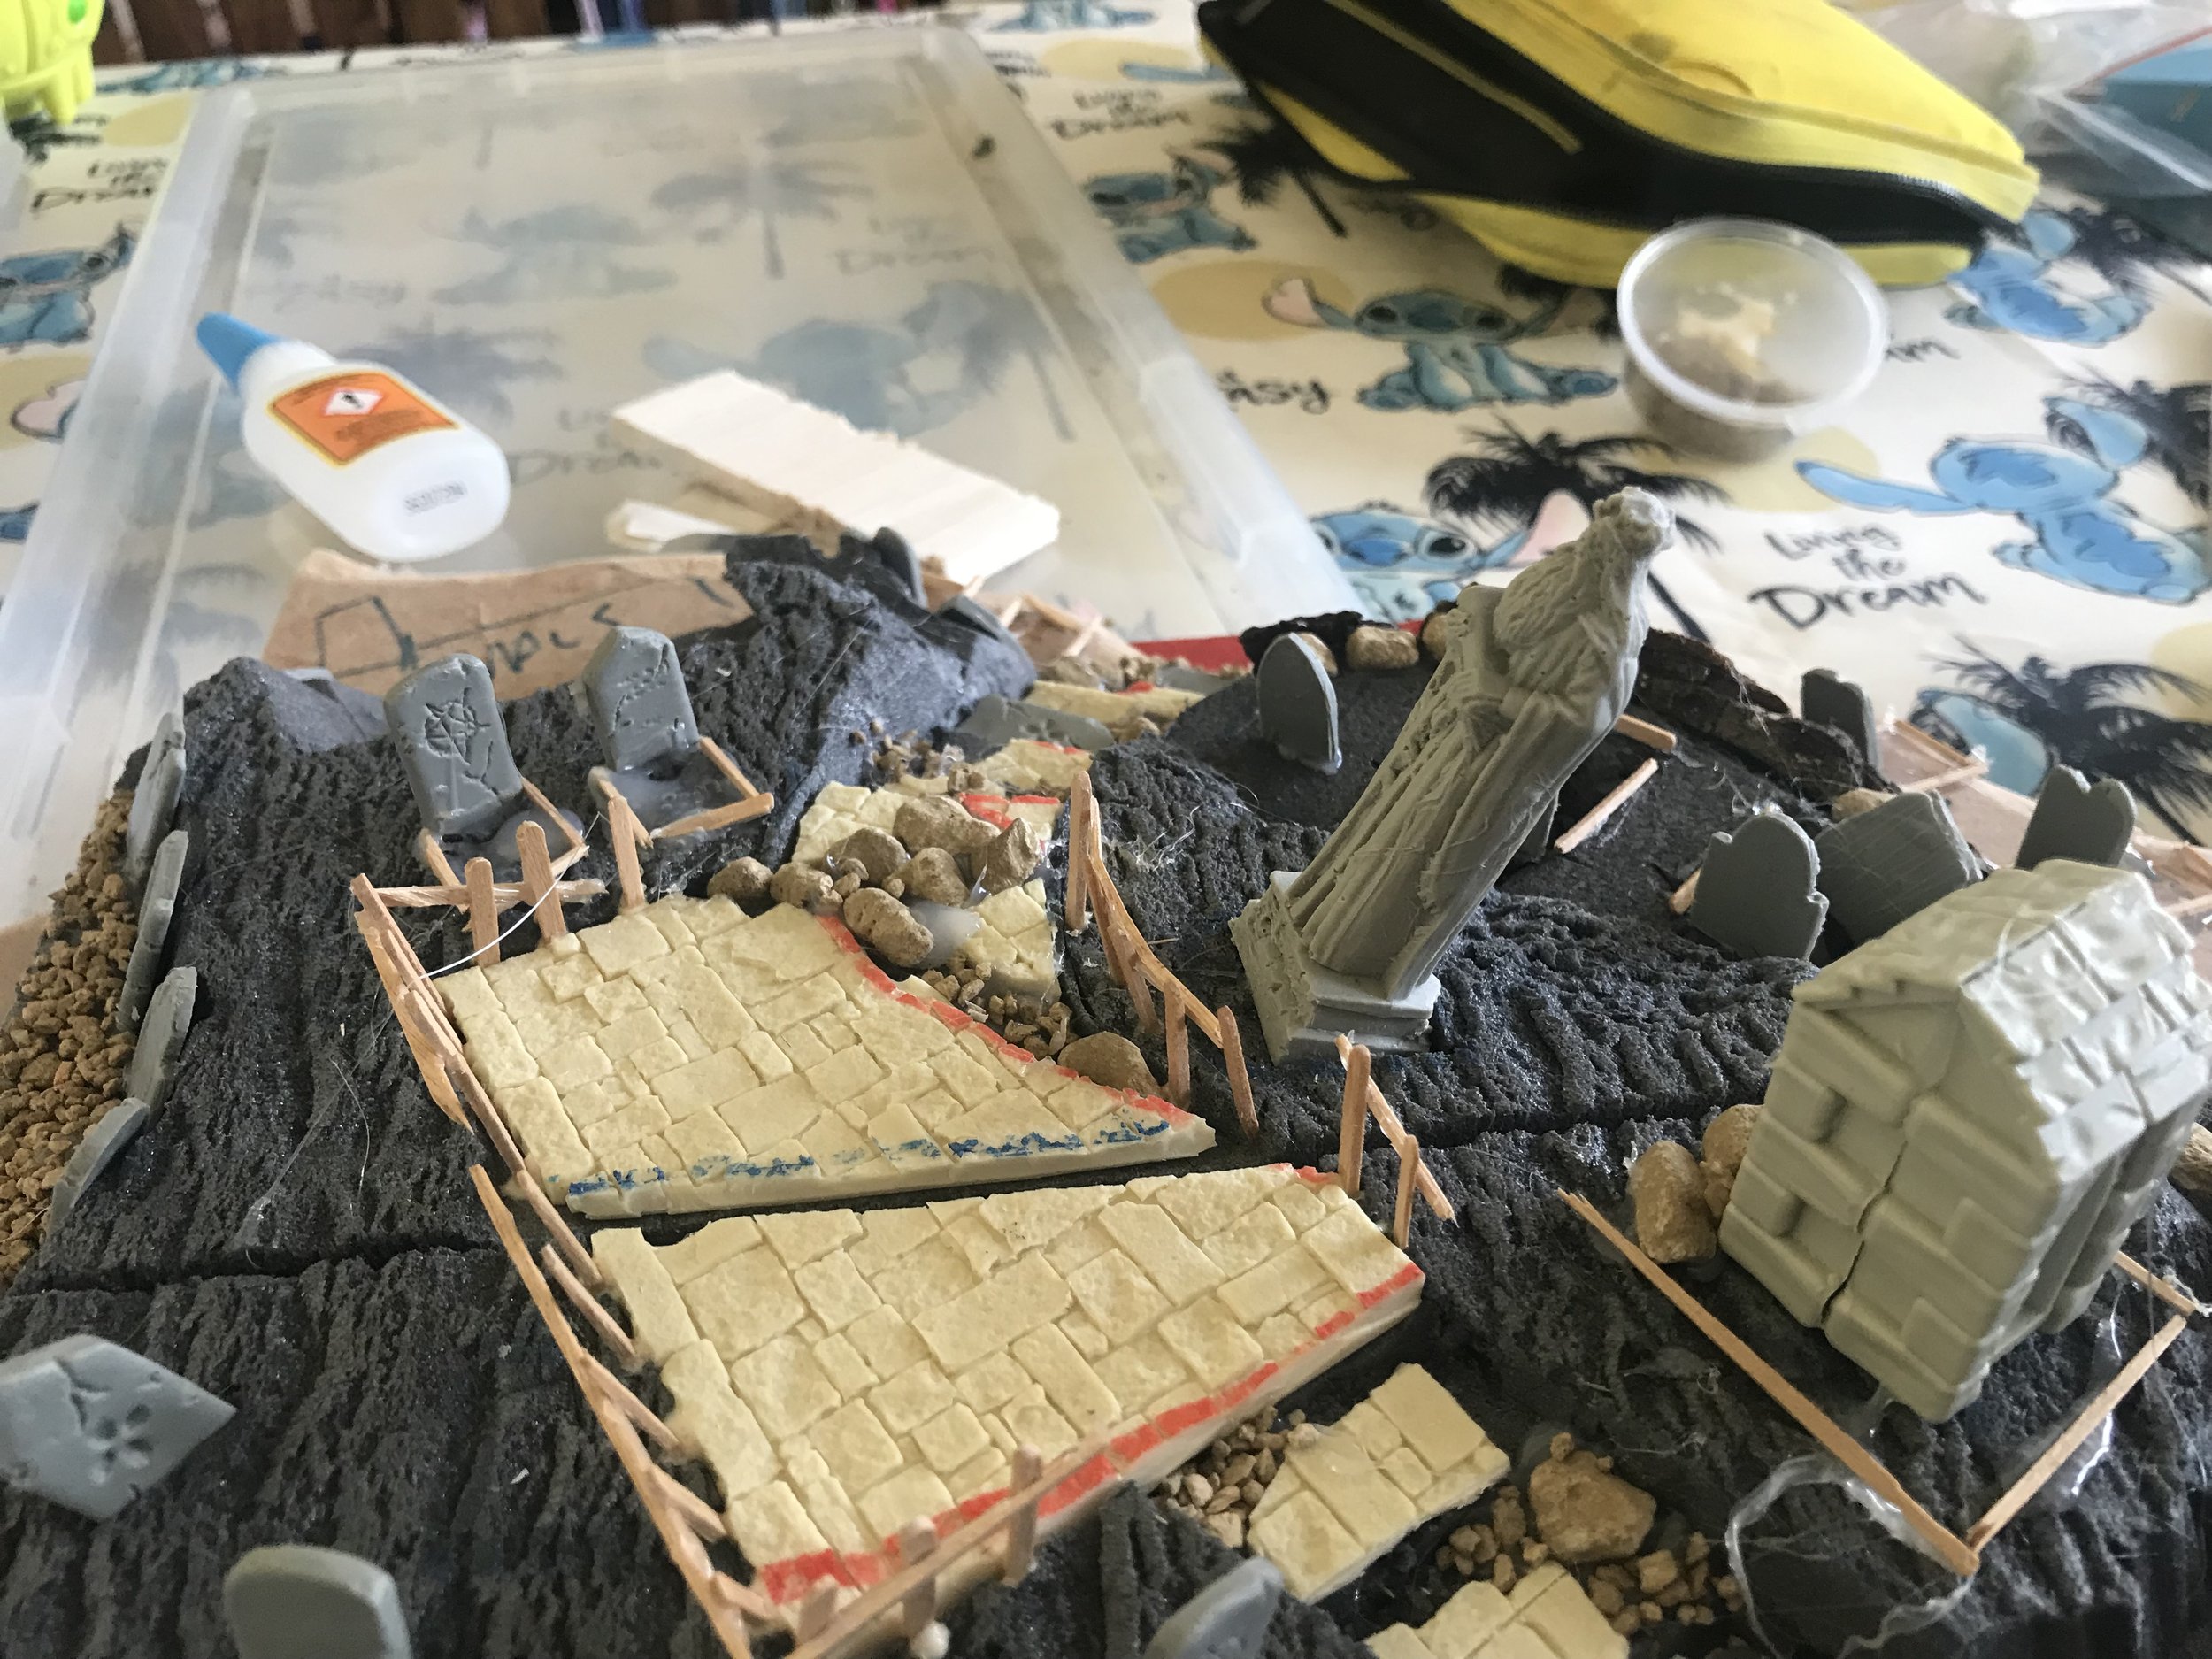
While I was gathering together all the various graves and statues I’d collected over the years, as well as the ones Model Display Products gifted me, I found some offcuts of the resin cobbles from Tabletop world I used in the winter demo table. This gave me the opportunity to pave the top area and add some more structured steps, although I still replaced a few steps with flat gravestones as I’d seen that in a local graveyard and really wanted to fit that detail in. I really paid attention to my reference photos when placing the graves, snipping them at odd angles and going from neat, defined areas to huddled piles in odd corners. This was all hot glue gun work, as the cooling gives plenty of time for positioning and I could also use the glue to create textures where needed.
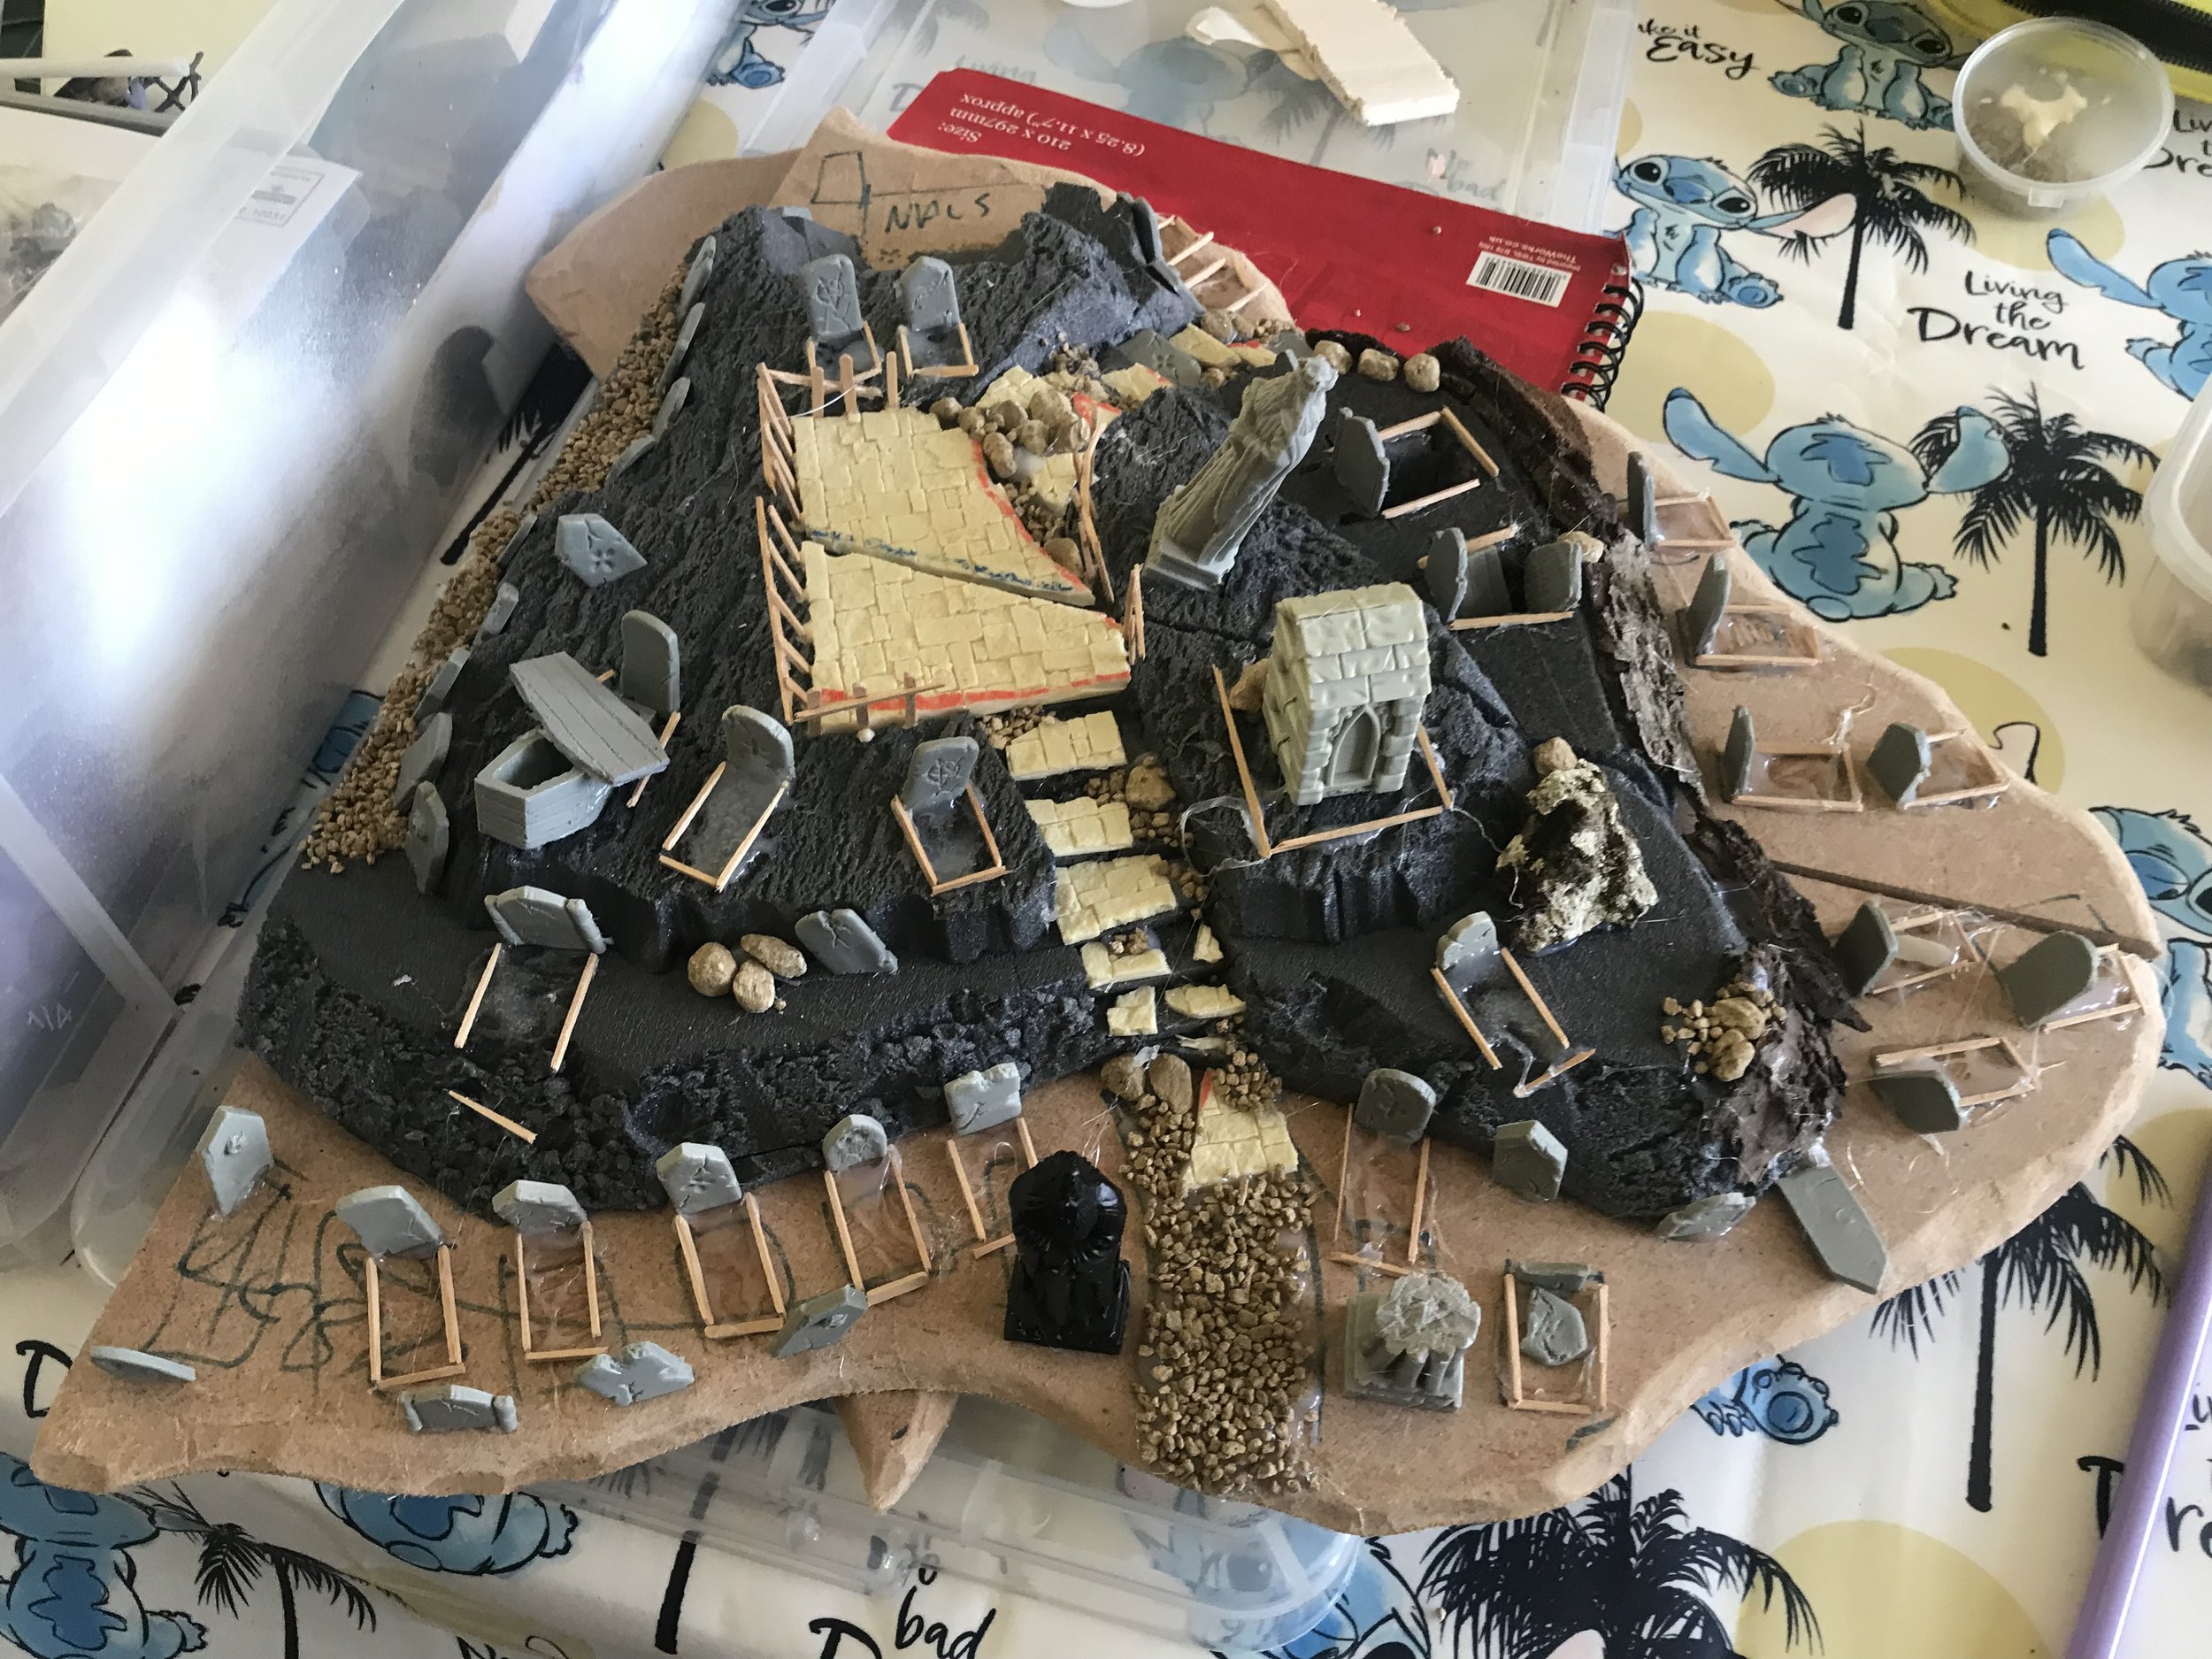
Paths, Fences and Toothpicks
I bulked out the paths with model train ballast and pea gravel, made a few clumps of each around the places where they had been disturbed, and then built up a cliff face on the narrow ends using tree bark left over from Moonreach. I broke out the fine flat toothpicks to make a fence, and used them sliced in half to mark the borders of each grave - by and large I’d be painting or texturing over them, but even hidden the shapes would still suggest themselves in the final piece. As an aside, I really recommend looking at catering wholesalers like Infusions4chefs for toothpicks, coffee stirrers and wooden skewers - they are silly cheap and you can get amazingly useful designs like the turned bamboo skewers I use on the Mausoleum later.

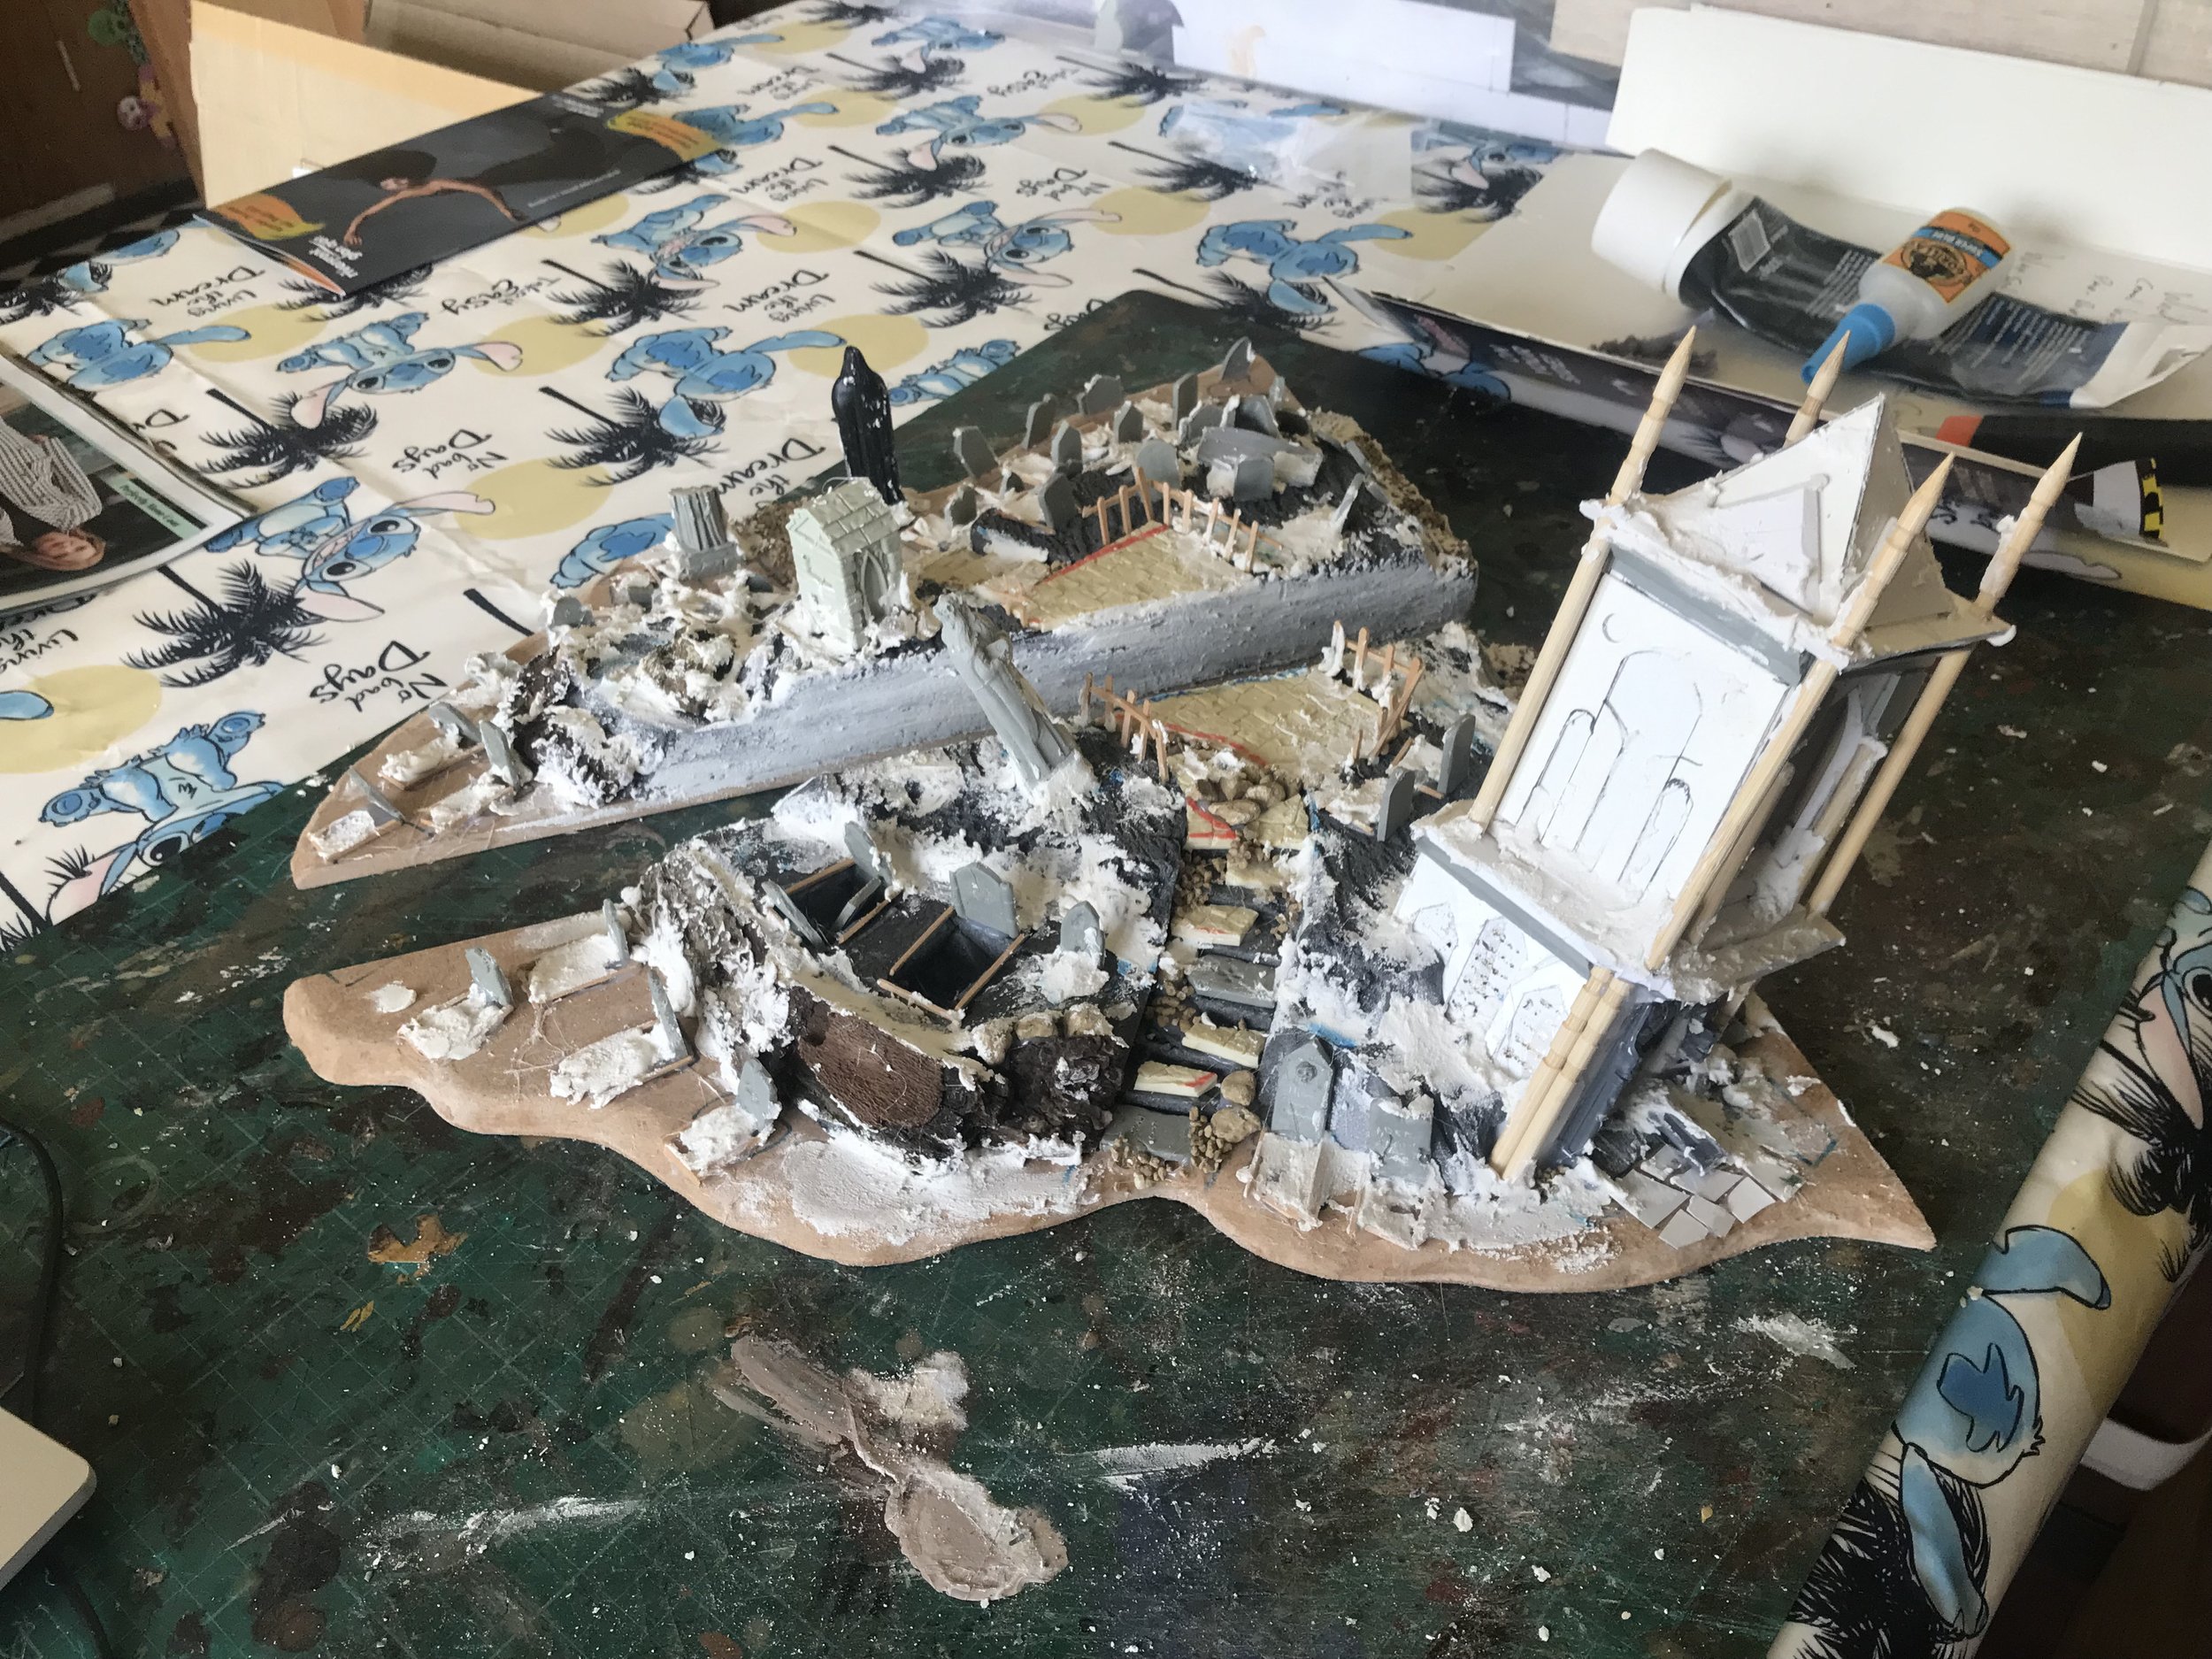
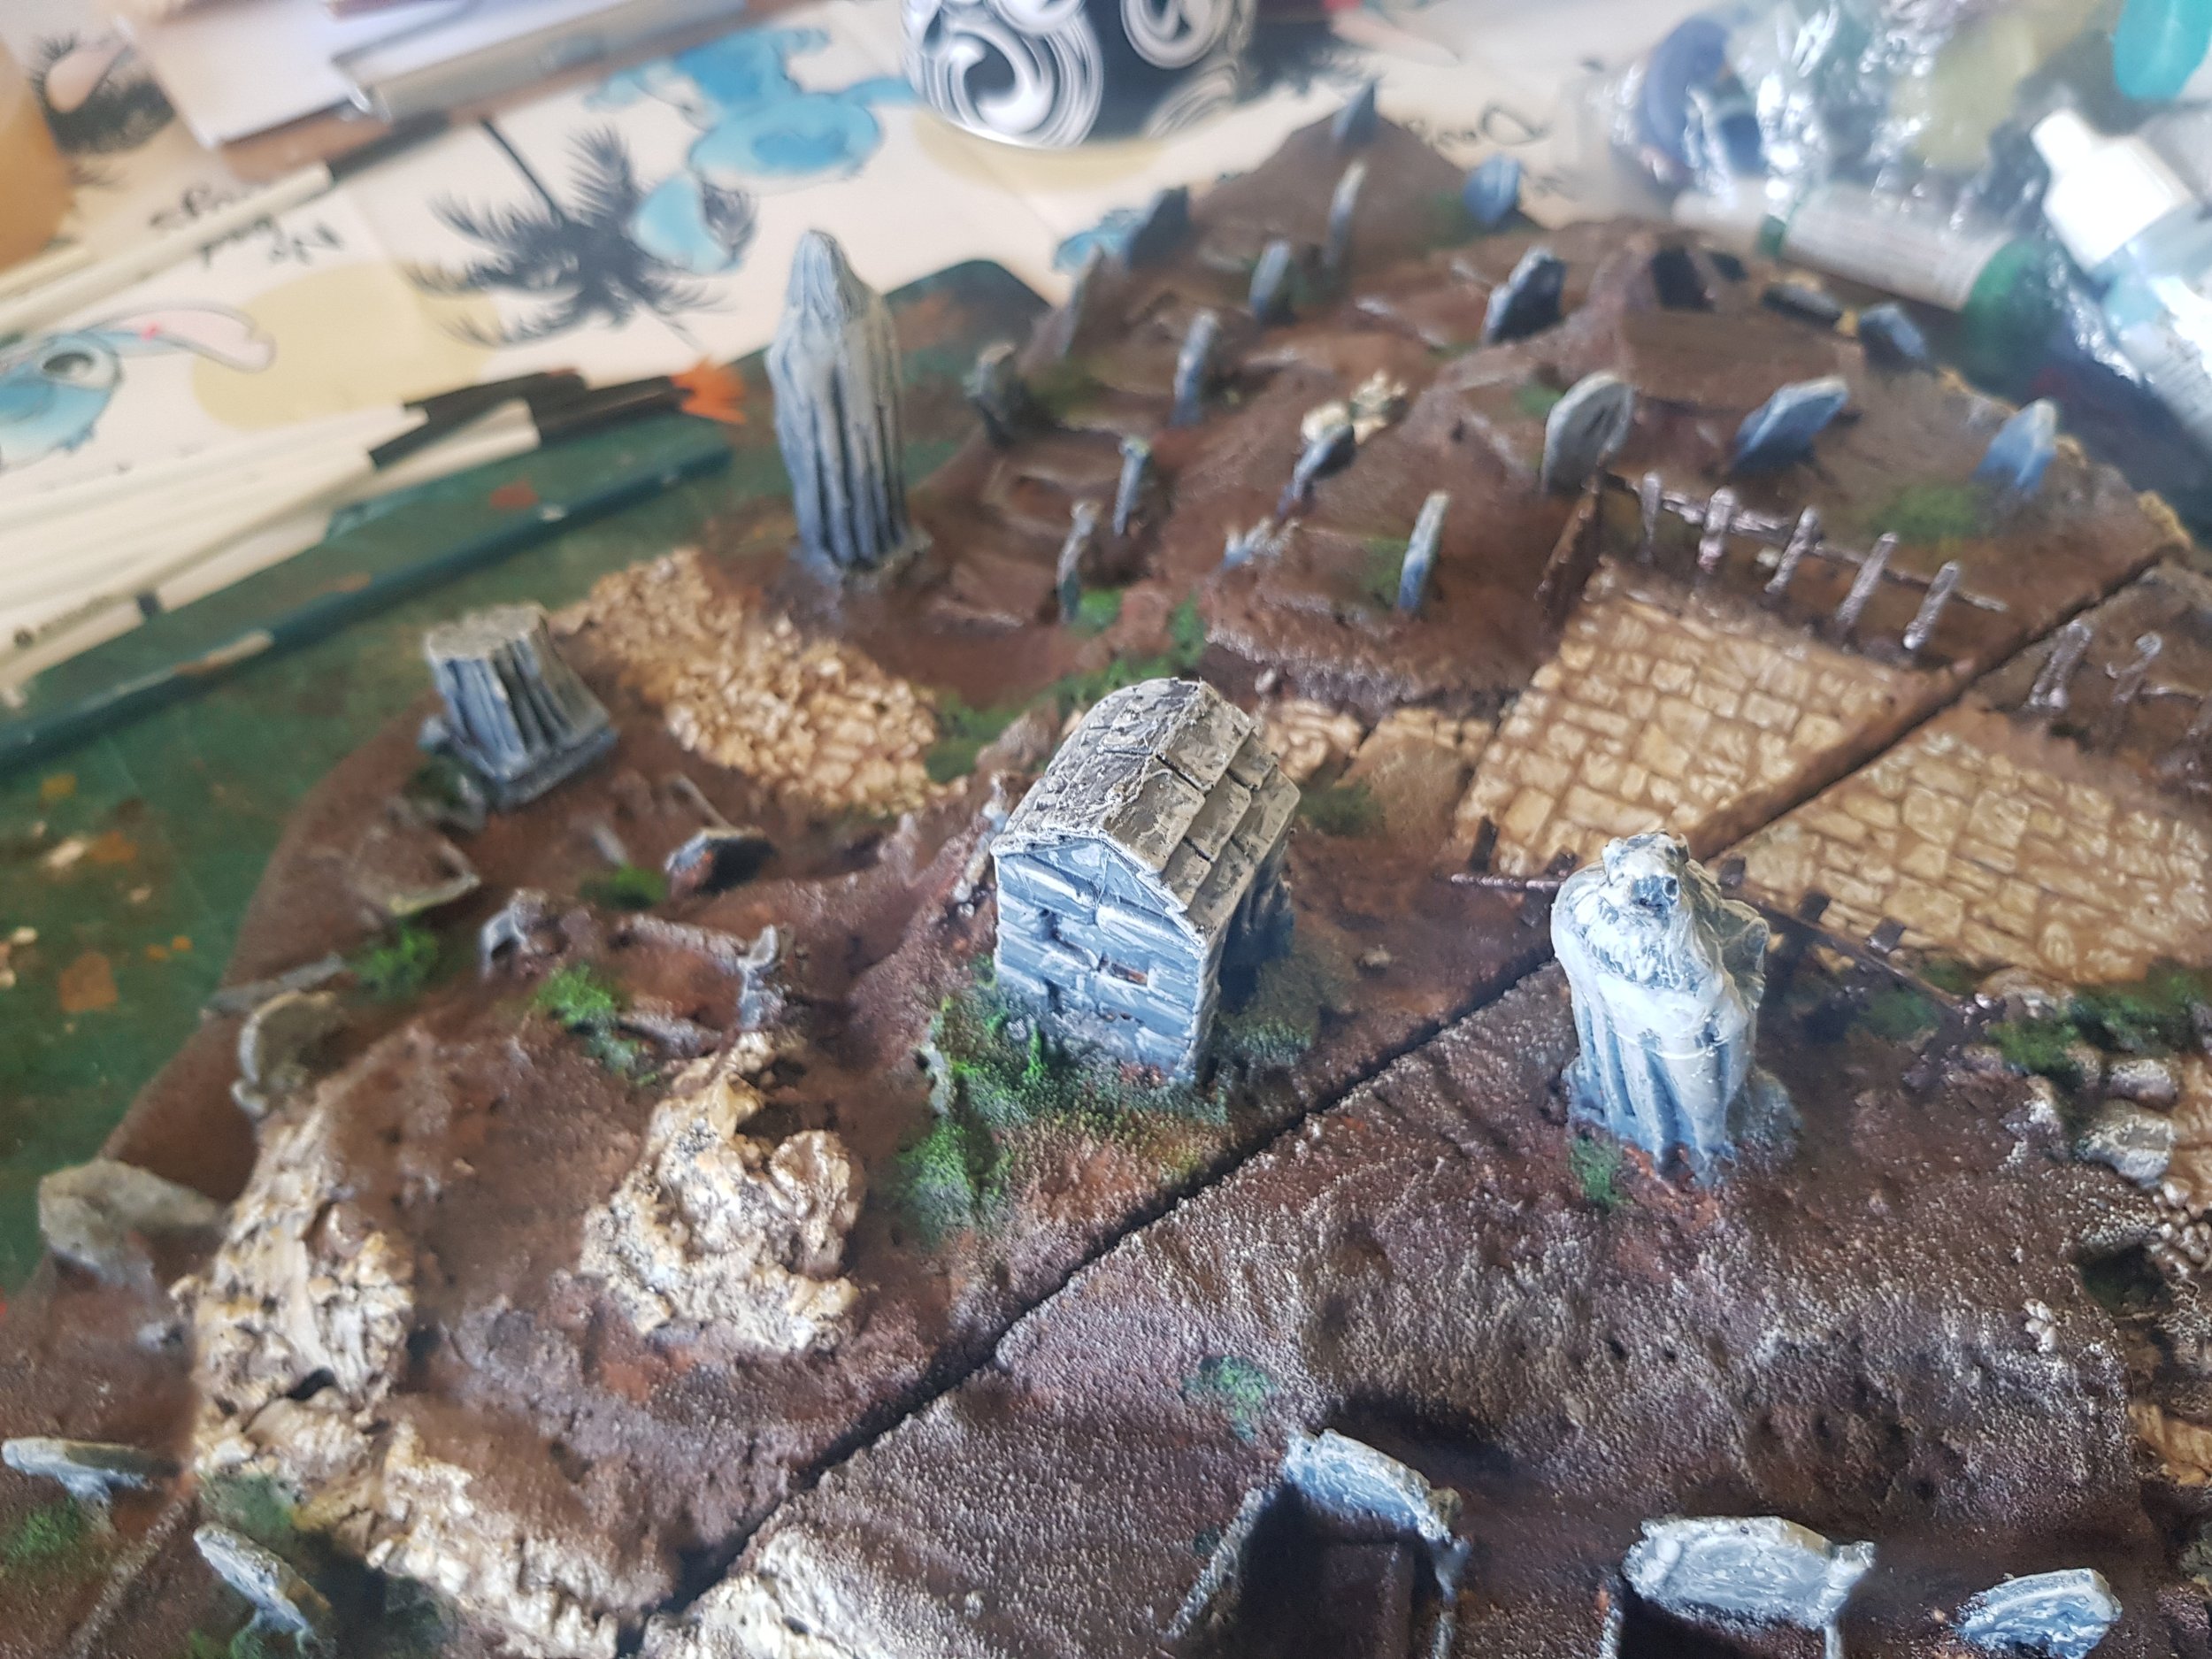
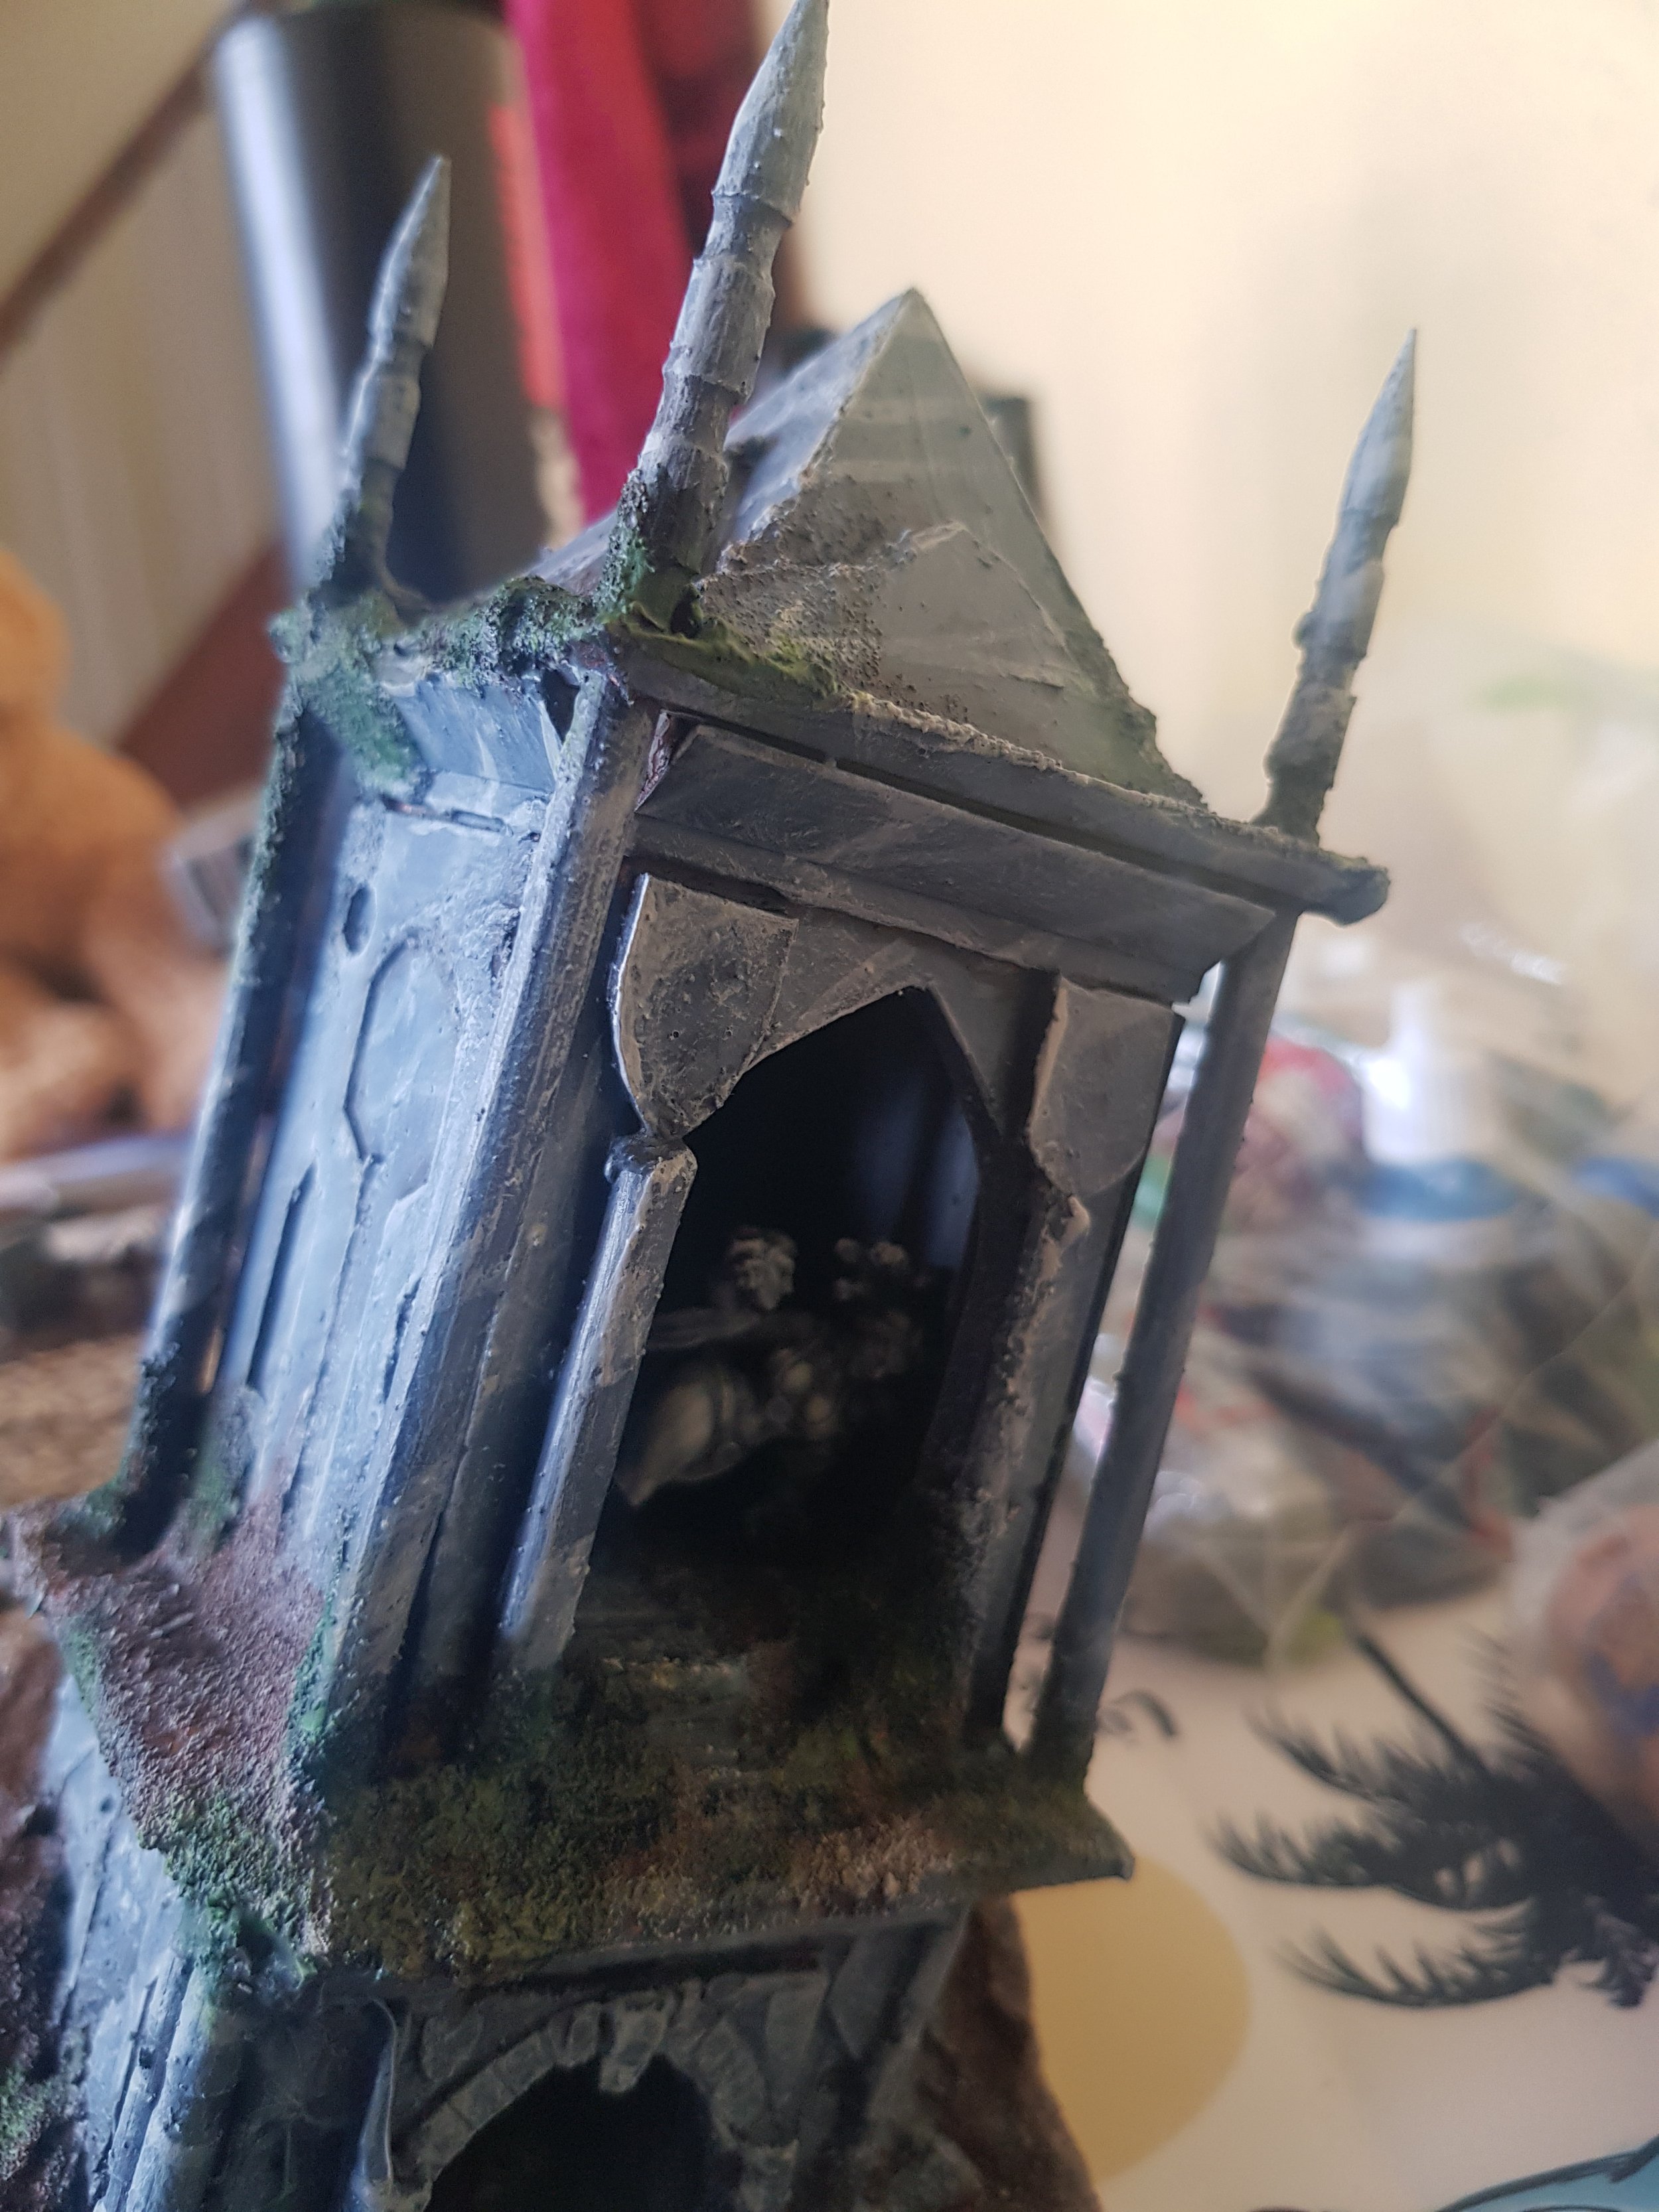
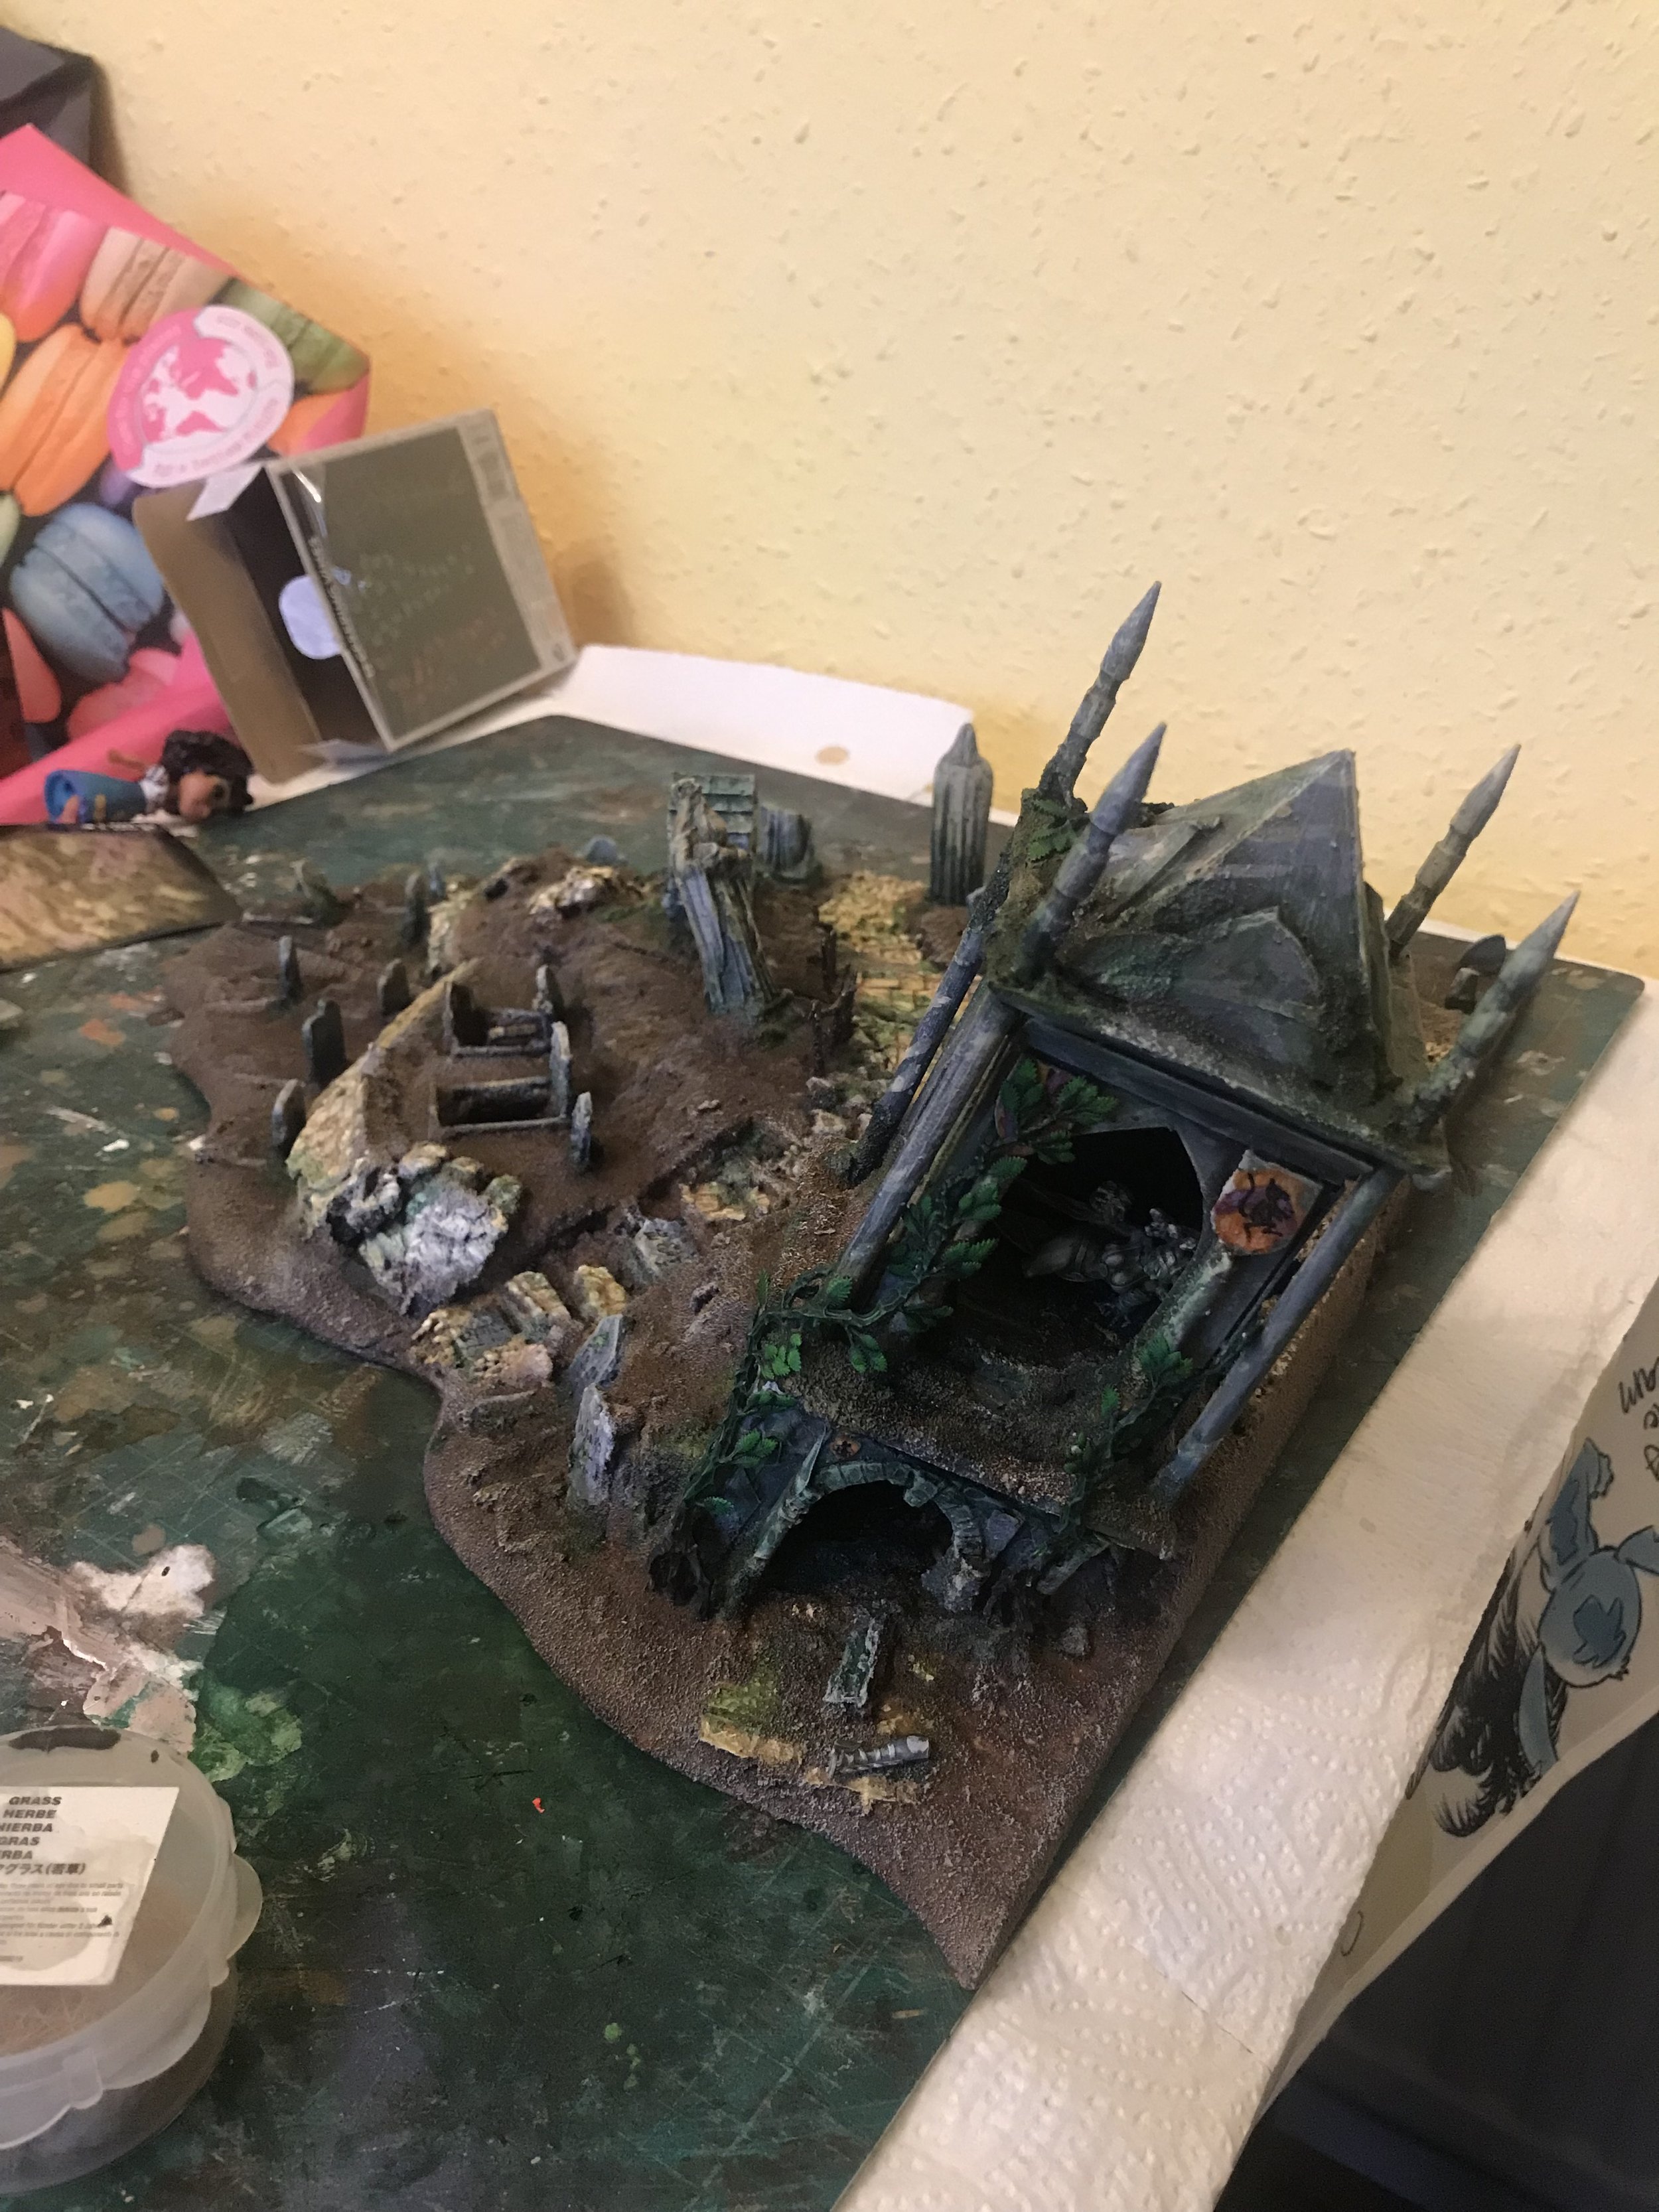
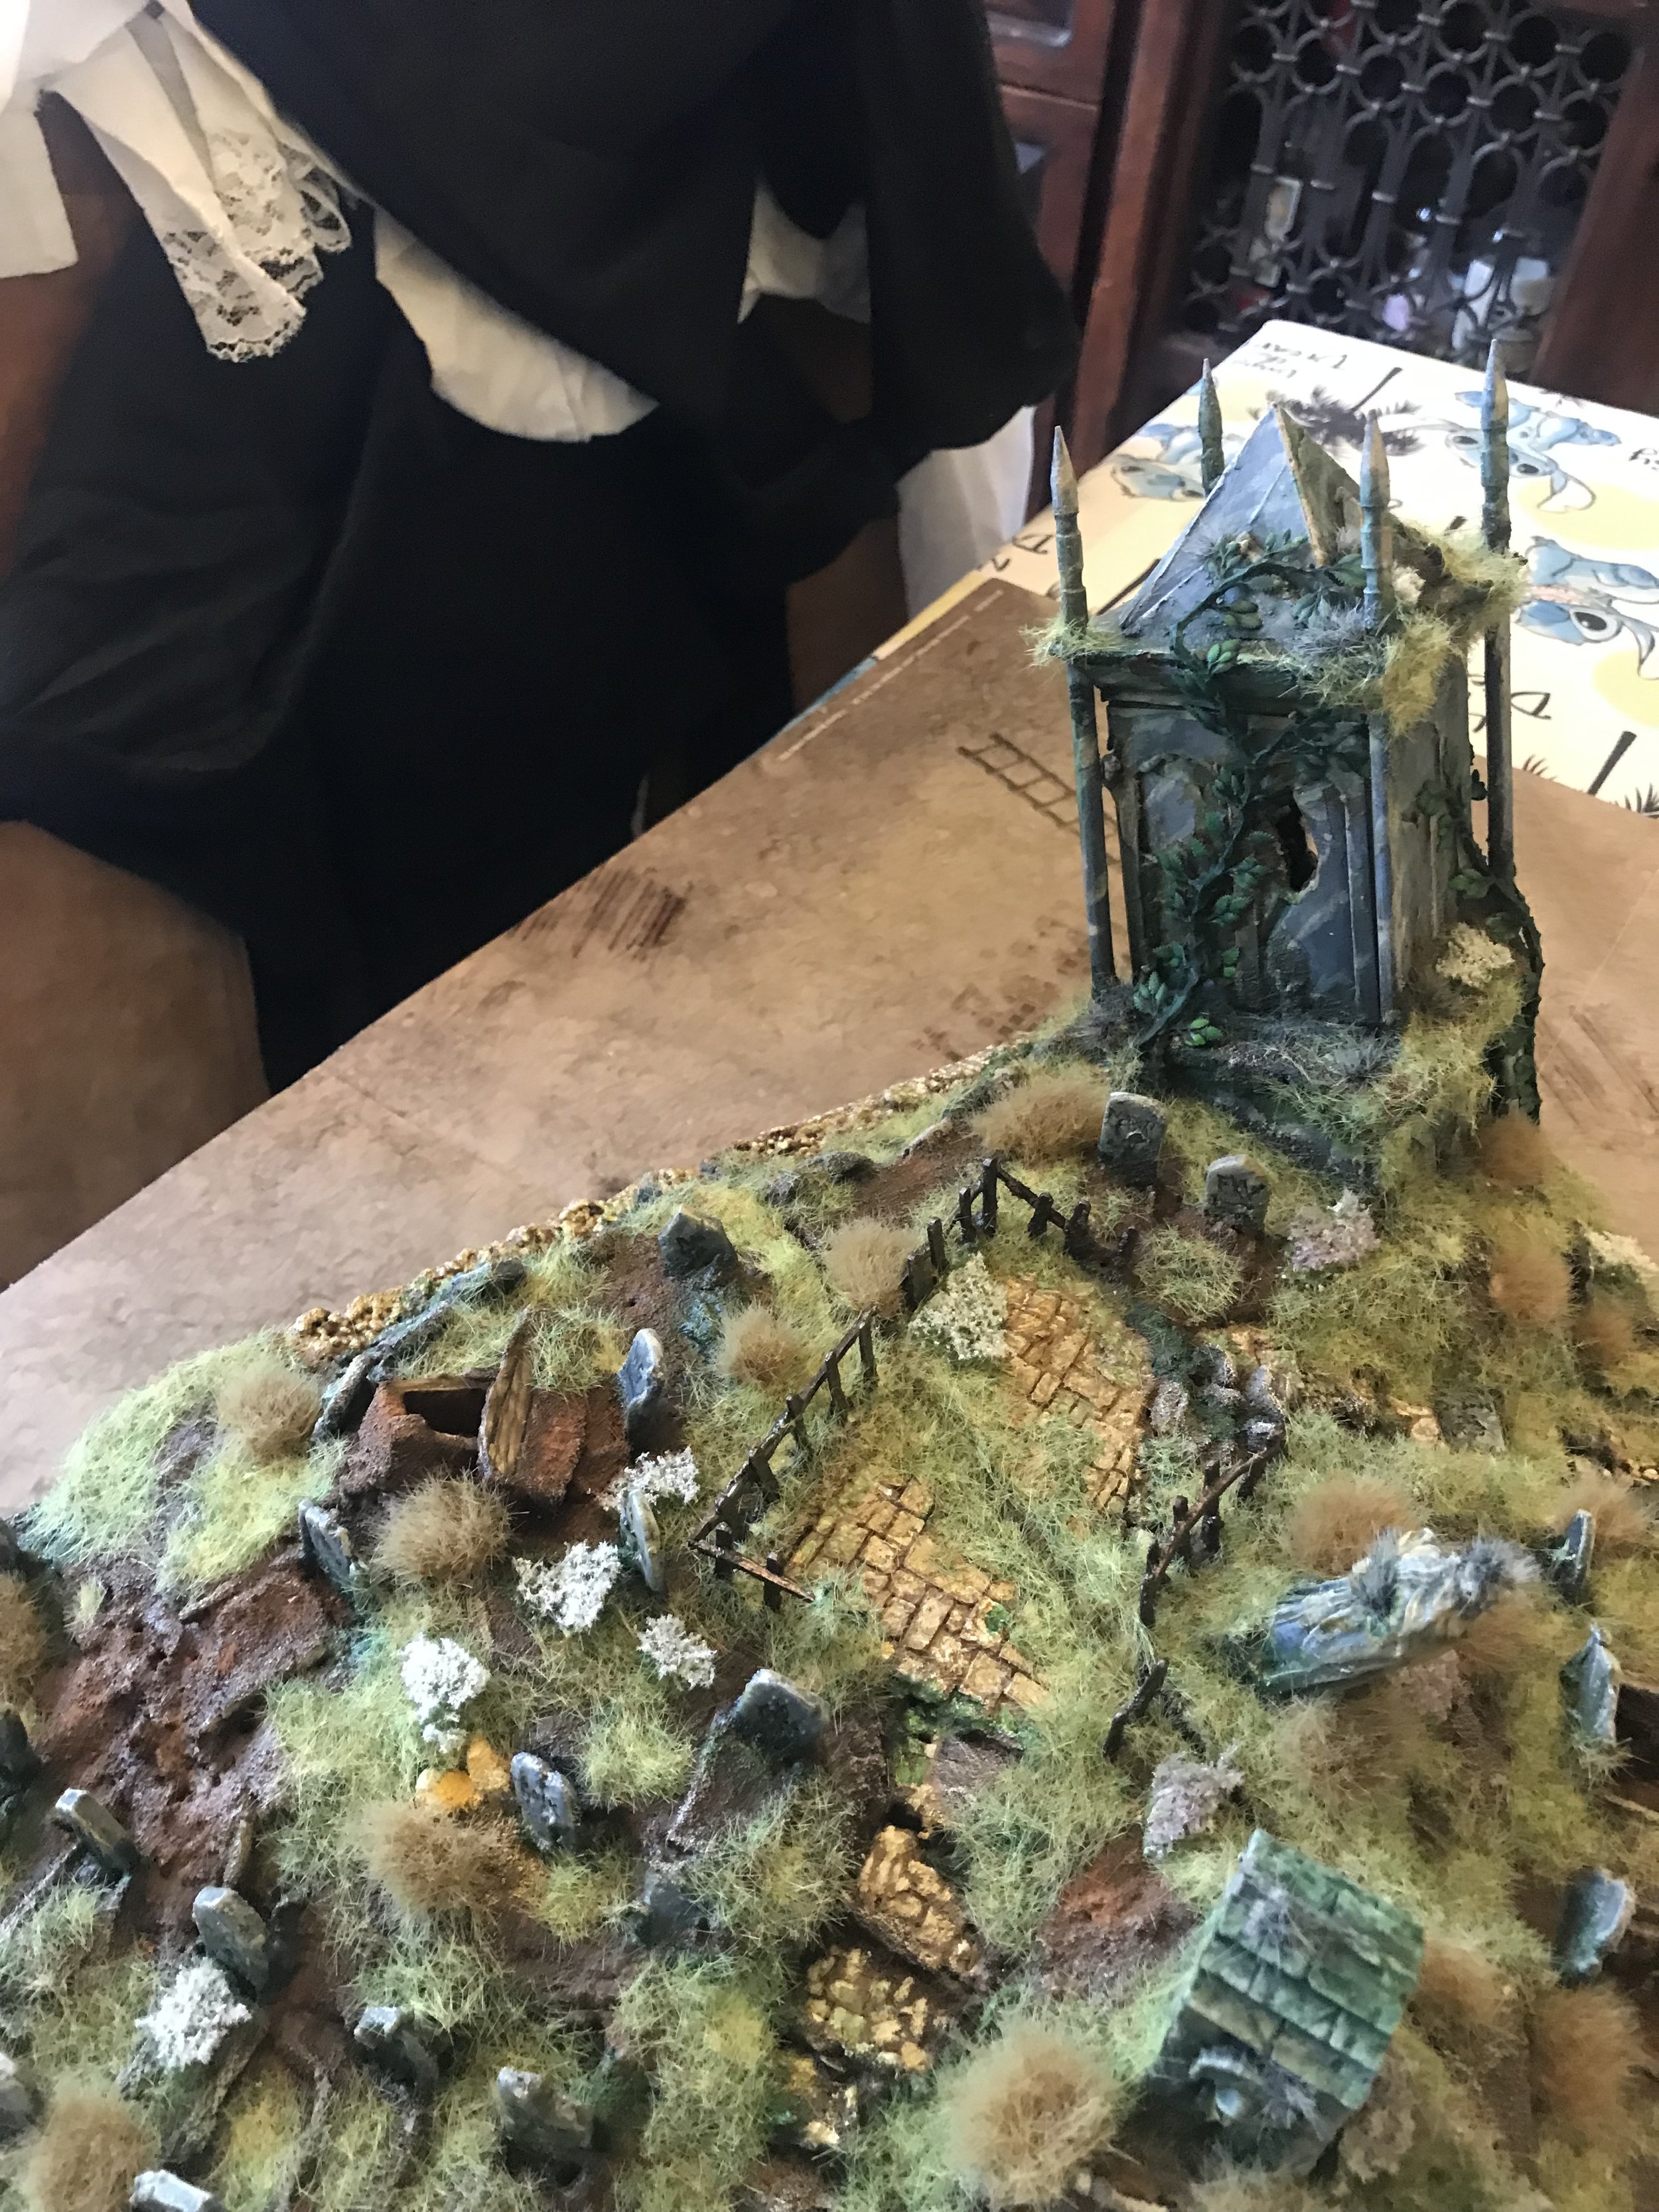
The Mausoleum
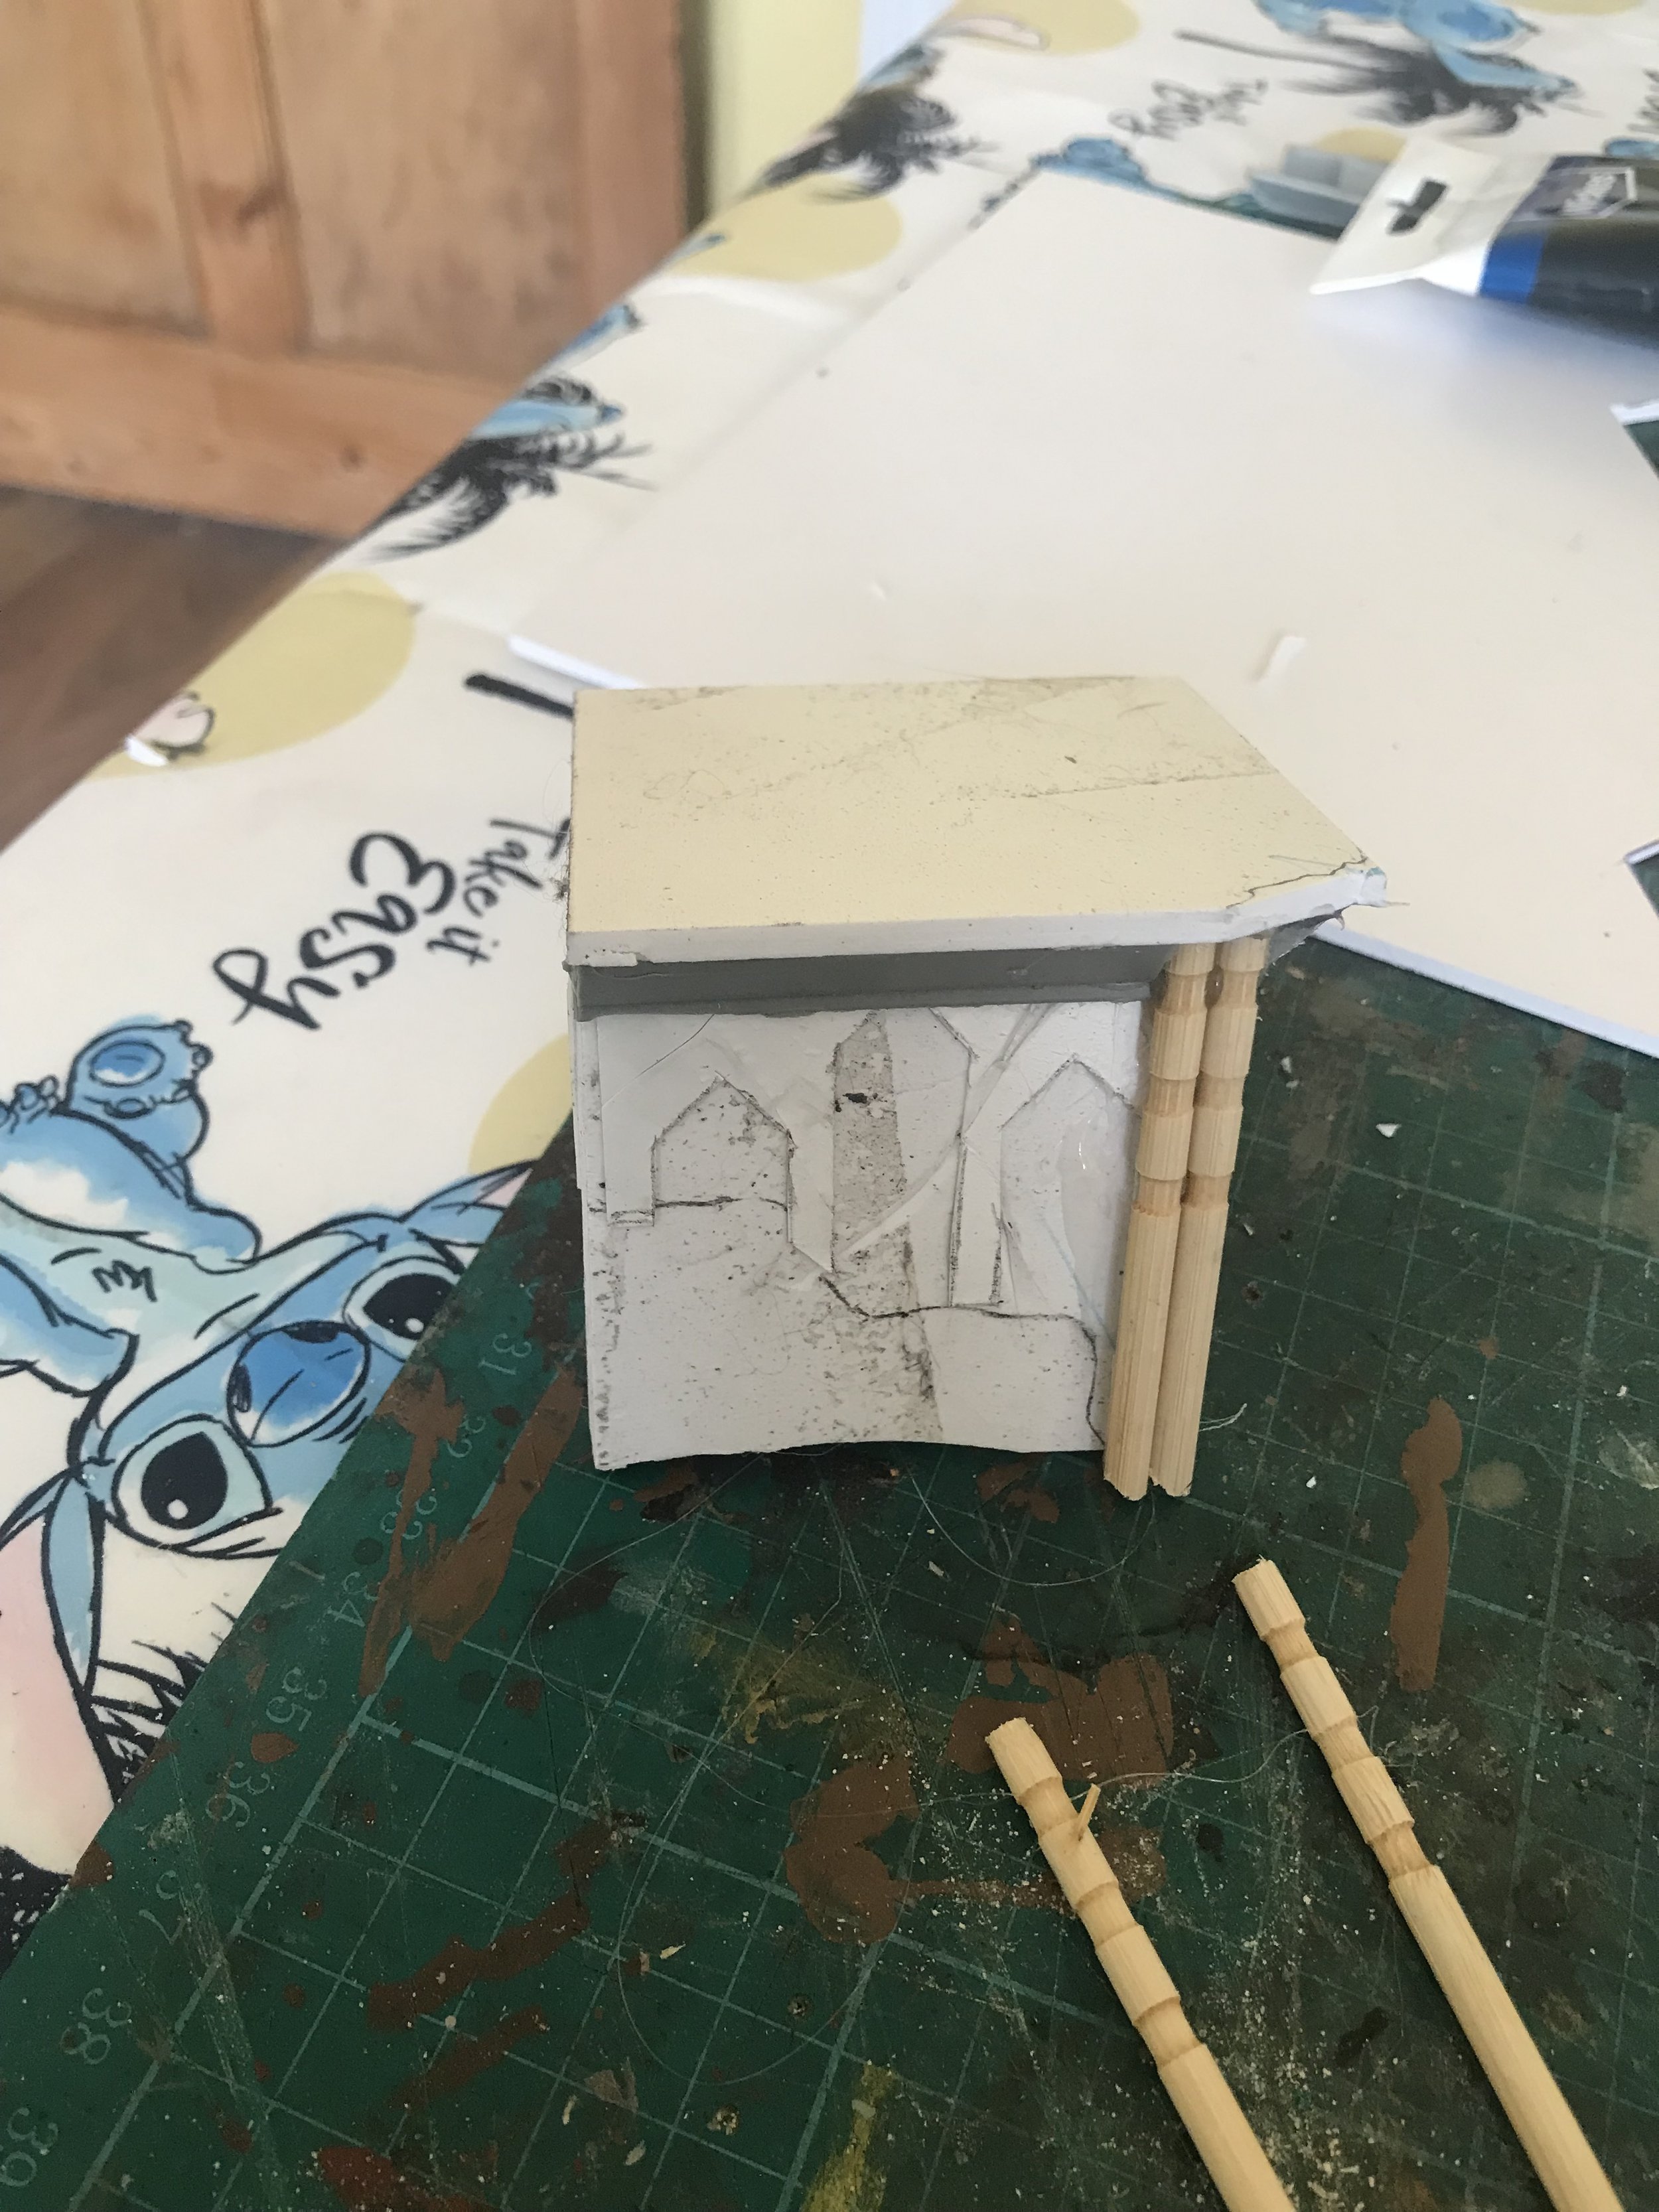
Speaking of Mausoleums, I needed to get on with building this one. I started by making the basic wonky cube base out of the EPVC and Bamboo for pillars, added thin card details to the side and then battered it all over to add the age effect. I also managed to use the chunky bit of sprue the graves came on to add a bit of architectural detail because recycling is ace! This was the first storey complete.
(Then I stopped taking photos, so you’ll have to see it finished later.)
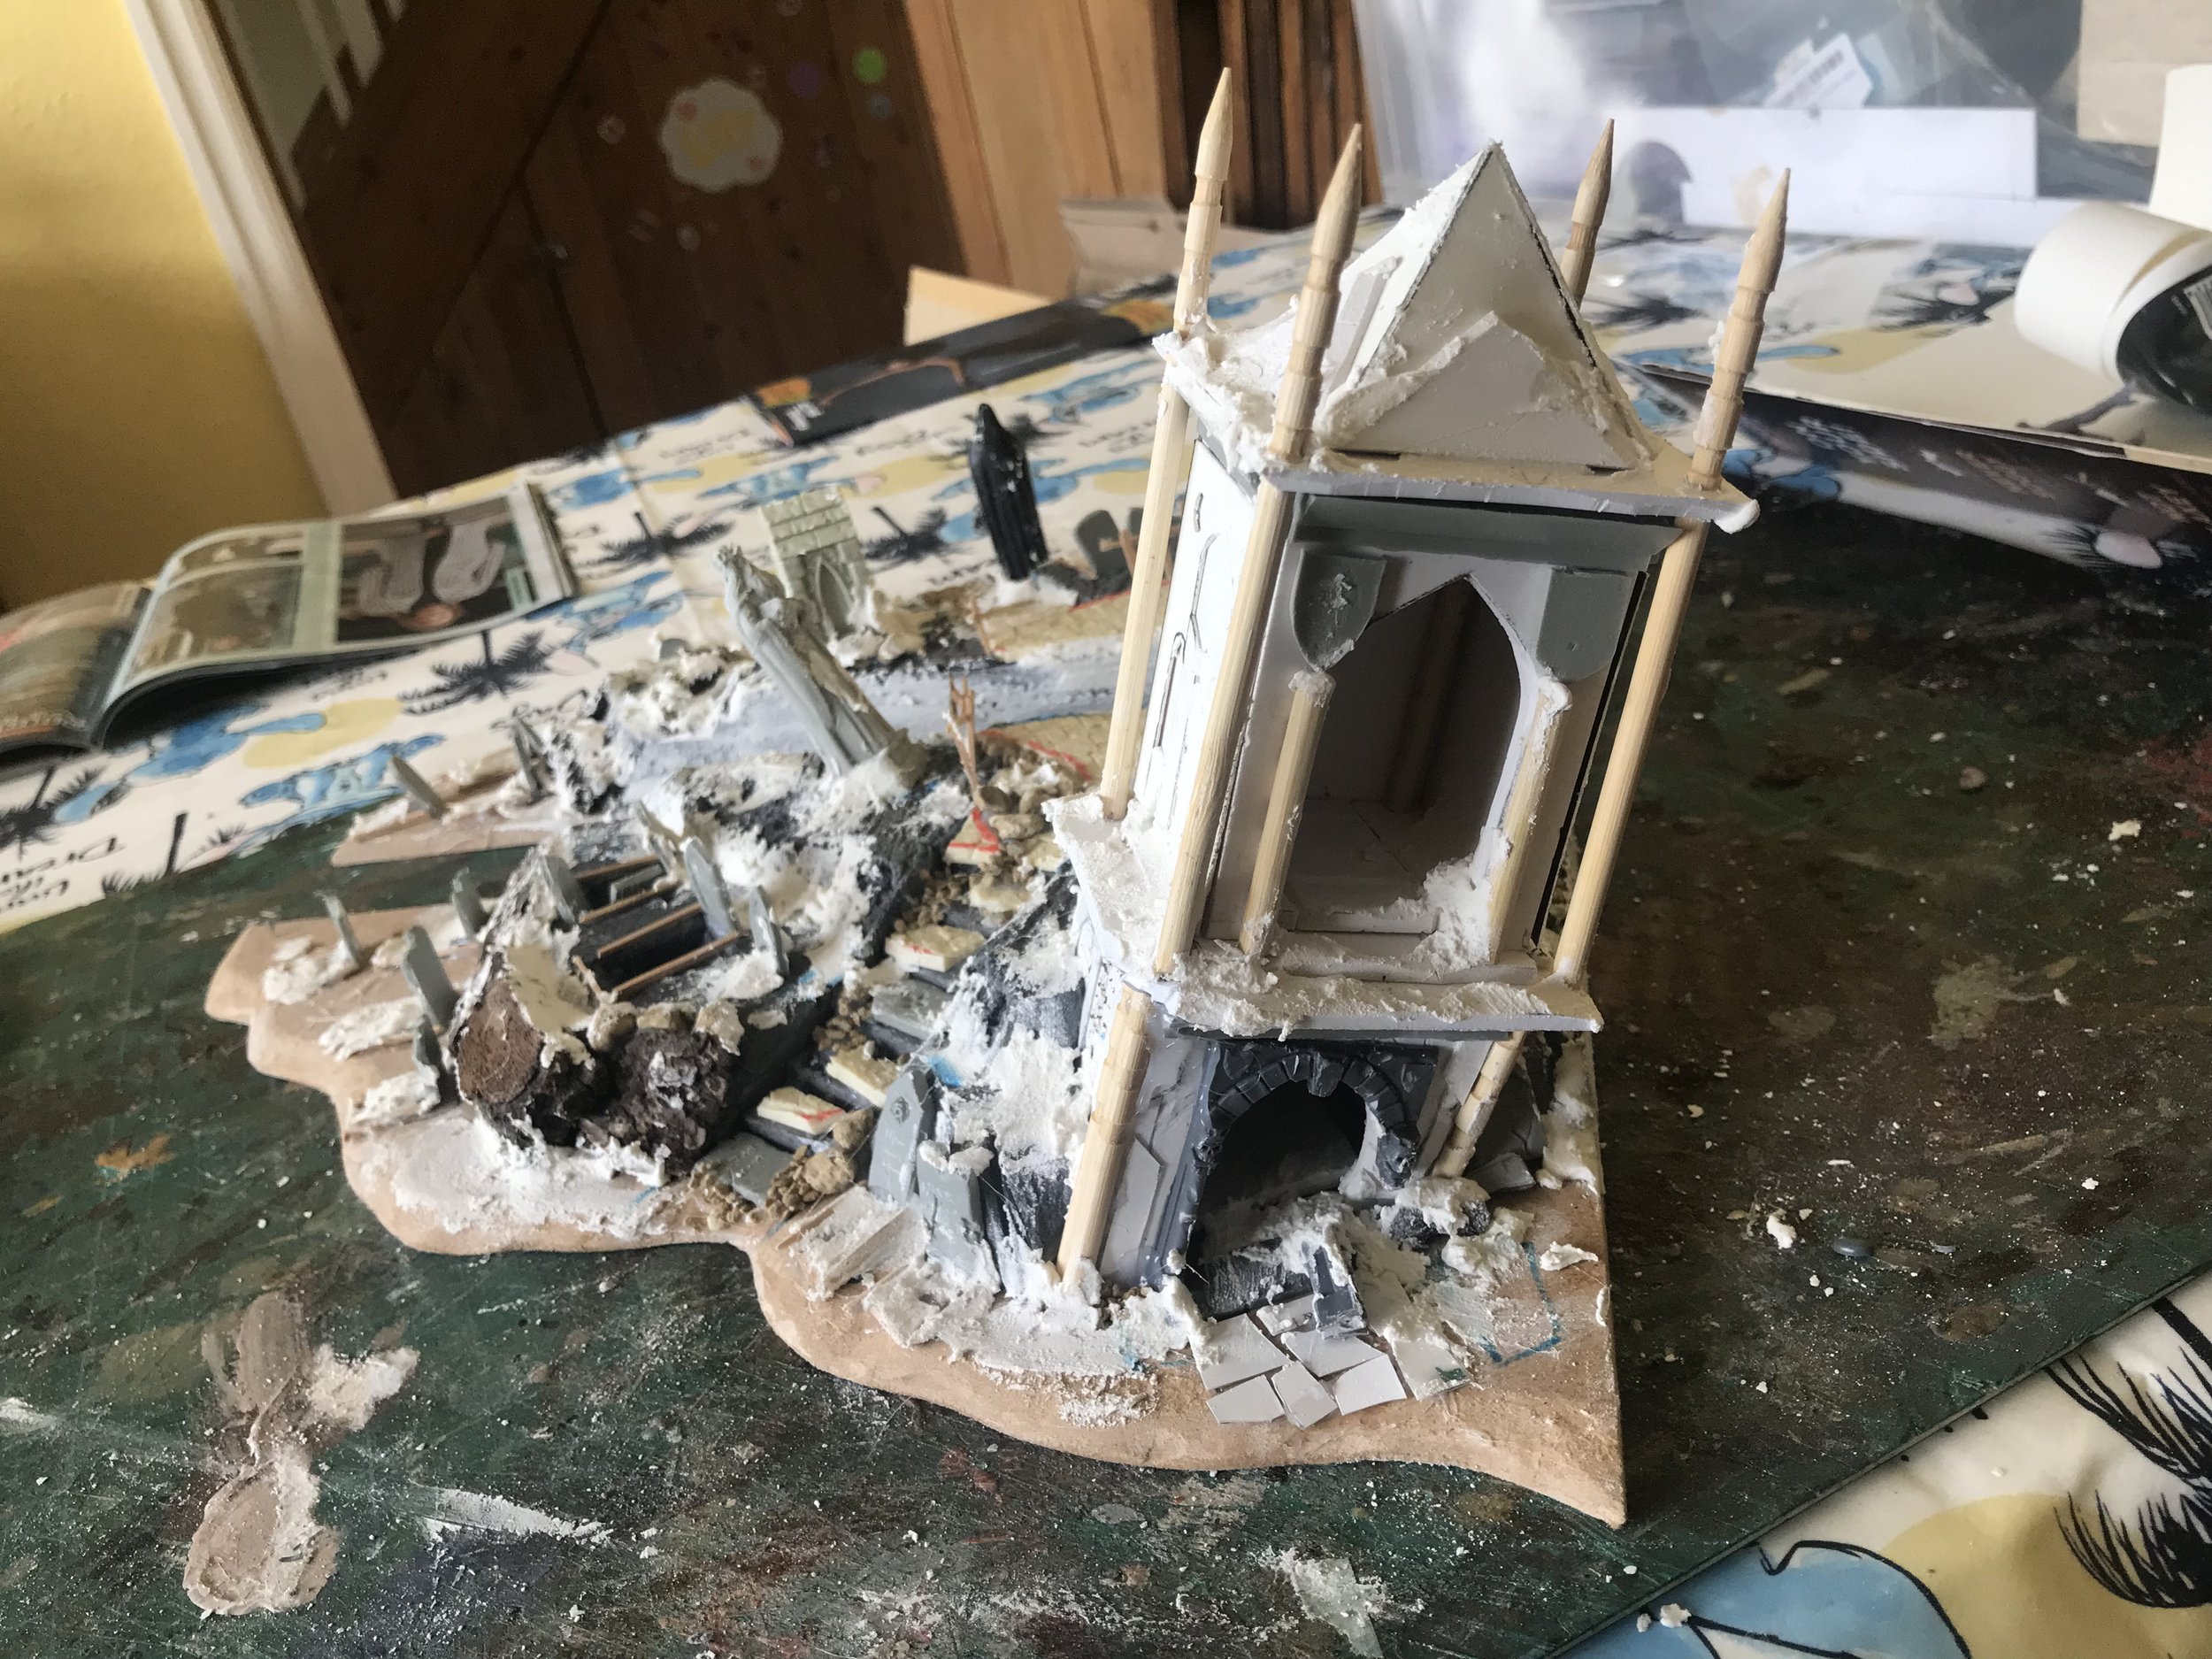
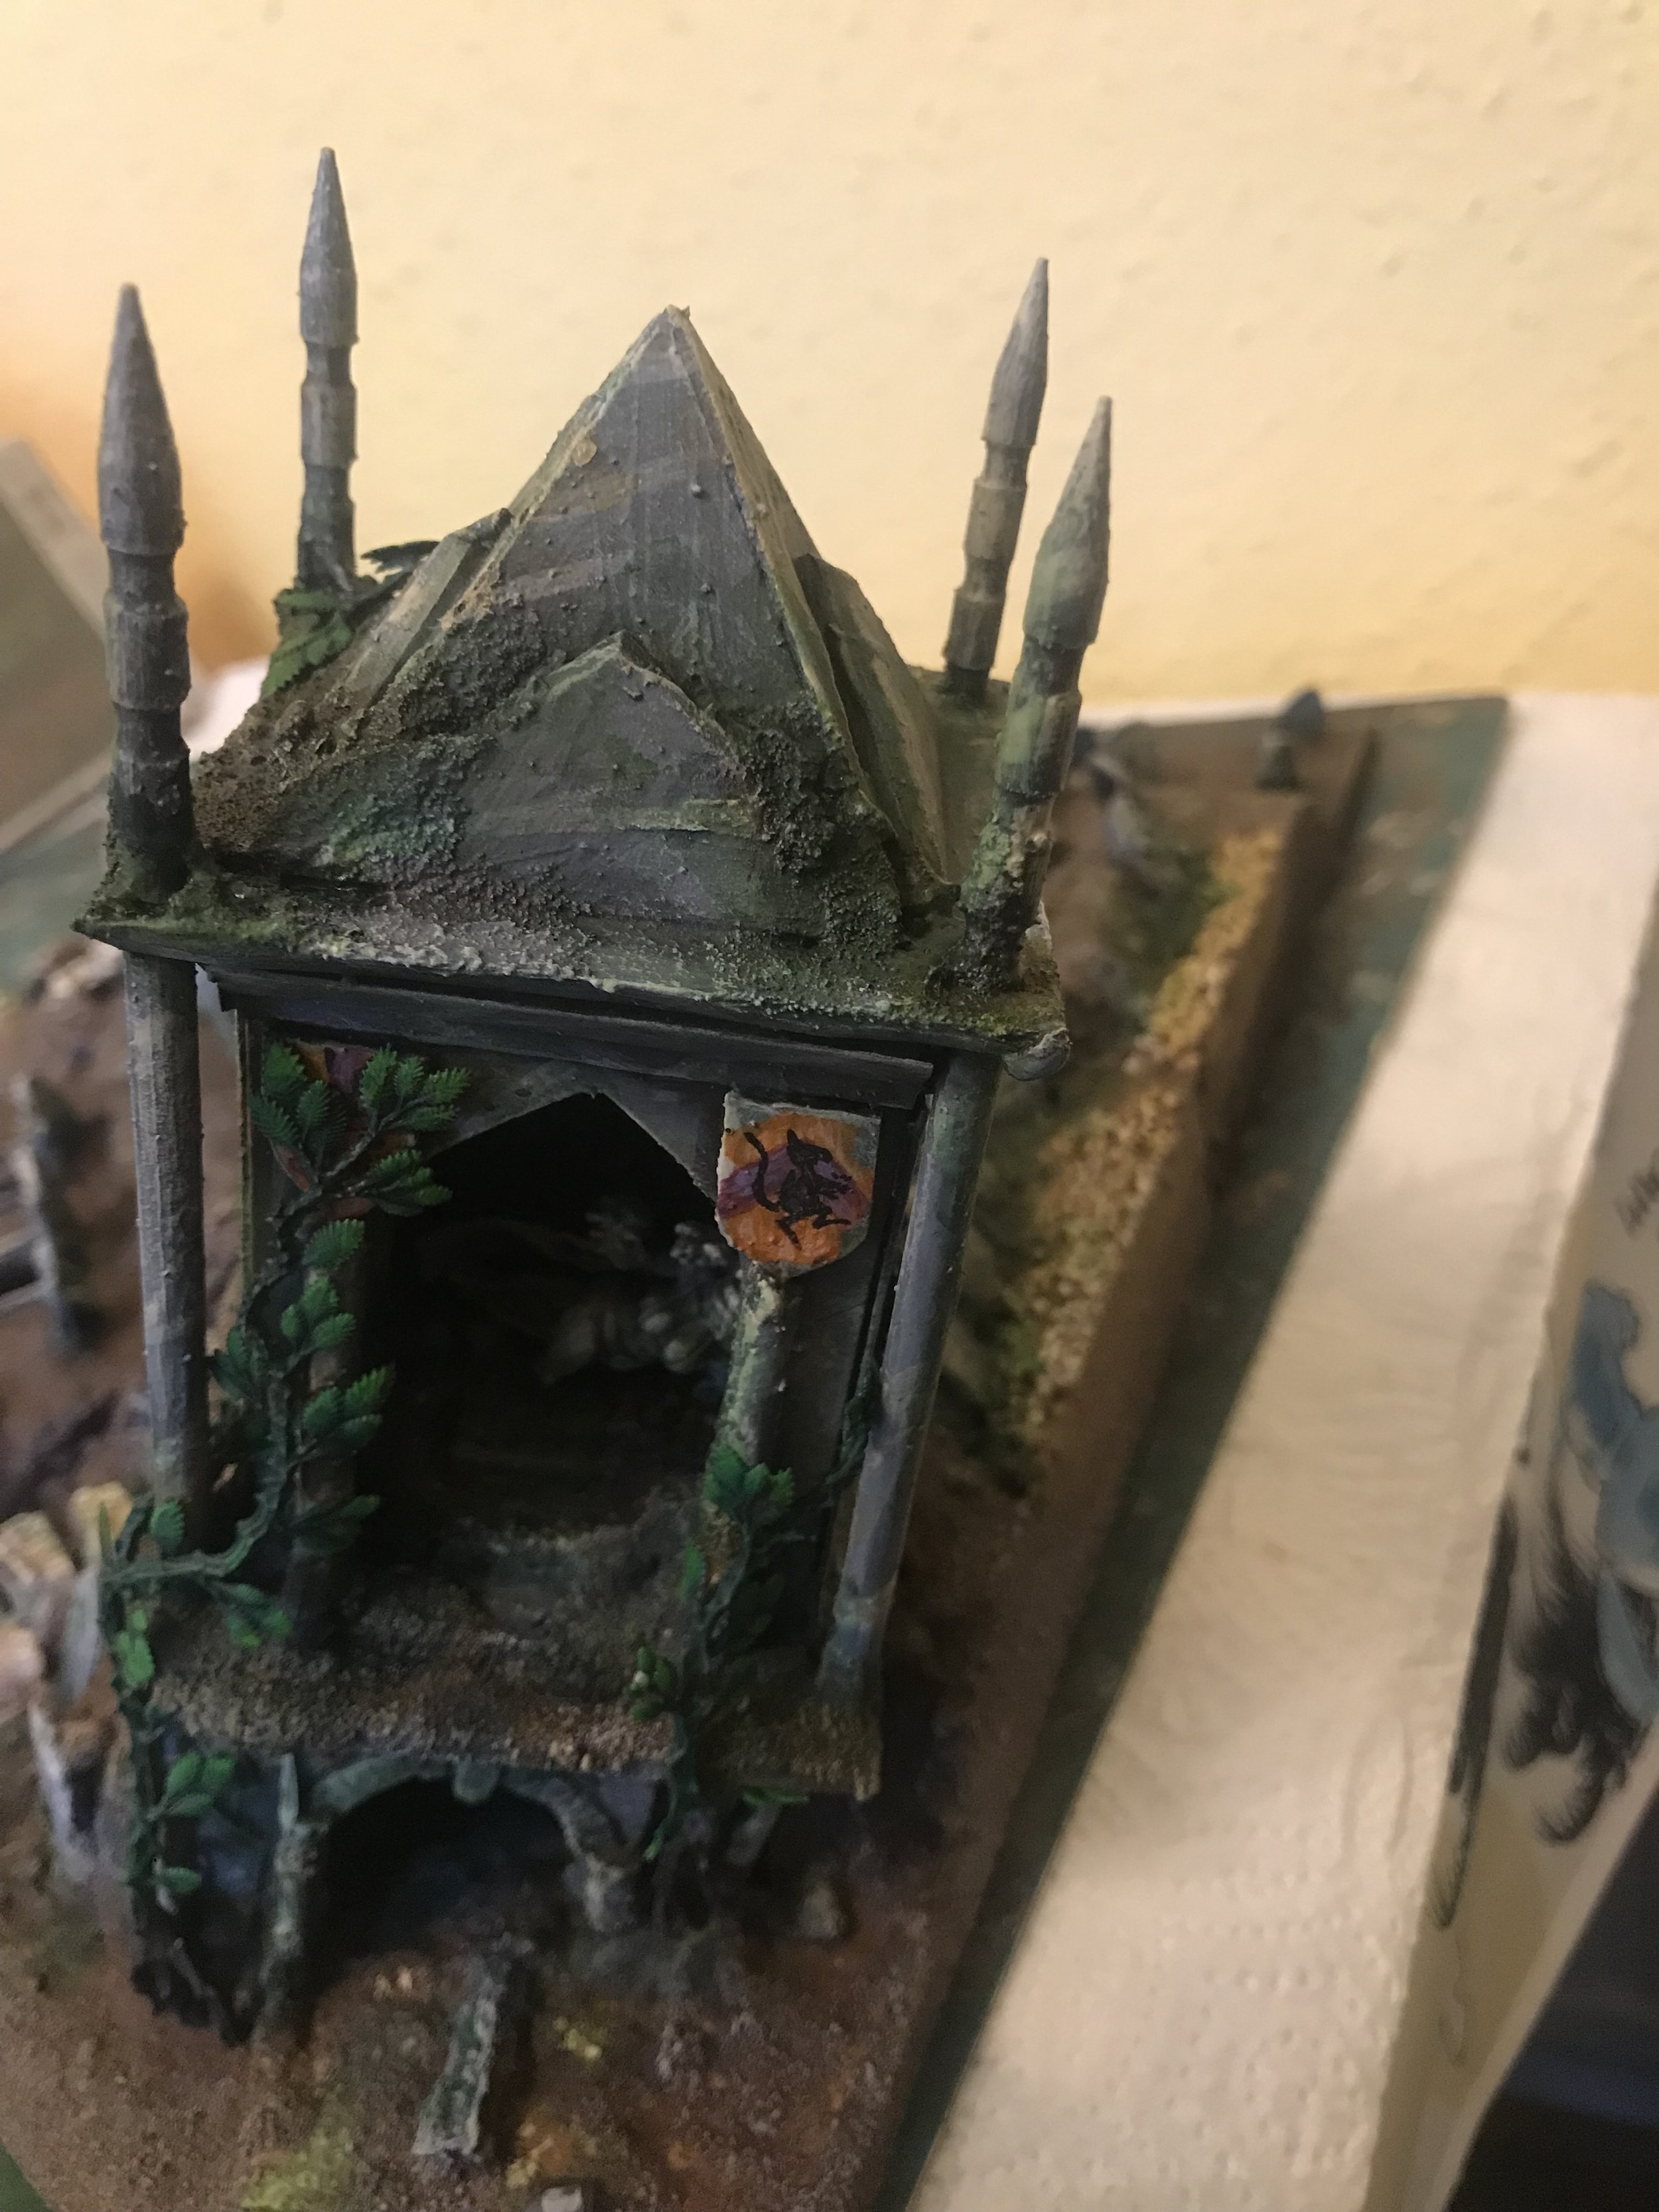
I wasn’t quite sure where to go with the top or the mausoleum so I consulted the GKG family (they are super useful as their knowledge of the lore is deeeeep). I wanted it to be a noble family and Suzie described them as arrogant and proud of their wealth, so I went with the most complex mausoleum option, which meant an entire second storey in gothic style, complete with medusa statue and coat of arms.
Building the second storey meant essentially a less wonky replica of the first storey as far as builds go. I lengthened the sides to fit the medusa statue inside, and kept the pointy bits on the skewers. I also carved a broken section in the back to allow light in, as the statue would be very hard to see otherwise.
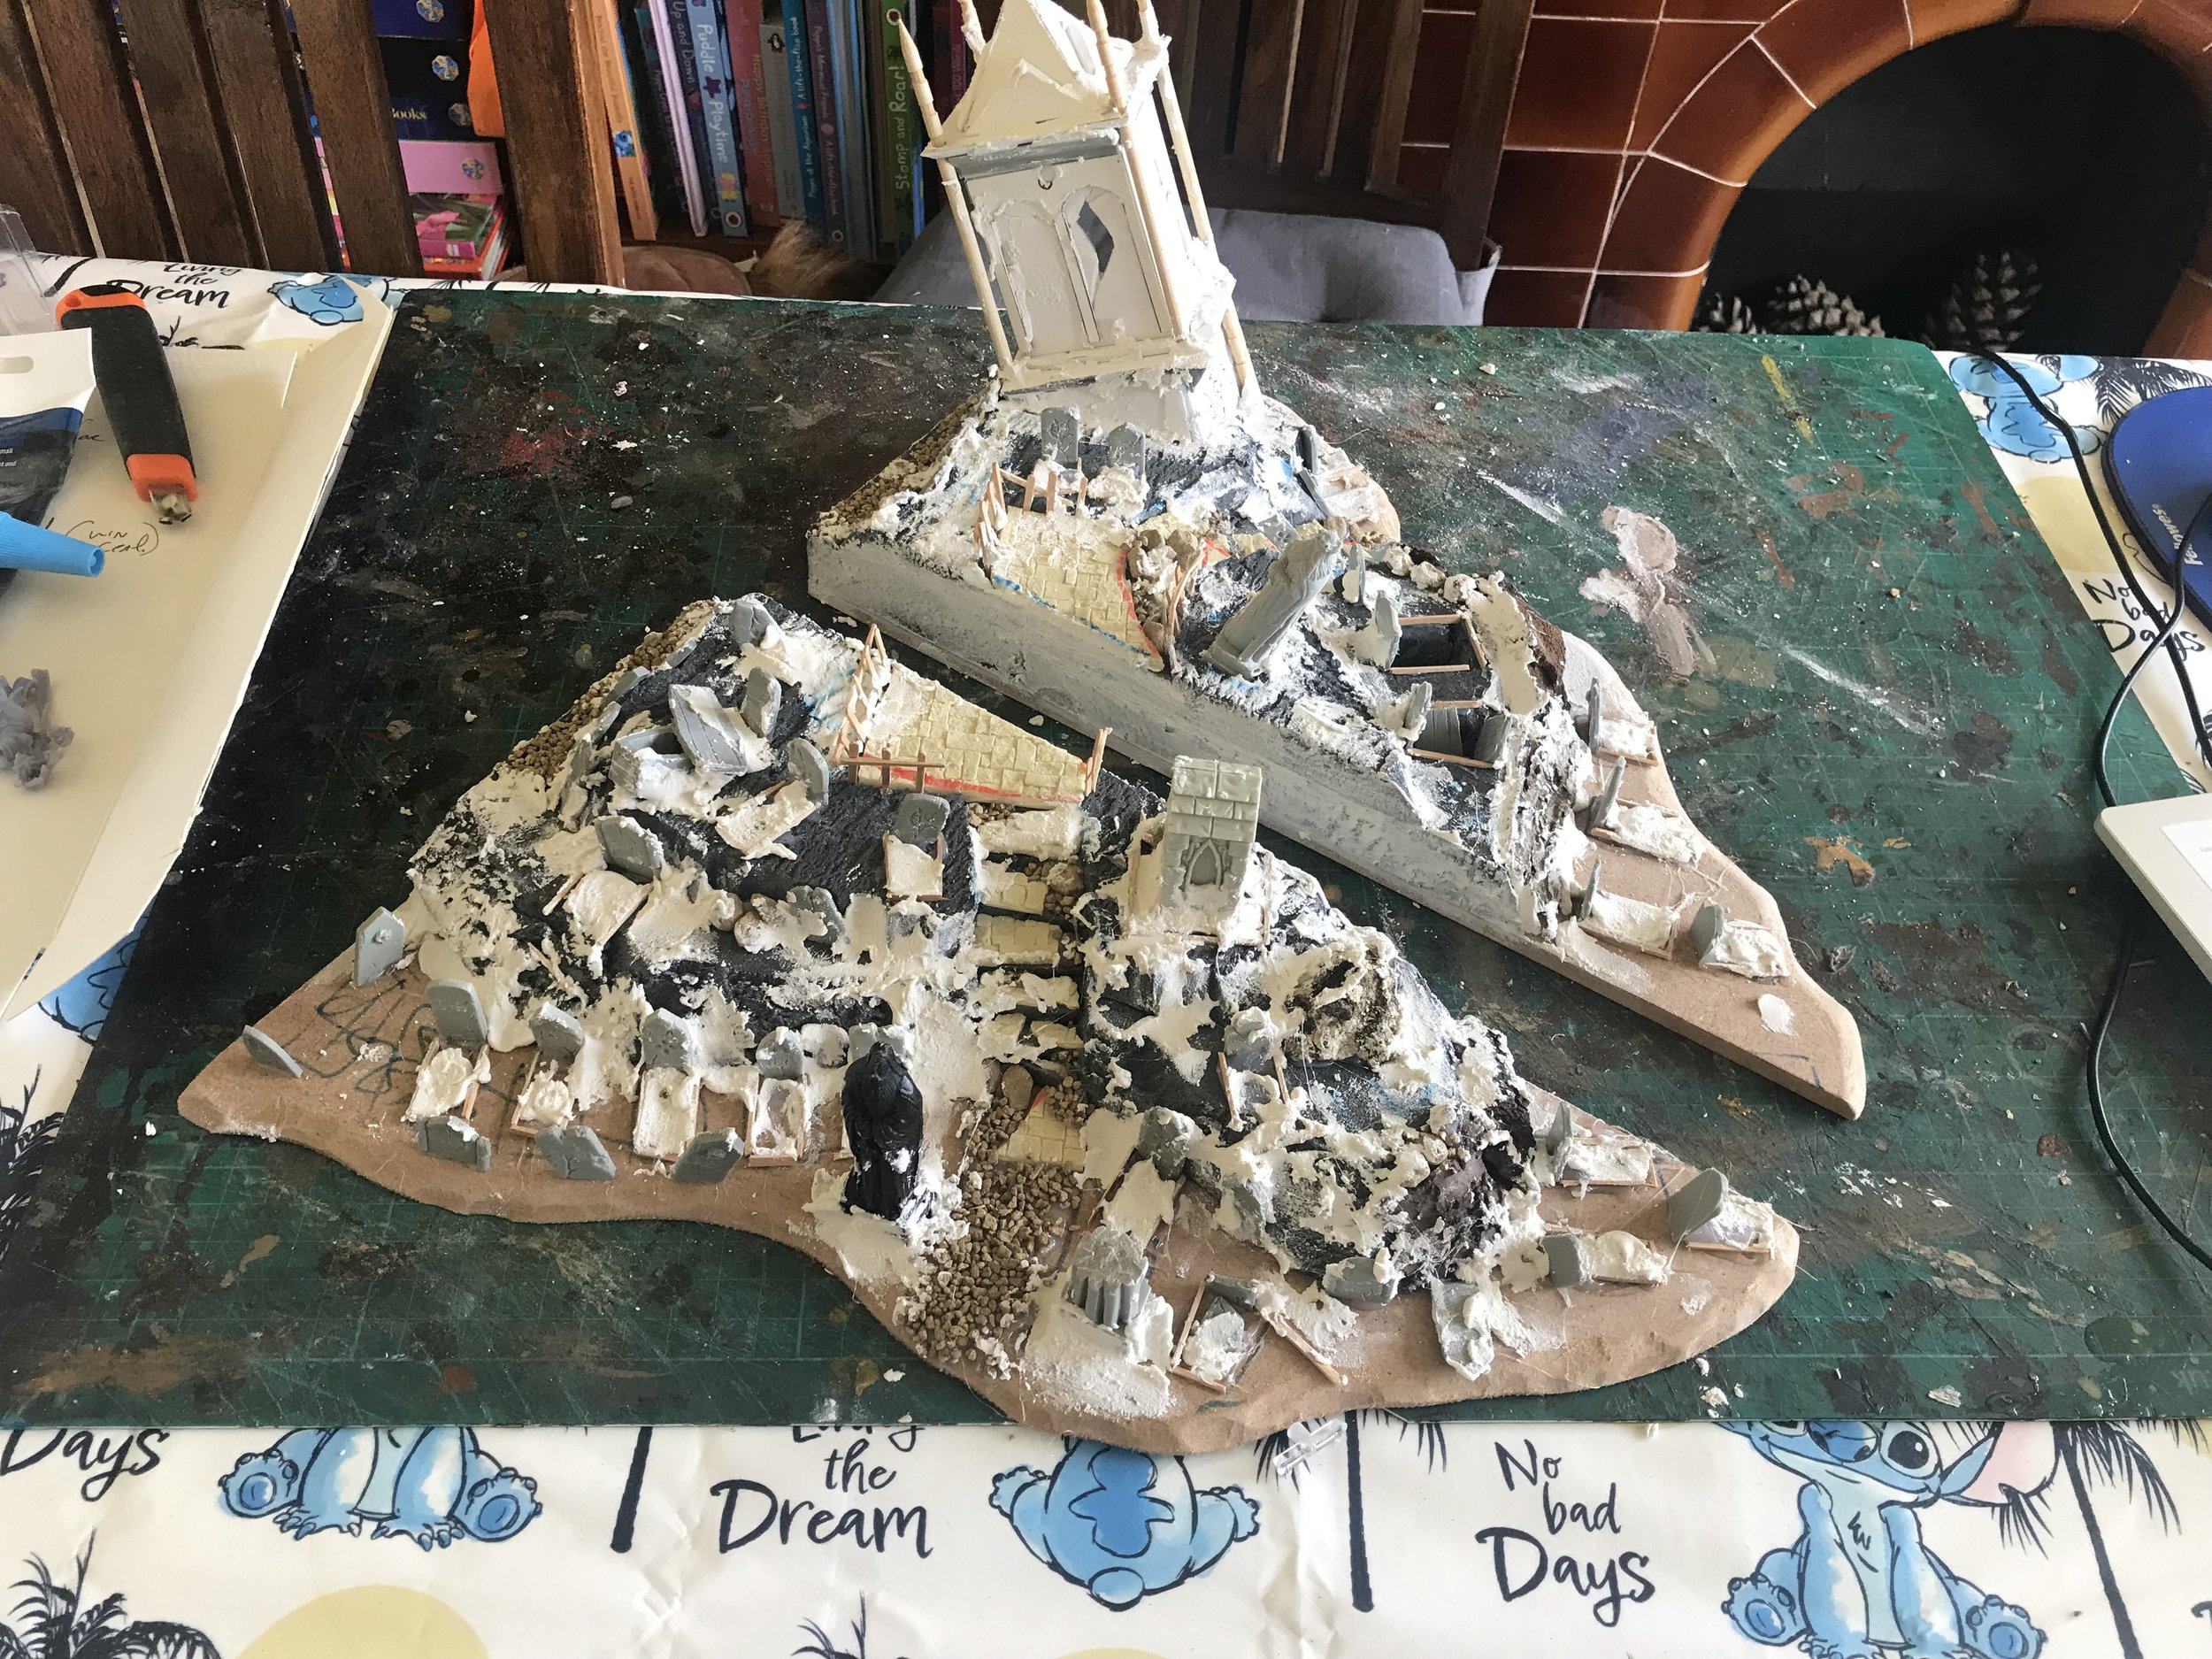
Gunk (Filler) Time!
Hey there it is, all covered in gunk! It’s non-shrinking filler actually, which does a couple of cool things although I mainly use it to blend the foam levels together in a more natural slope, as well as the tree bark and gravel etc. It’s also great at adding texture to stone buildings by applying in a thin layer, and I added lumps of it to each grave to further mark them out.
At this stage I made s slight mistake - I should have added thin card walls to the sides of the foam to keep it flat and smooth, so it fit together perfectly. Instead I used the filler to smooth it off and this created a tiny gap I didn’t notice till later, as well as not actually being decent protection. So, I had to add sand anyway making the gap even bigger.

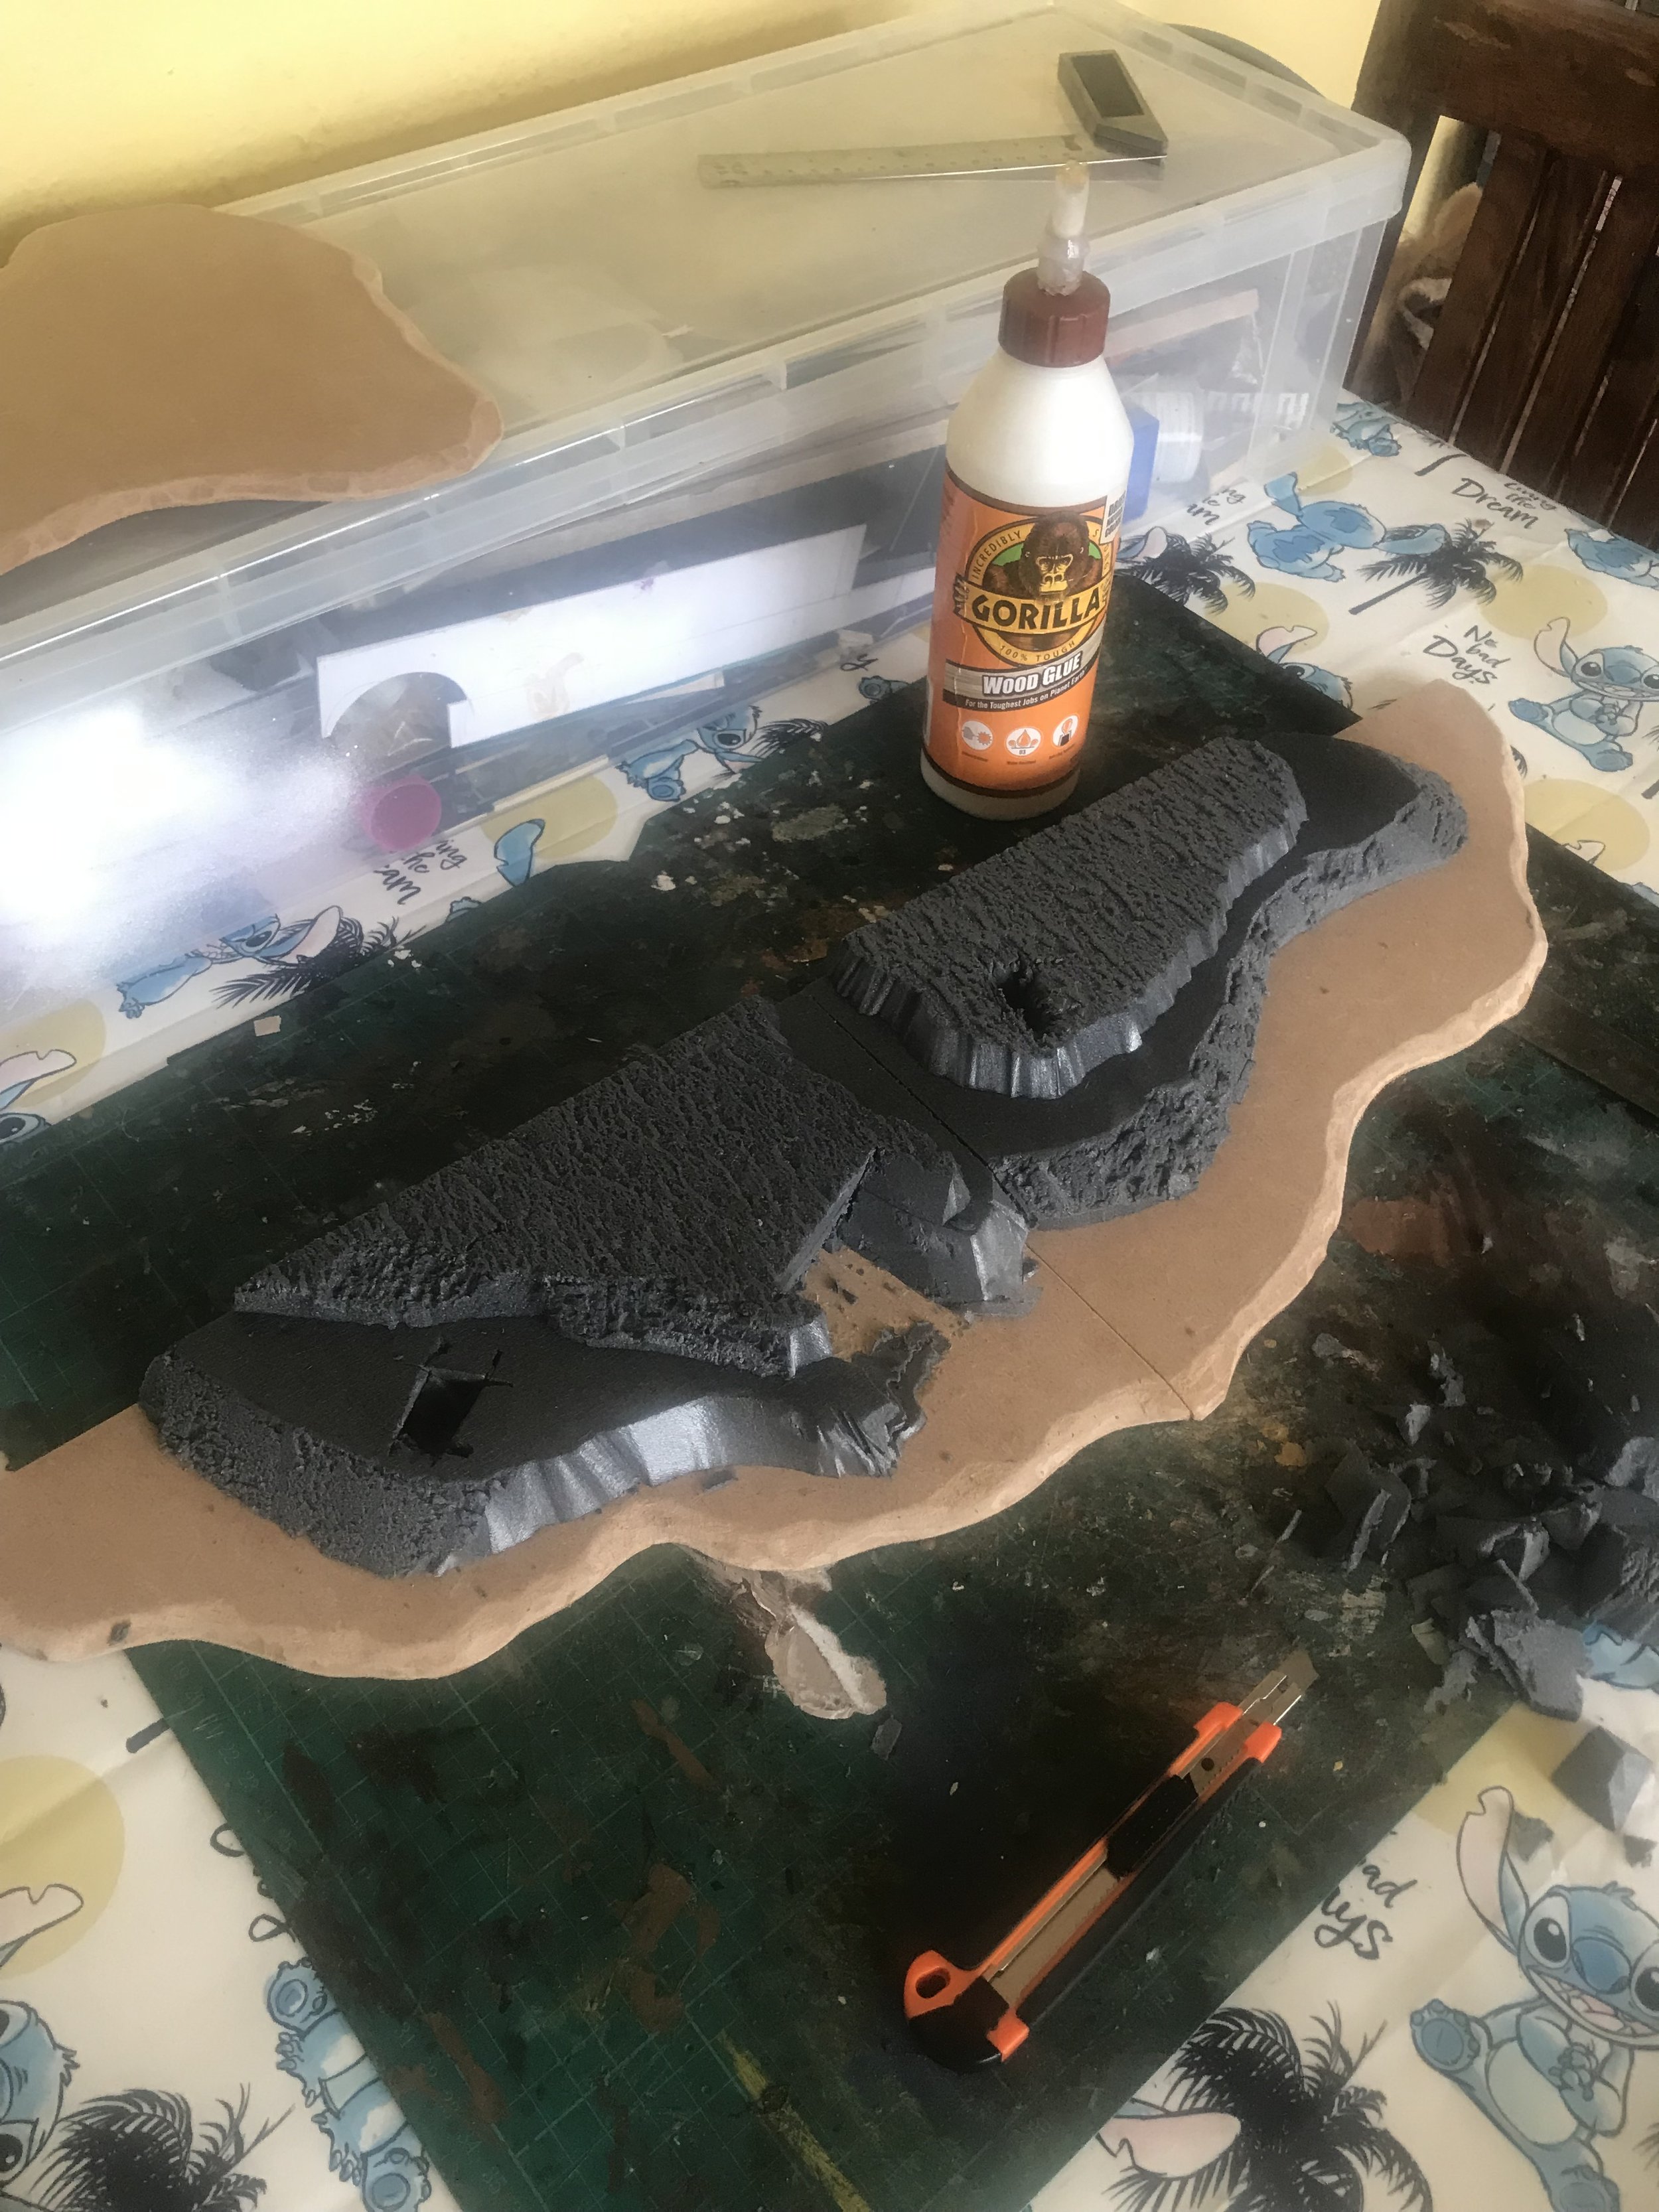
Painting
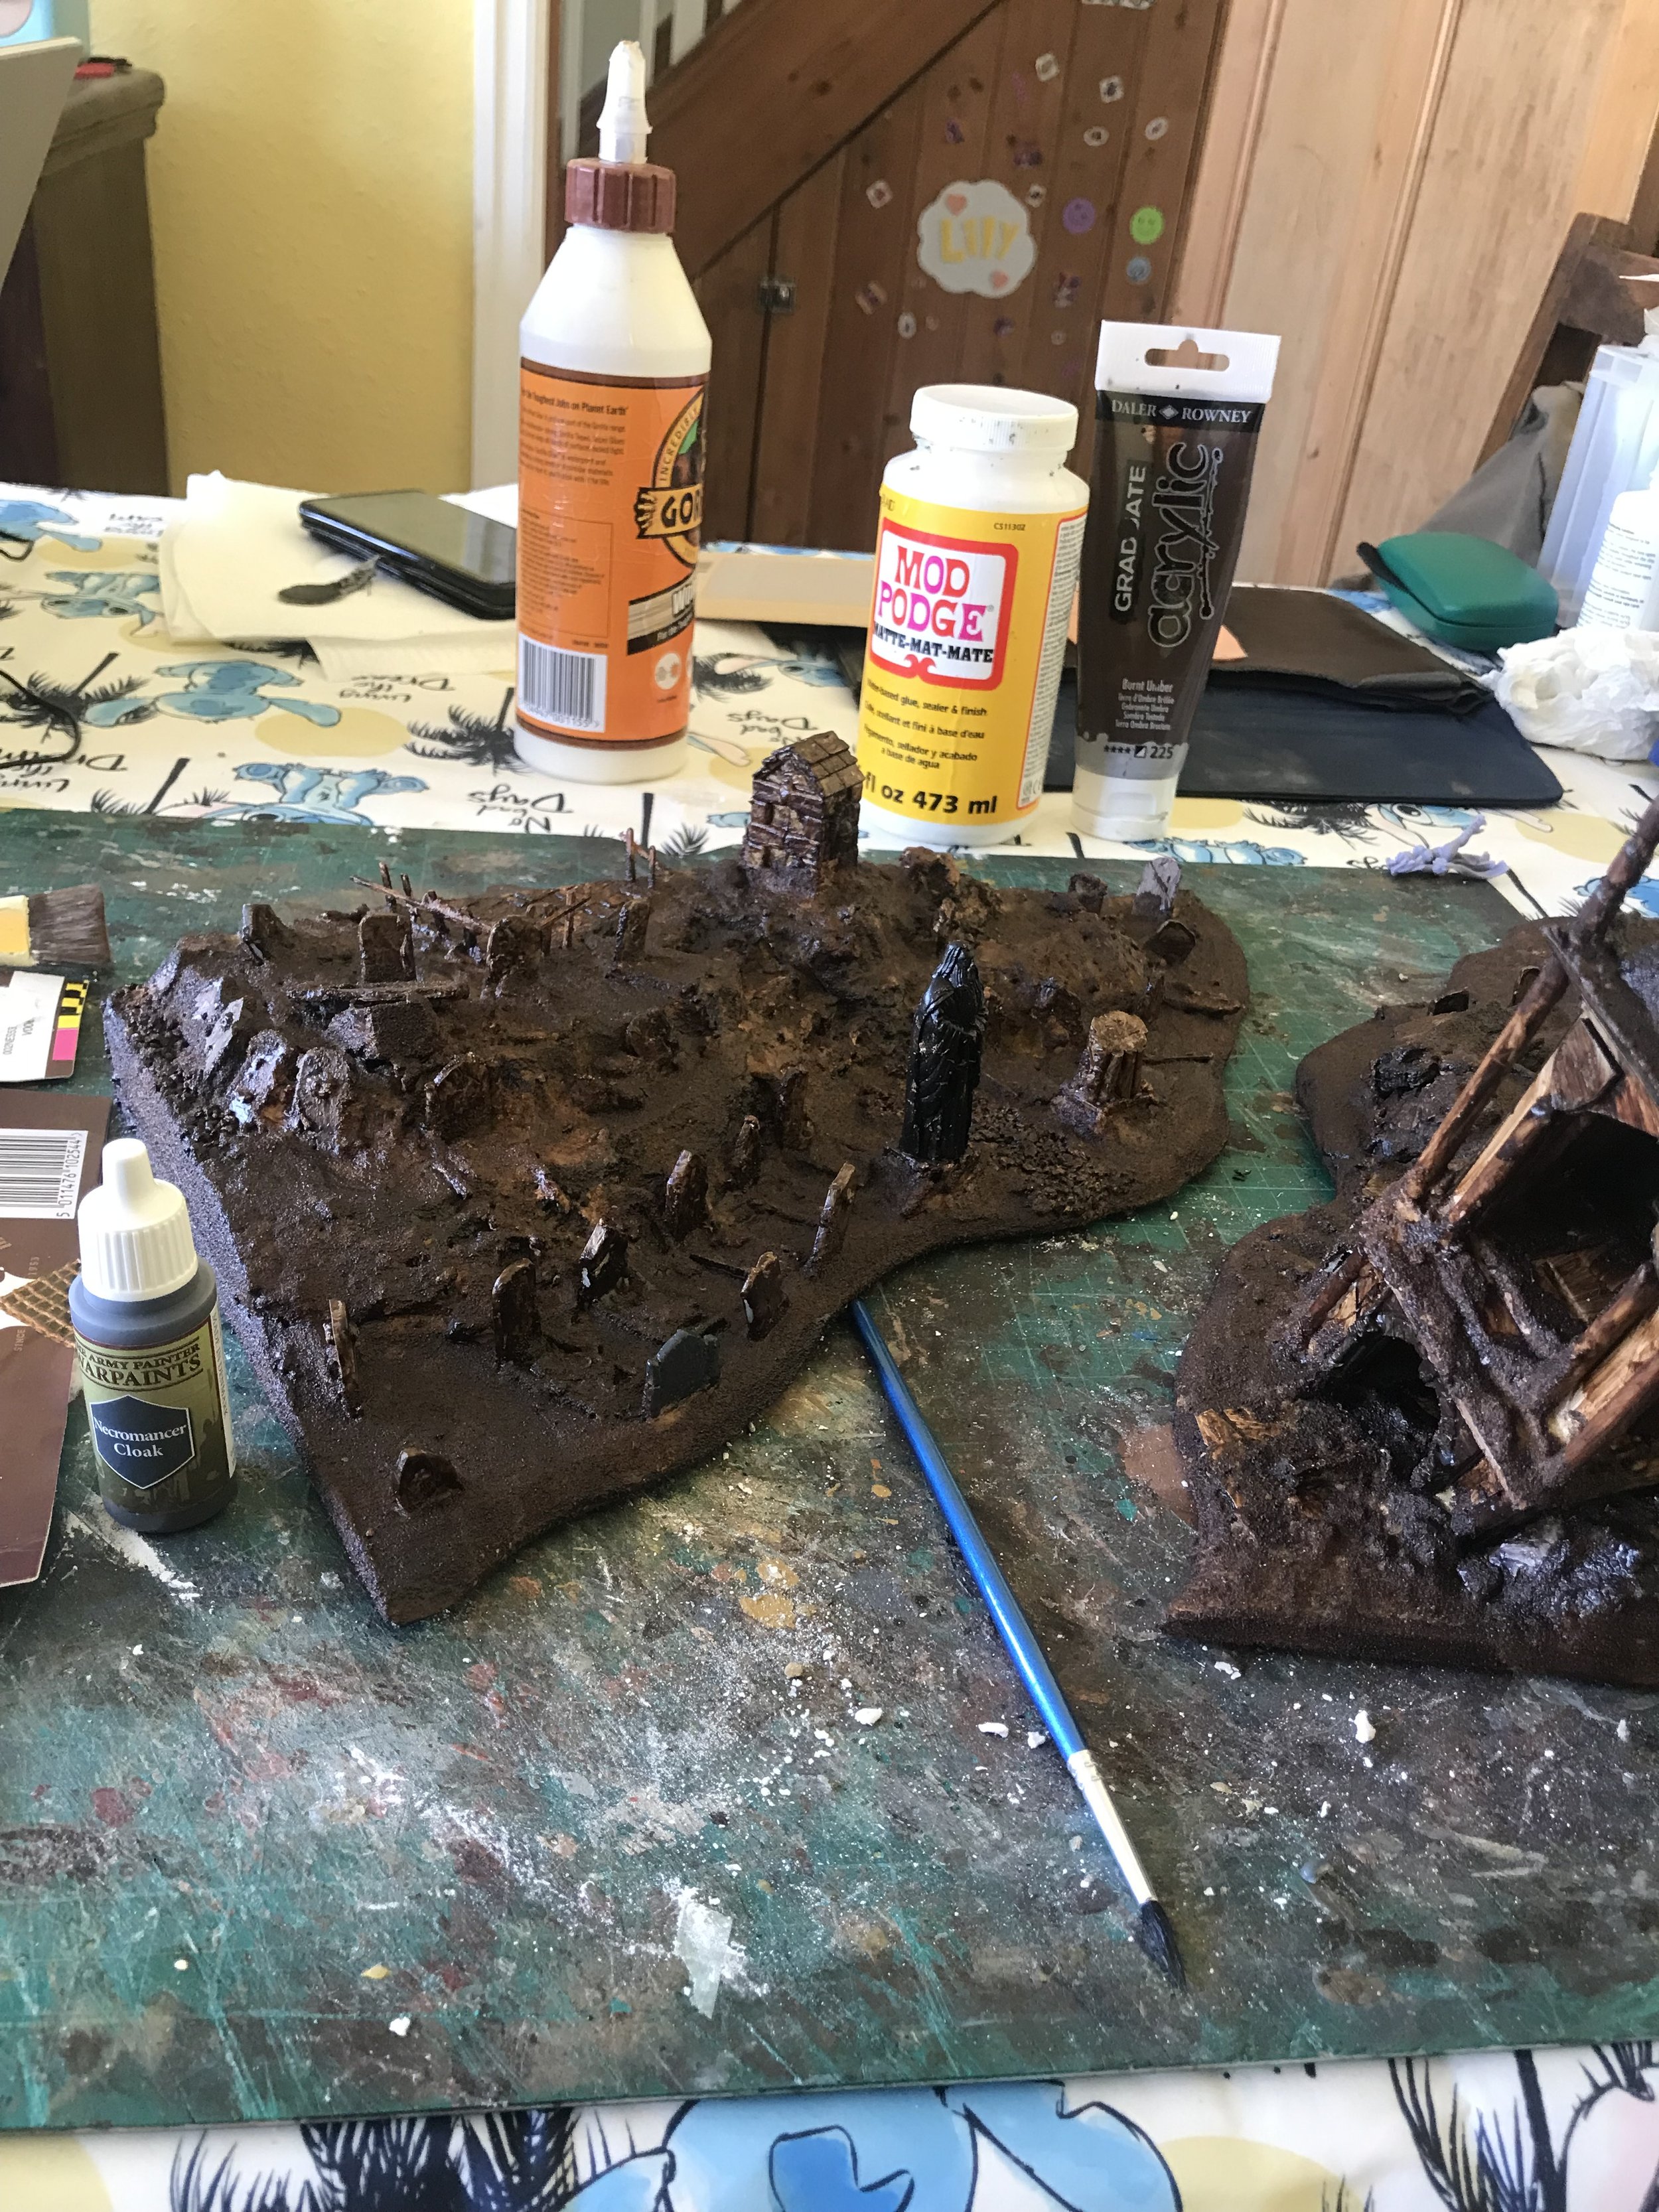
Browns
It’s painting time baby! And yes, I am a terrible photographer, that’s just something we all have to live with now! The first coat was more Gorilla glue, this time to hold down sand to all the flat surfaces. Then it’s brown all day... and then more brown... and some brown... in total there is one brown base (a cheap acrylic) followed by three increasingly light (in both colour and pressure) dry brushes, (all Army Painter: Leather Brown, Monster Brown and Skeleton Bone).
Once I was thoroughly sick of dry brushing I heavily coated the cliffs, stones, paving and gravel with Monster Brown, with a rough wet brush of Skeleton Bone over the top and some final highlights of Army Painter Arid Earth. I’d be adding pigment to these later so they didn’t need to be bang on at this point.
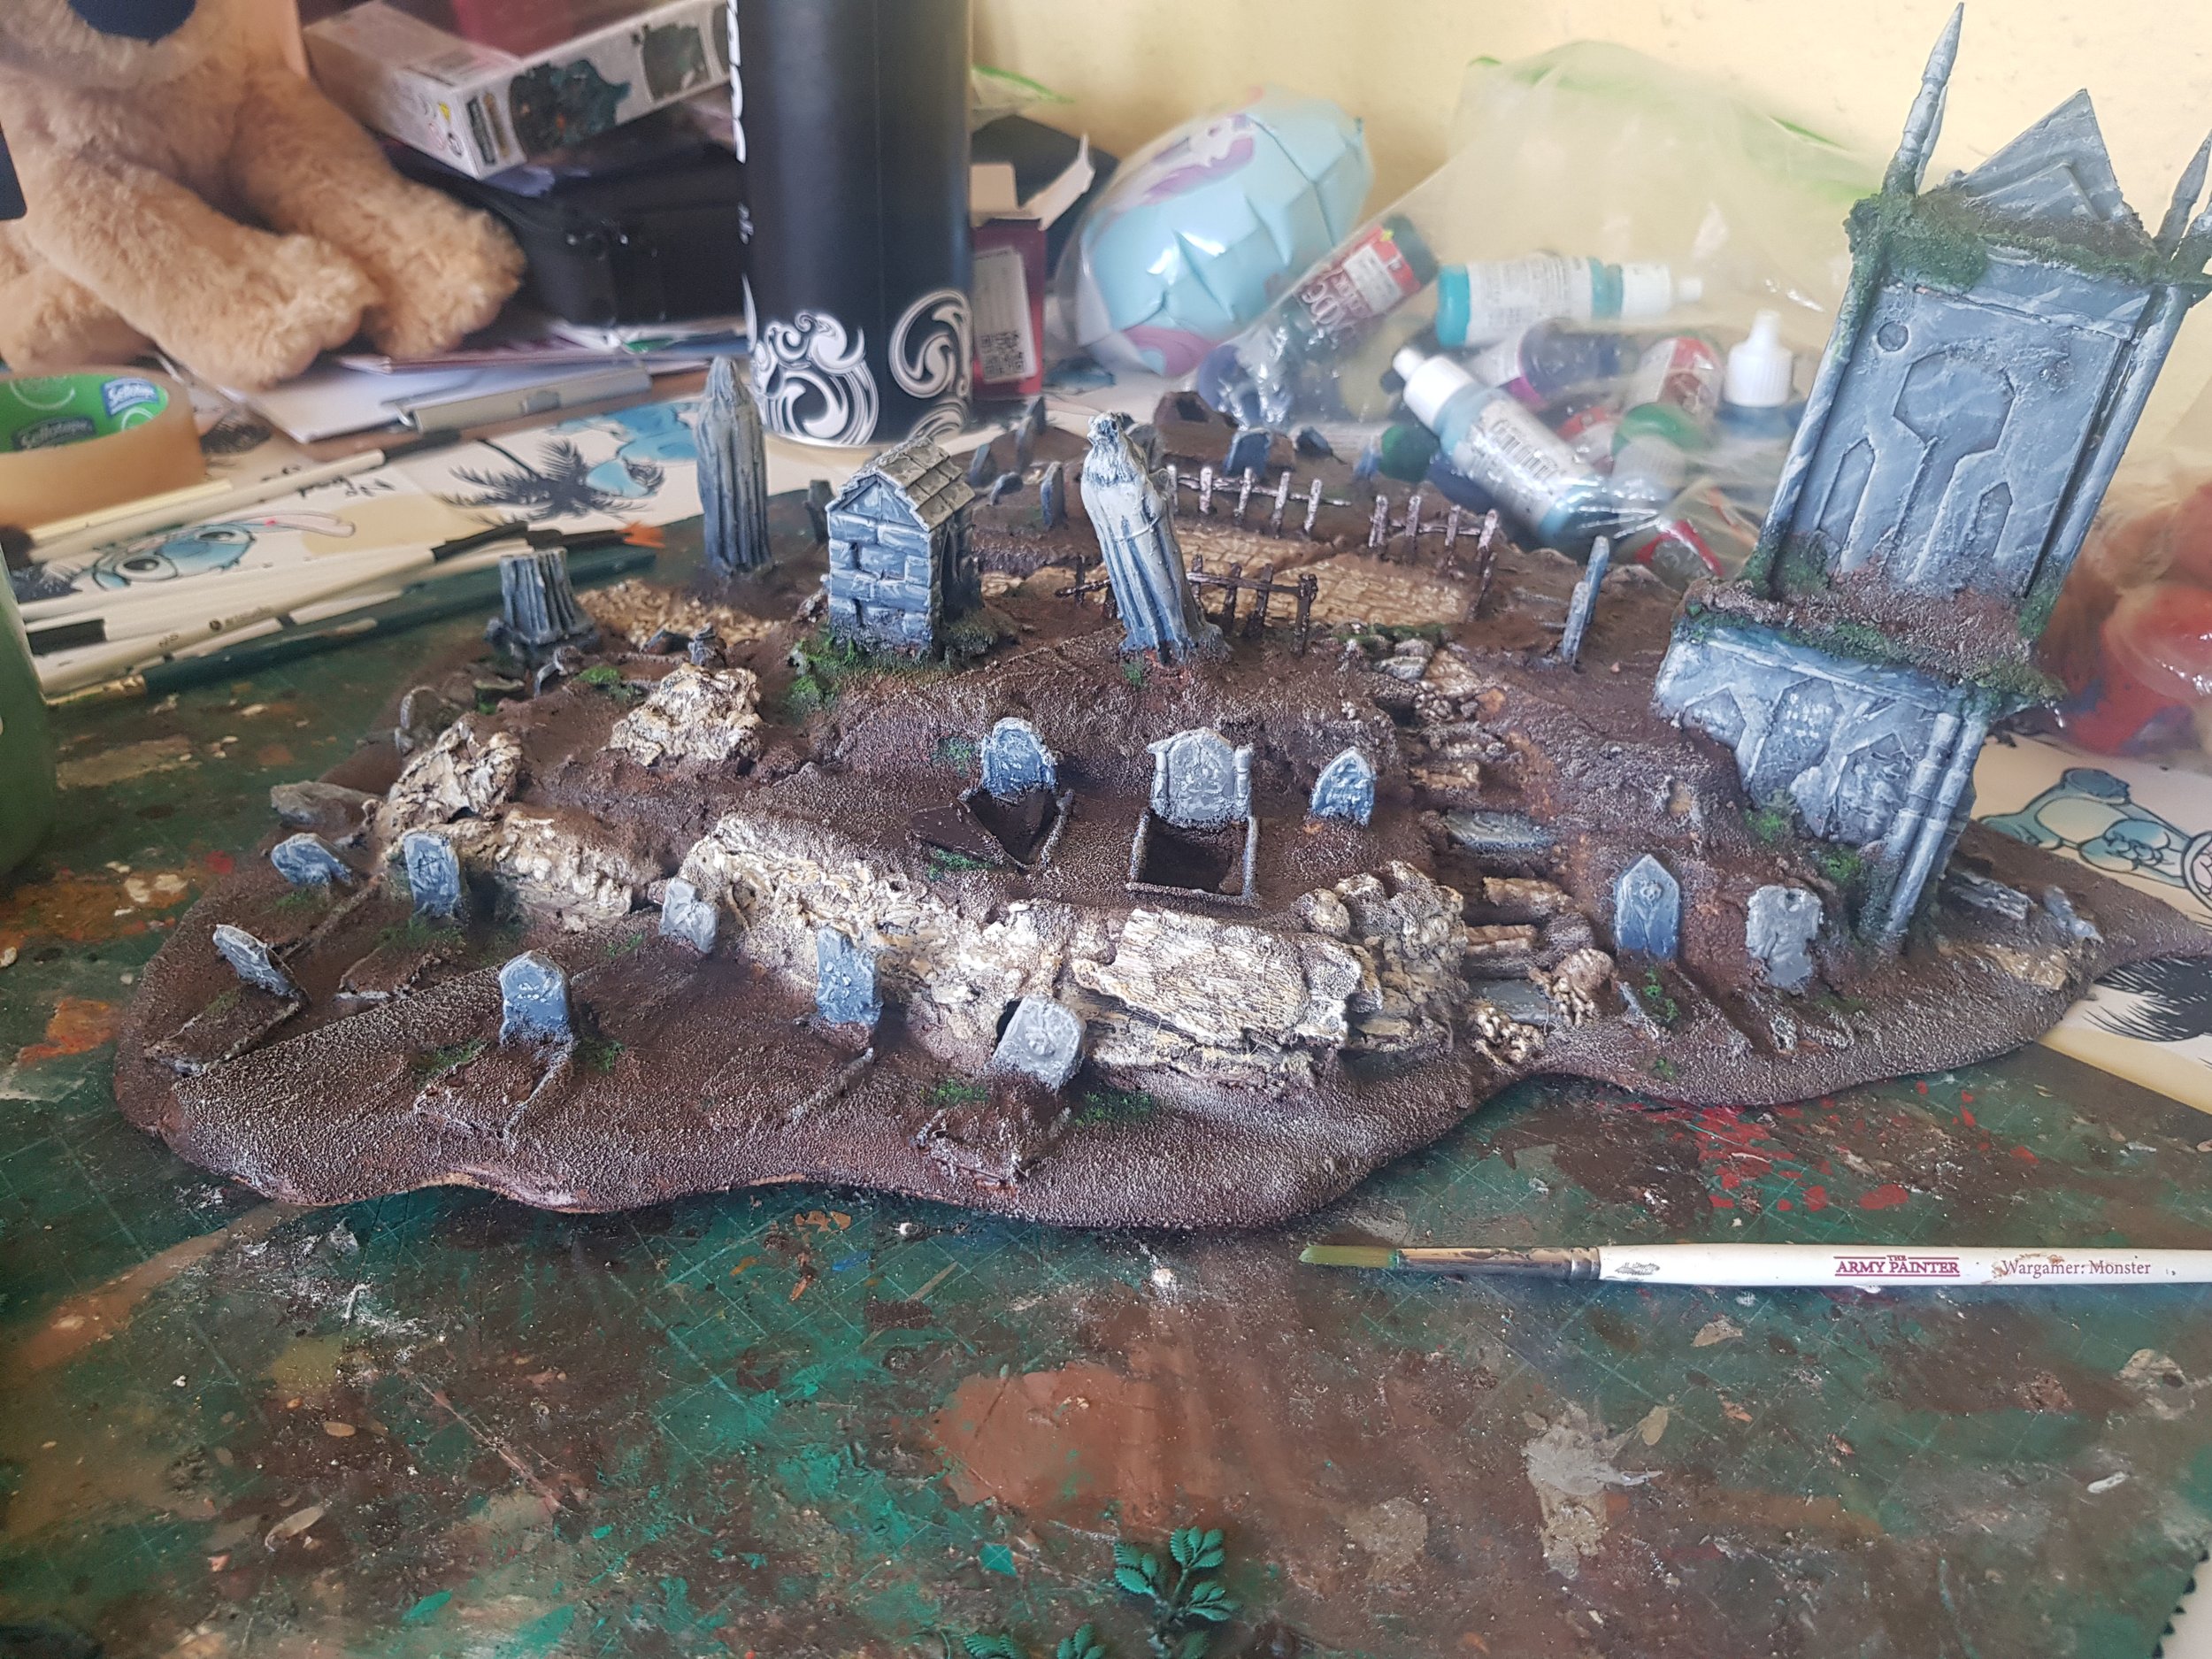
Greys
The graves were a not quite as repetitive swathe of grey - I chose two base colours, a bluey grey and a more chalky grey (Citadels’ The Fang and Mechanicus Grey respectively). I painted the stone rather than dry brushing, so it allowed me to blend colours a little more. From the bases I added Citadel Dawnstone to both to lighten them, then really pushed up the top highlights with Army Painter Ice Storm on the blue graves and Stone Golem on the chalky.
I used all the same greys on the Mausoleum, mixing them where it seemed natural and doing a very quick marbling effect. The statue was all chalky grey, and the smaller crypt and statues got the same treatment.
Once the grey was basically done I gave everything - mud, stone, graves, mausoleum whatever - a veeeeery light drybrush of Arid Earth. I do this to tie all the colours back together so the whole piece it bathed in the same ‘light’ as it were. This also has a nice effect where it lets me spot bits I’ve missed more easily - in this case the open coffins in the graves and a few hard to get areas.
I painted the coffins a woody brown and then took Citadel Caliban Green to all the hard to get areas I’d missed, the moss covering the mausoleum and gave it a Camo Green drybrush. This breaks up the brown and gives something for the flock and tufts to visually key into later. I also pianted the coat of arms.
Weathering
I then used some homemade Agrax Earthshade (thanks Luke’s APS, you will be missed) and covered EVERYTHING in this gloriously cheap slop to shade and weather it. Whilst it was still wet I used green ink in certain areas to alter the shadow colours and weather it further towards mossy.
It then took two whole, painfully slow days to dry - because it’s not like I was in a hurry or anything…
Basing Materials
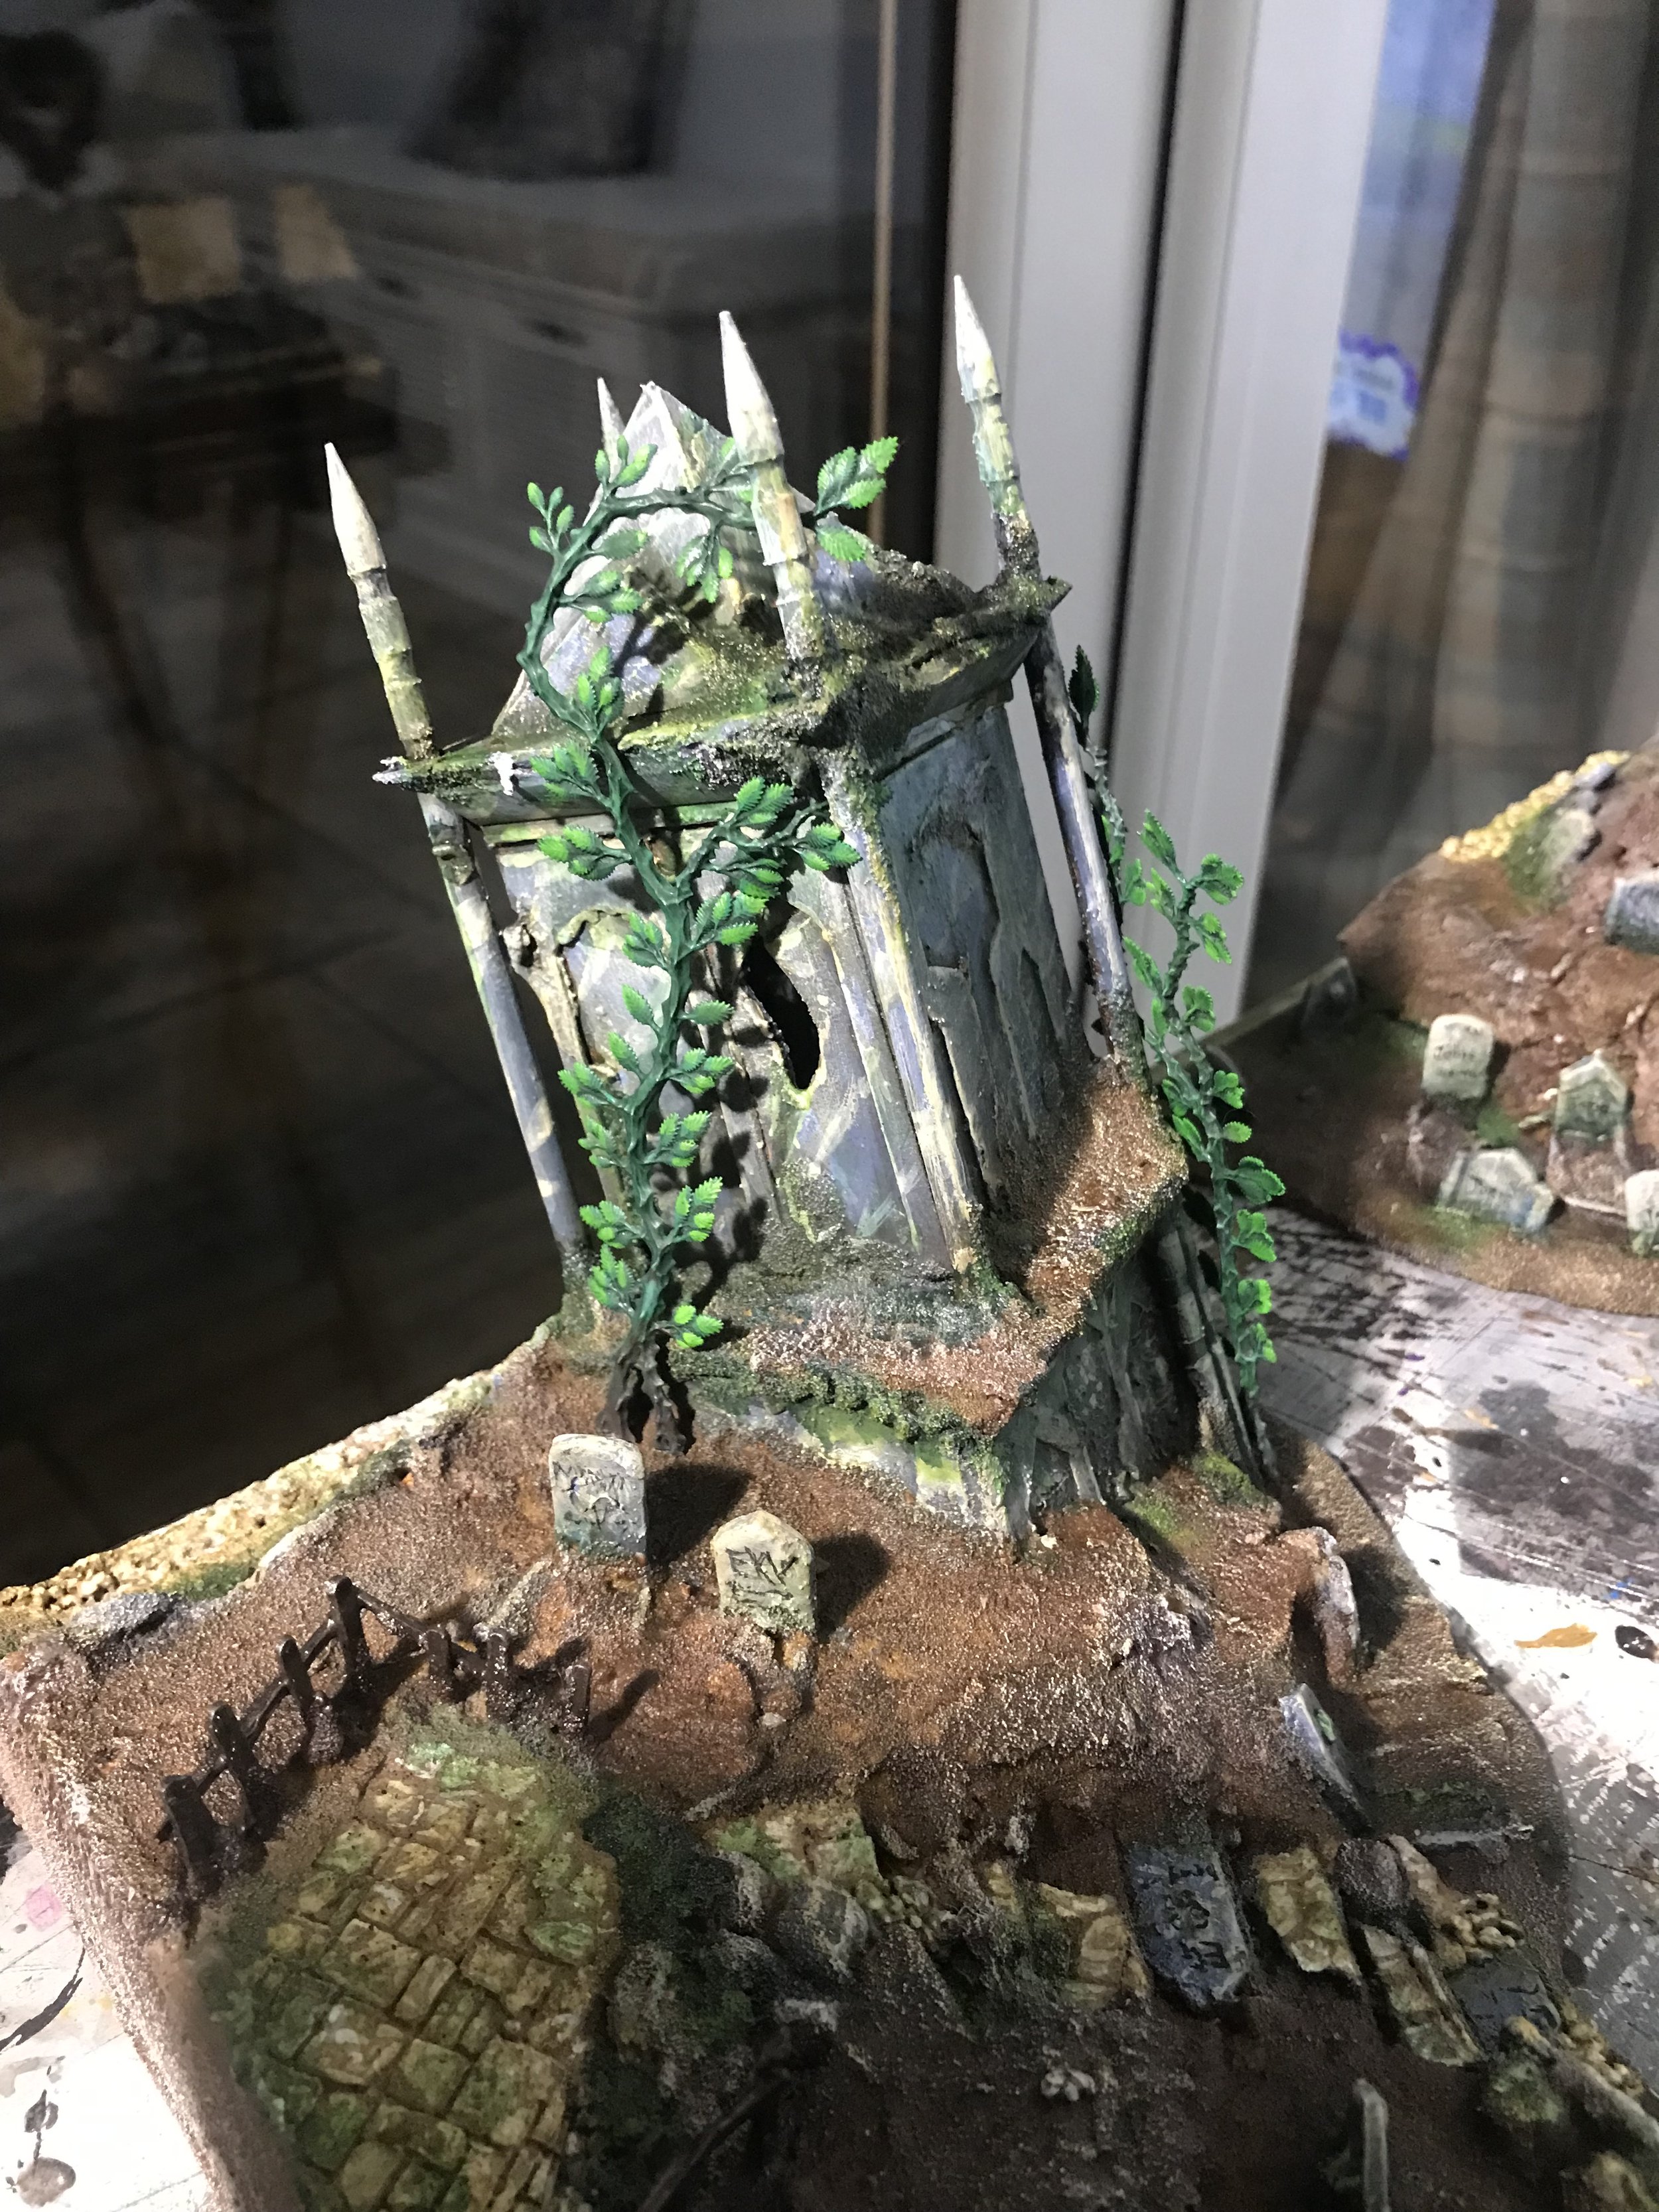
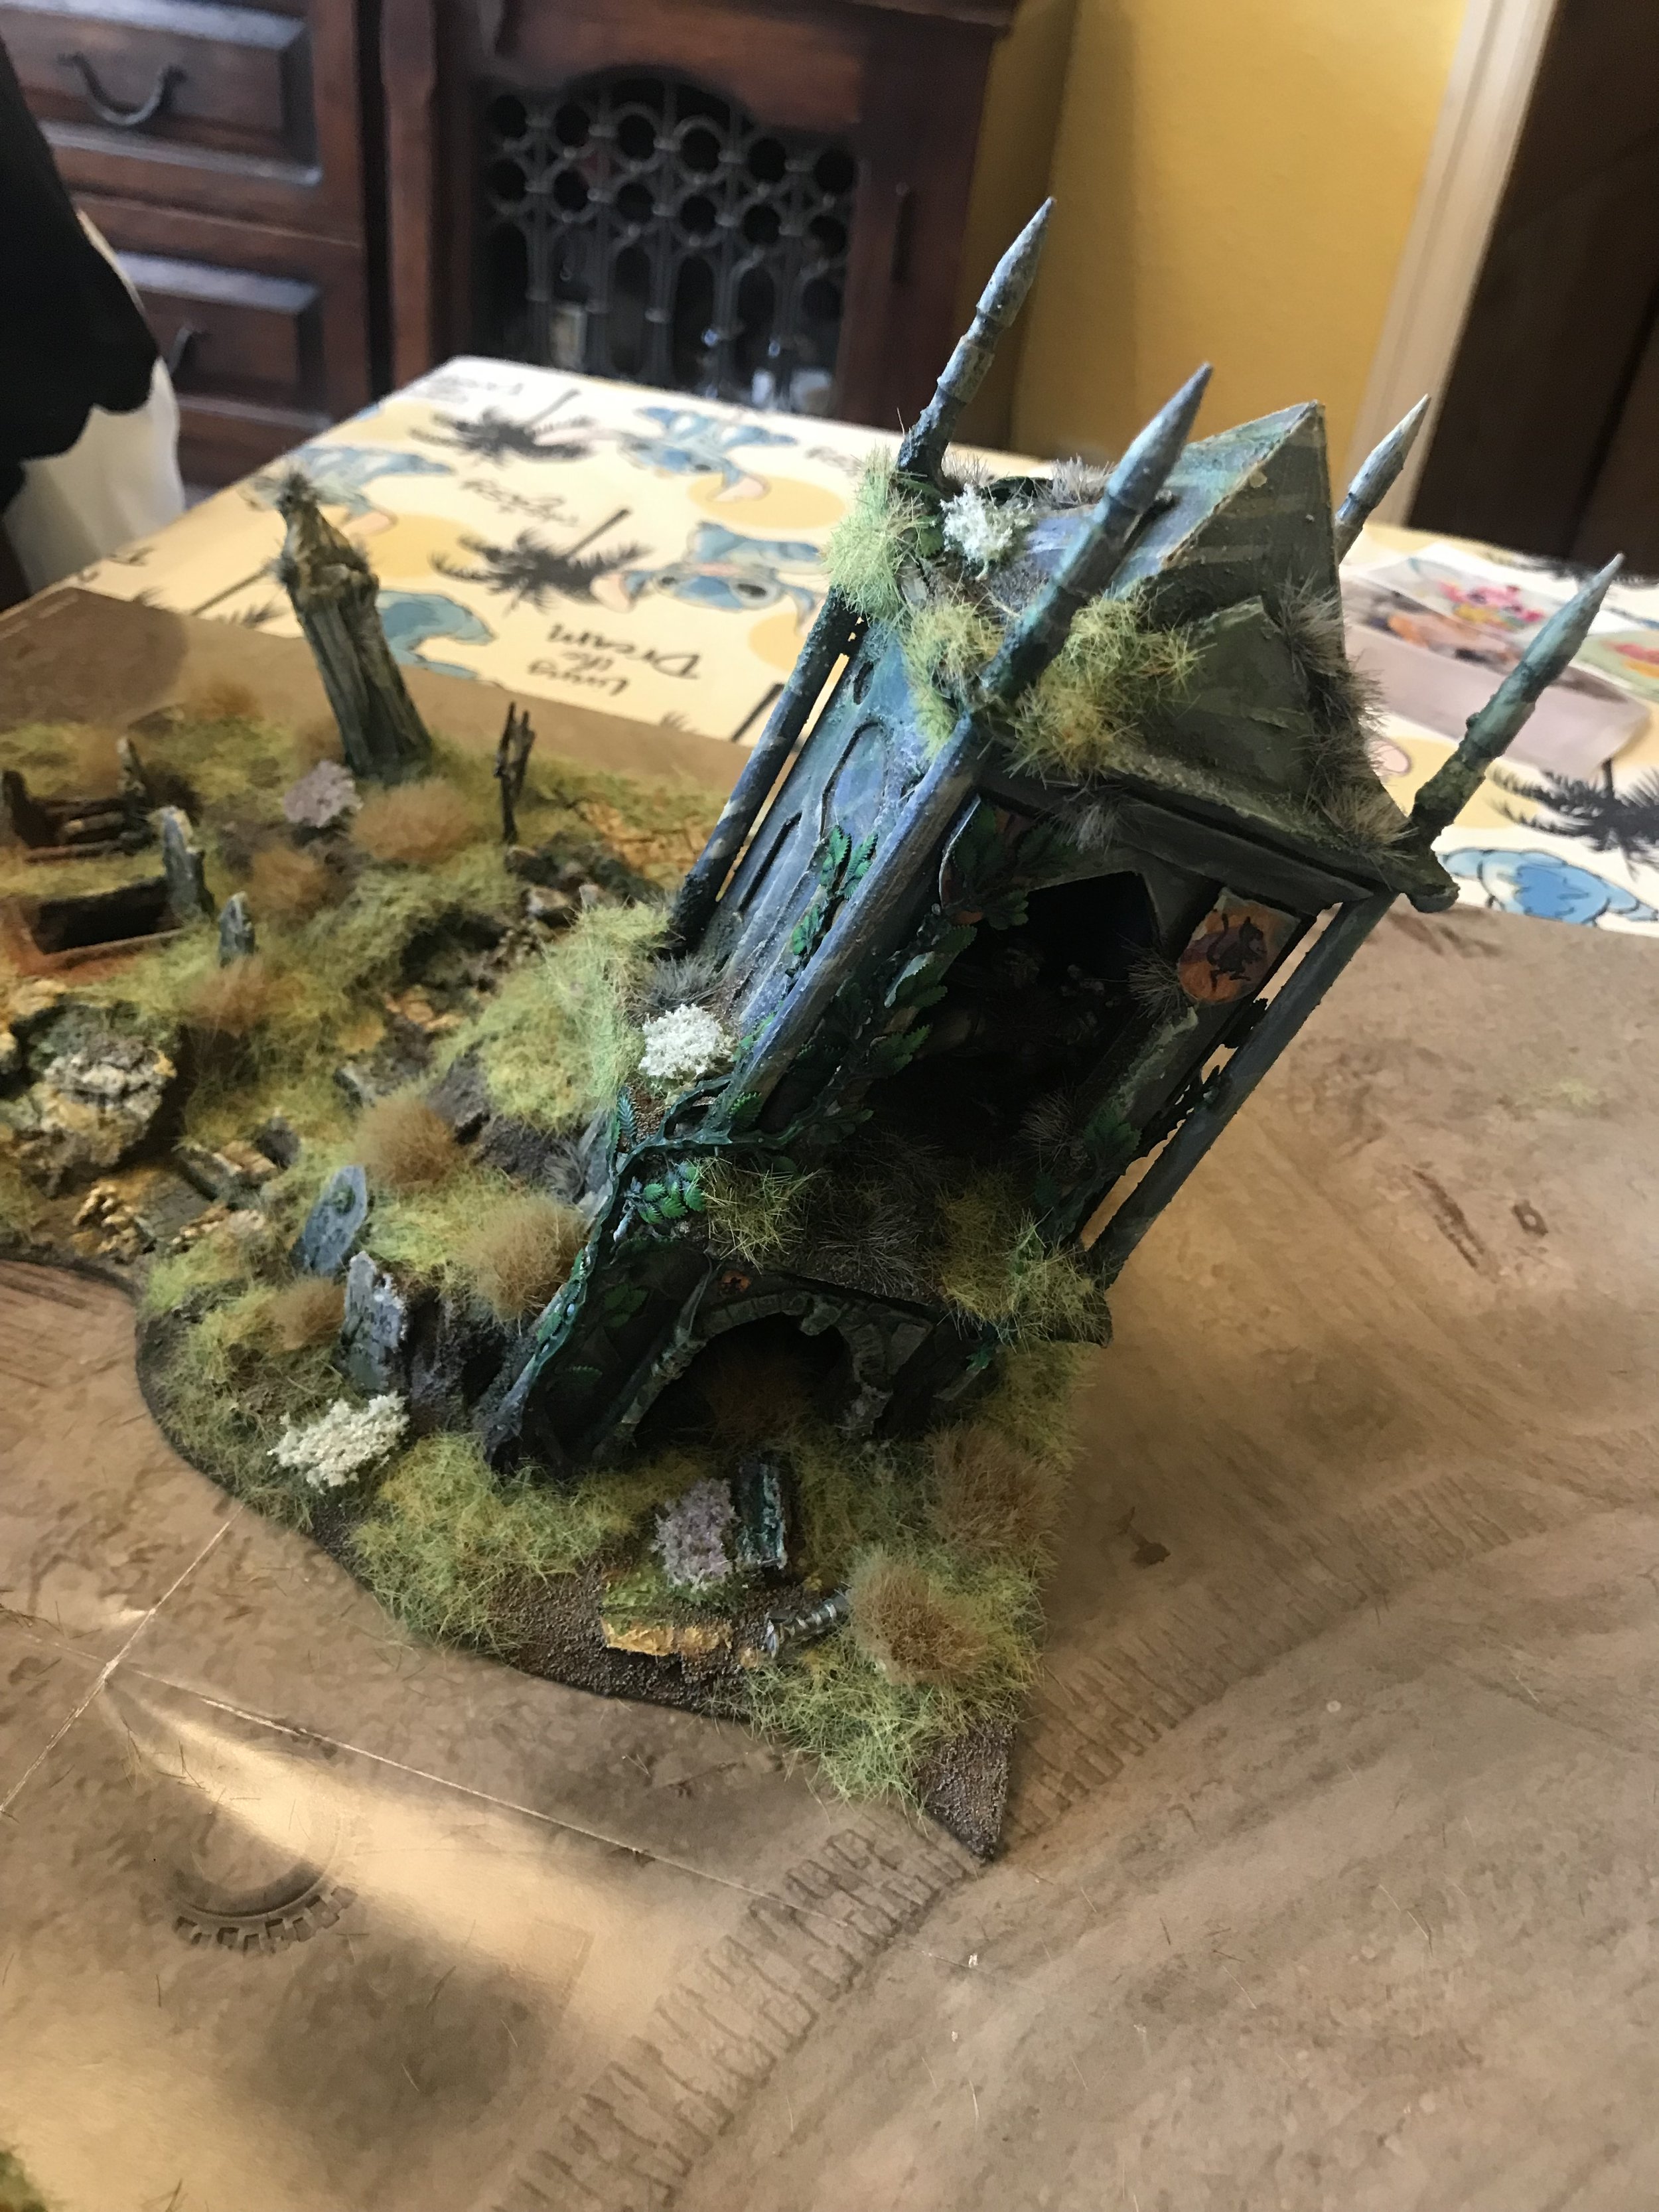
Vines
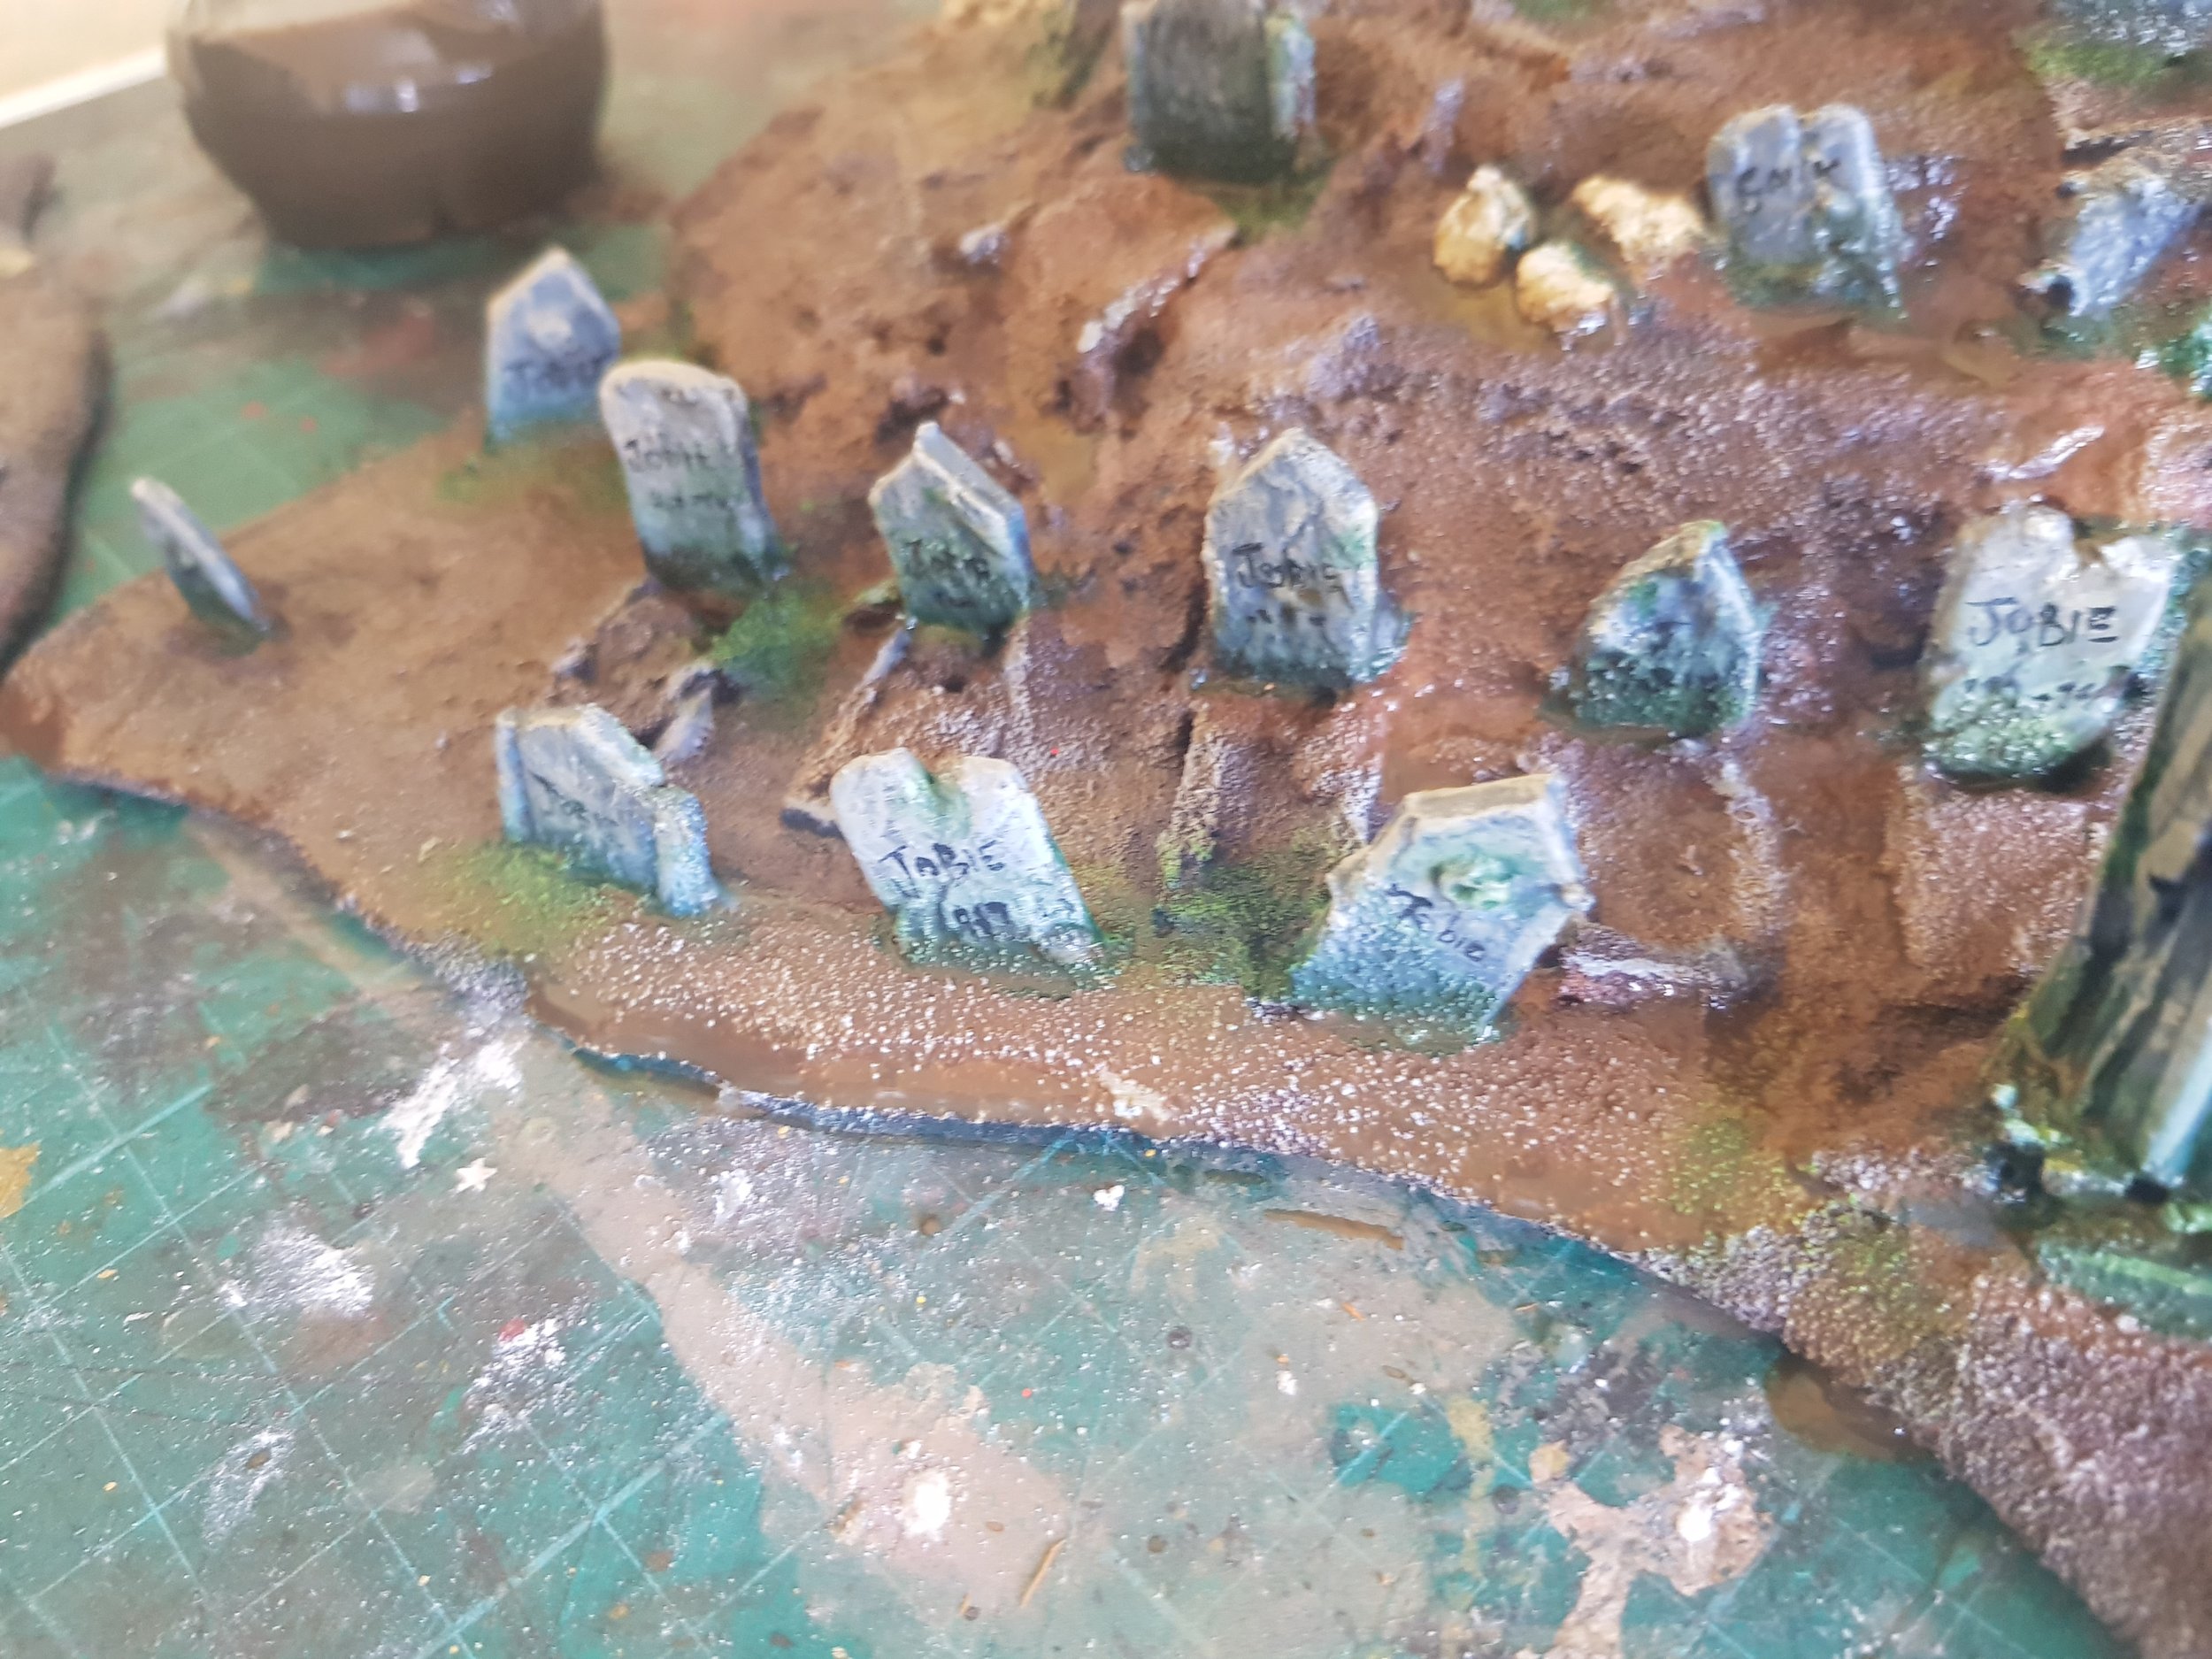
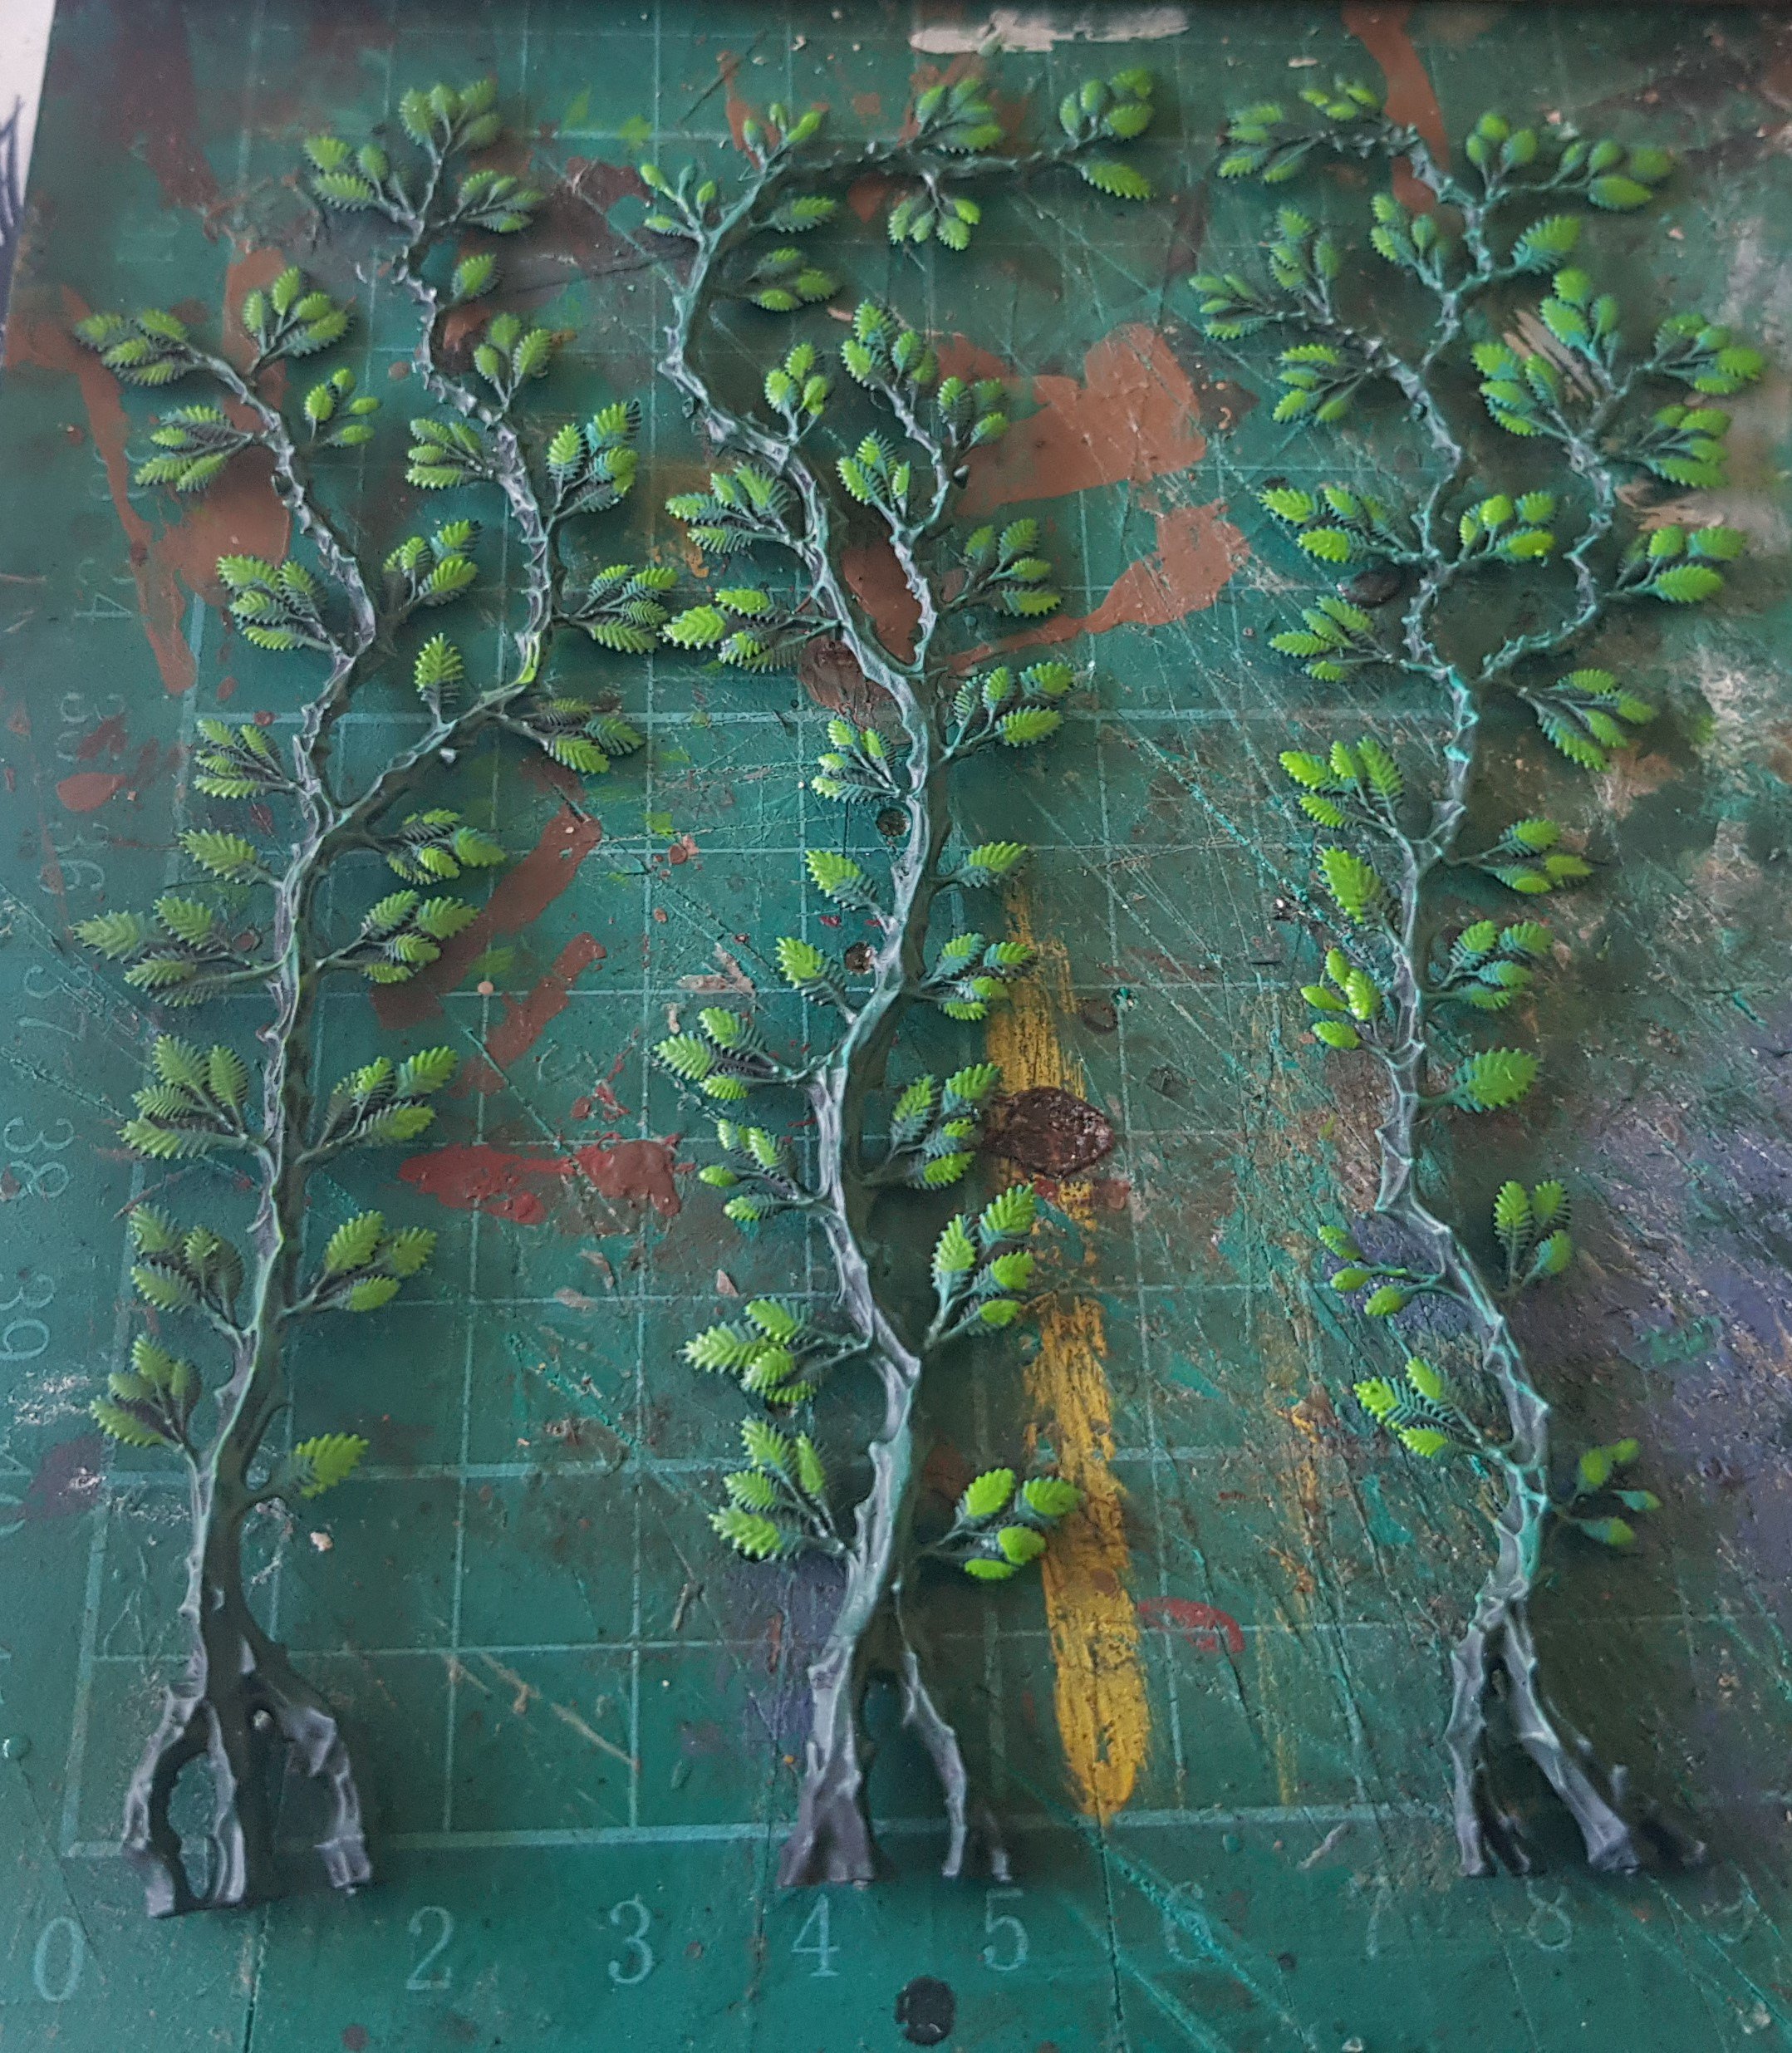
Before the flock hits I had a few last details to finish off - names on the graves, some extra highlights where the ink had taken the edge off, and some ivy on the mausoleum. I originally tried some Mininatur ivy but it just didn’t sit right against the stone as I wanted, it looks amazing on a large scale but for delicate tendrils it just didn’t work.
Eventually I decided to actually spend some of Tom’s money on the project and popped down to my FLGS NGC to pick up one of the Citadel Vines boxes. These little beauties are super flexible plastic and really versatile once painted. I personally did a wonderfully half-assed job of painting the vines (see that last image above) because if I made them too crisp they’d jar with the rest of the painting style (honest guv’). Lots of superglue and swearing later and they were climbing in an around the mausoleum just as I’d pictured.
Flocking
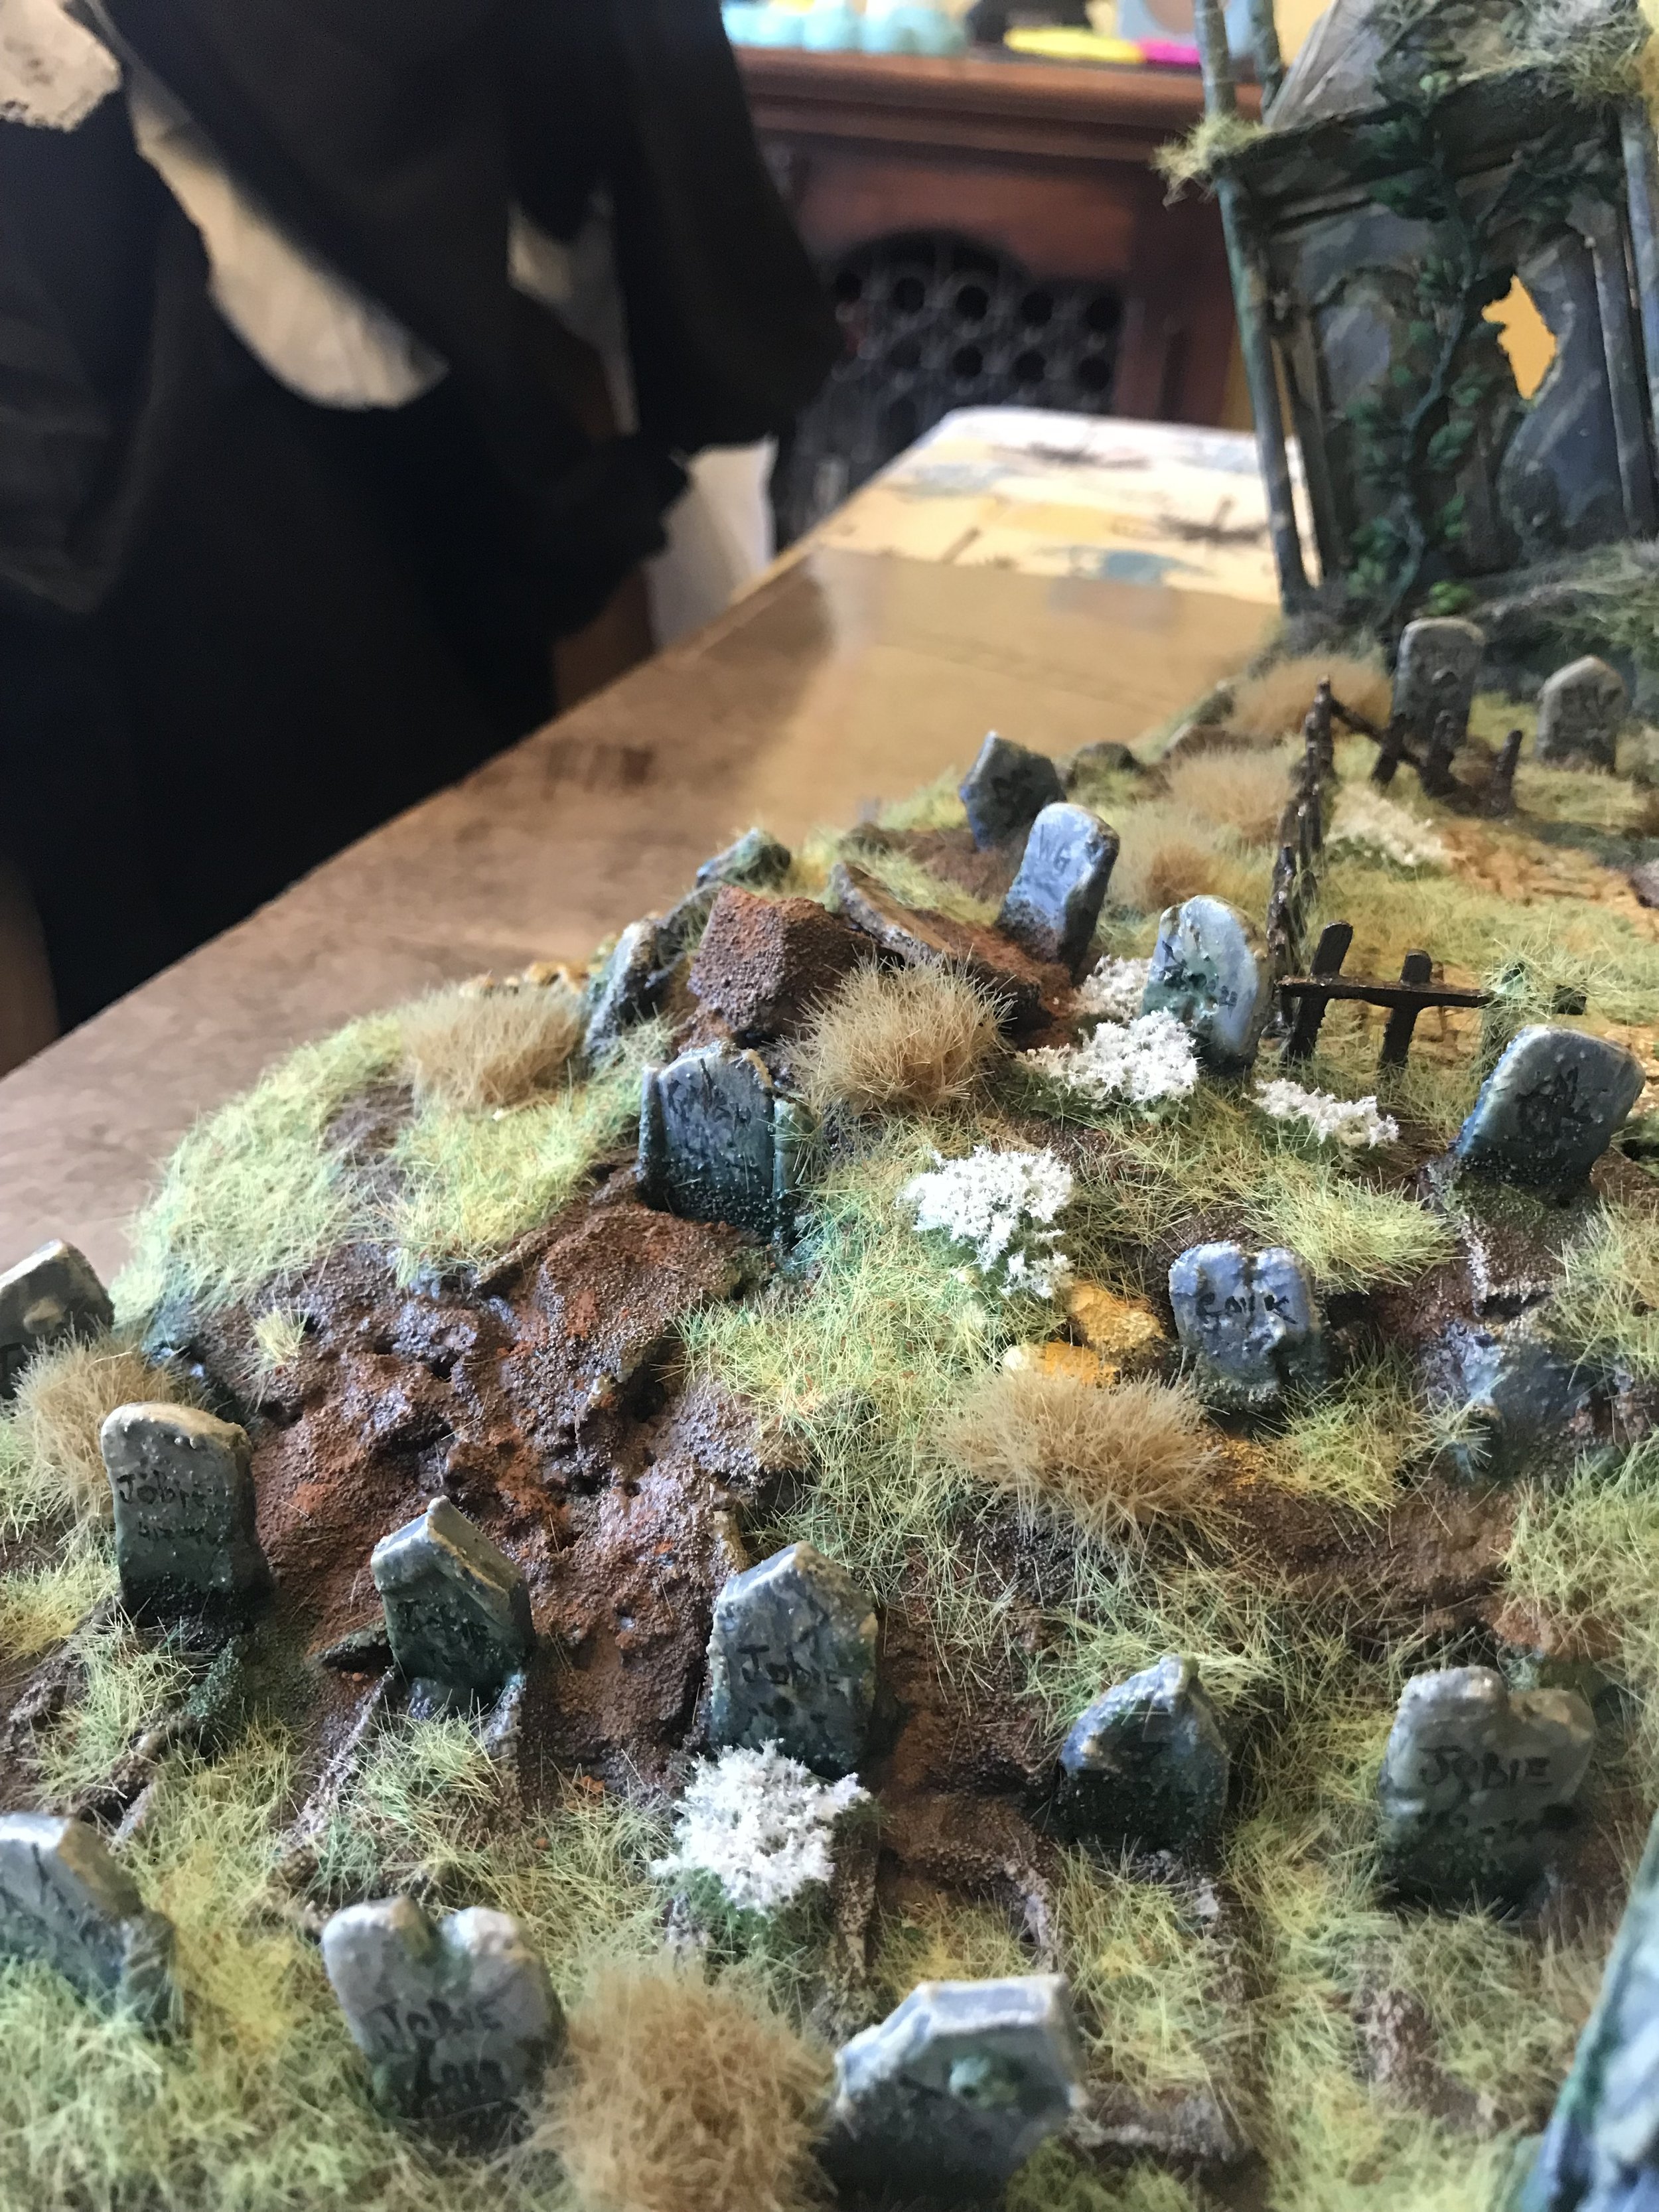
The final stages of this build were in sight - flocking and pigment. For flocking I wanted a really verdant, overgrown look but still a little dark and creepy, so I used a darker static grass shade (Colour Forge Moss mix) and just went hogwild with it. Any large flat areas got a liberal coating, as did any green mossy areas I’d painted earlier. Some graves got a splash whereas others I left empty for flowers later.
Tufts
Then I grabbed my ‘tuft box’ (with a new pack of Gamers Grass XL dry grass tufts I’d bought just for this). The tufts were applied with more thought, clumping away from more treaded areas and in hollows where the seeds would catch and grow. I also used the browny-yellow of the tufts to balance out the green in places where it was overpowering the piece. Other smaller tufts from various ranges were then added all over - especially the mausoleum and statues which were going to catch the eye.
The final tufts were flowers from The Colour Forge I’d had for ages - you only really use flower tufts in small amounts usually, so they last a good long while, and these varied across the strip from purple to white so I’d been picking away at them in different places for years. These primarily went on graves as there’s a phenomenon I noticed in Wardsend and other older cemeteries locally - where people have left flowers on graves over the years, eventually they have pollinated and spread to the area, so you have these very vivid wild crocus or tulips in places they really shouldn’t be!
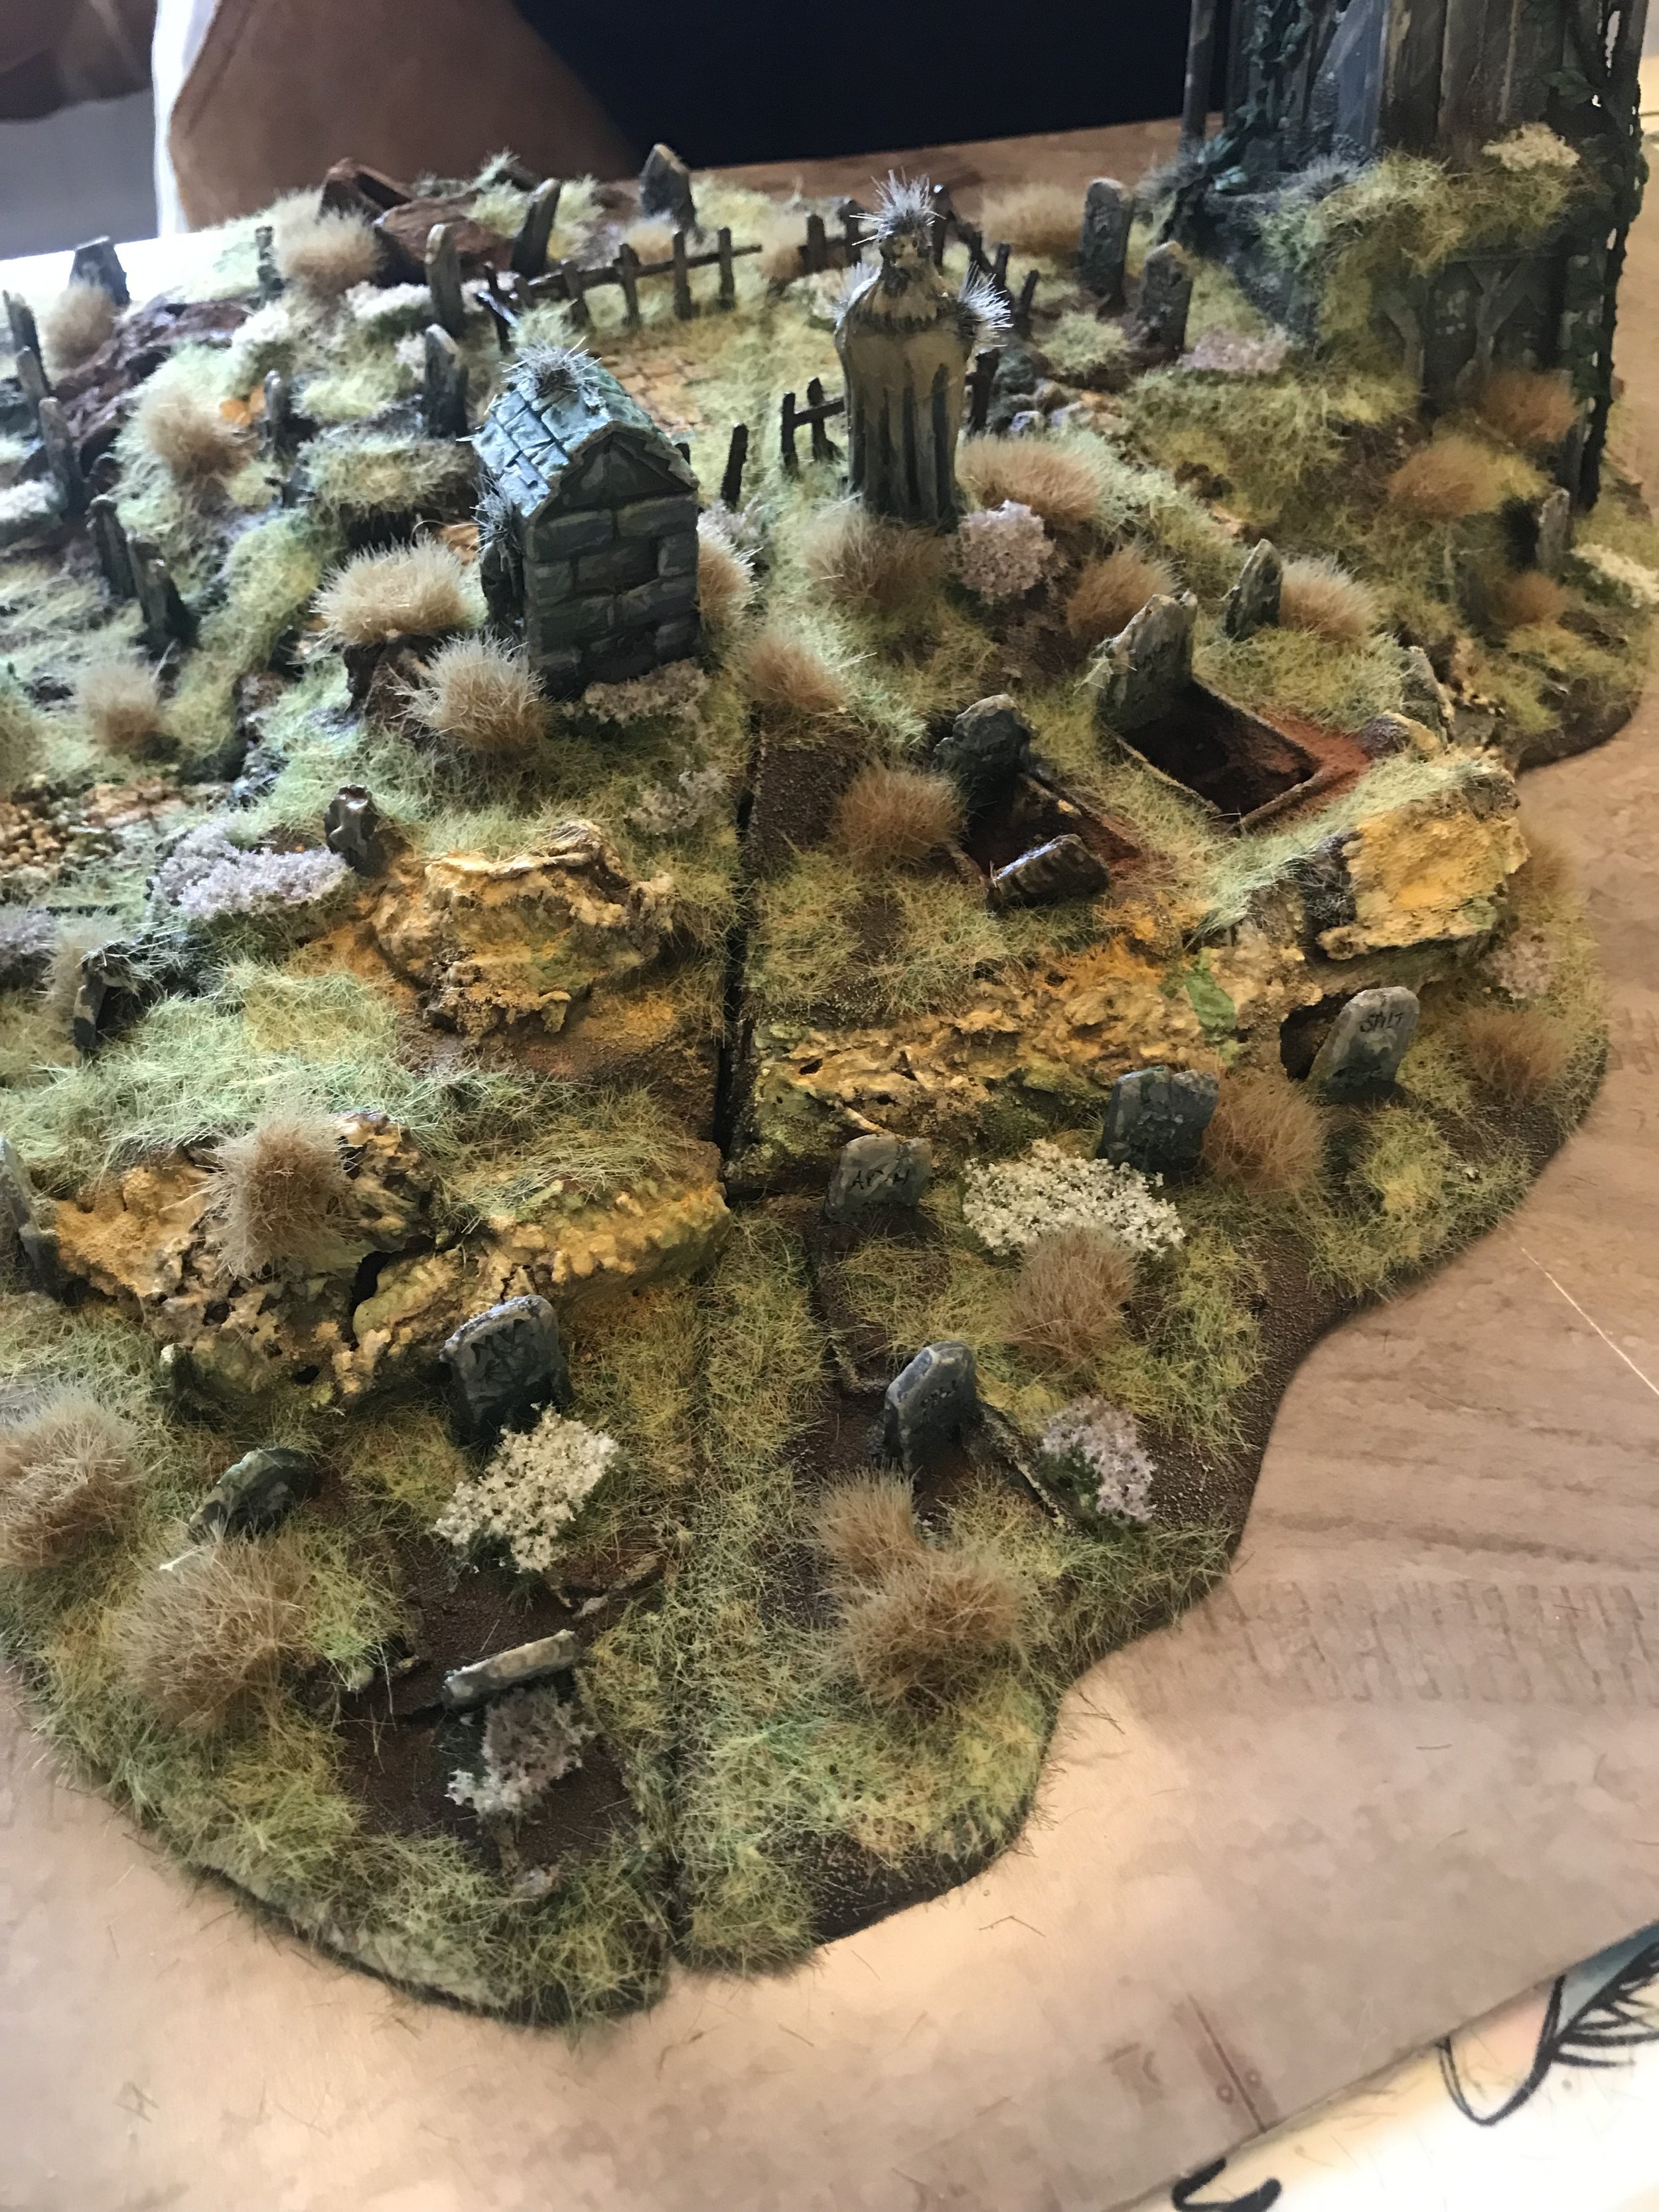
Pigment
Eventually all that was left to do was add the desert pigment to the rocks and paths, some fresh earthy pigment to the open graves and we were done. I’m pretty happy with it, though I would definitely have done a flat board gap if I’d thought about it for even a second, as it is I’ve hidden the line as best I can with grass and tufts. I’m very much looking forward to seeing our new Shades capering around like goths in Whitby for their official photographs! (Check out the Kickstarter!)
What’s Next
I’d like to say I’m taking a break from terrain for a bit, but during the recent studio move I found that Tom has a wicked little Tabletop World Outhouse that would make an excellent grave keepers hut just sitting in a drawer screaming at me for paint…
I’ll be doing more workbench articles in the future, so keep an eye out and we’ll do a focus on the Church of Gary terrain piece I made up and my ‘Goblin Kings court’ troupe with a whole bunch of silly conversions.
Thanks for reading- see you across the tabletop :)
Mick
